Pages

Showing newest 14 of 15 posts from August 2010. Show older posts

Monday, August 30, 2010

Cooking For Others: The Long Weekend Getaway


On July 4th, we shared some of our cooking strategies for long weekends away with friends with the folks over at Dine & Cook. Since Labor Day is almost upon us, we're posting them again here. We want to make sure you do your weekend (cooking) right.

One of the best parts of the long weekend away, in general, is the group eating. Unless we’ve wound up in the most rustic little cottage, preparing meals in the comfort of a breezy house kitchen is a pleasant change of pace from those made in our dinky apartments back in the city. But the cooking challenges of a group getaway are many. There are a lot of mouths to feed. There are no bodegas on the corner. There’s more planning and less reliable equipment. There may not be a fully stocked pantry. There are expensive trips to the grocery store. And, perhaps worst of all, there are hungry friends, hovering around, who, in spite of varying levels of kitchen prowess, insist on “helping.”

As more experienced cooks, there’s a part of us that wants to be the CEOs of the weekend’s meal plan. We want to eat well, spend some time stirring and sautéing, and perhaps work with some local ingredients. But we also don’t want to slave away during our two days of relaxation. And we certainly don’t want to spend a fortune. To have fun, our proprietary instincts must be diffused a little, our grip on the menus ever so slightly loosened. We’ve perfected a strategy, honed at weekends at friends’ houses during college and at summertime getaways in the three summers since we’ve graduated school.

It’s not a plan to follow exactly, but it does have a couple crucial rules of thumb we’d like to elaborate on. Read on for the secrets to feeding hungry quarter-lifers during a Labor Day weekend away, or any other opportunity you and your friends find to get out of town.

From our kitchen, moved as far from the city as possible, to yours,

Cara and Phoebe, THE QUARTER-LIFE COOKS

**Strategies**

Pack a Meal
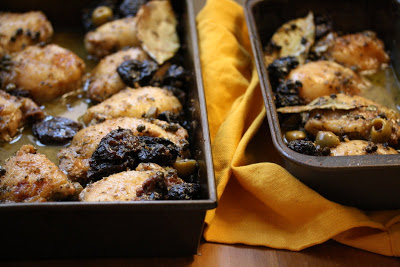
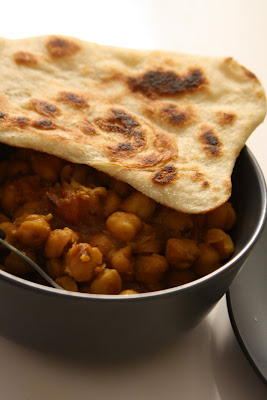
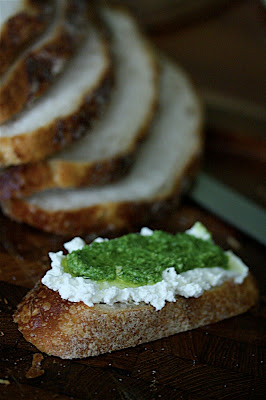
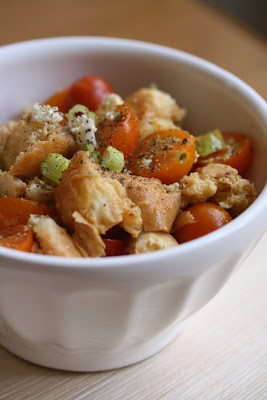
Make a dish before you leave town. Pack it in good tupperware and stow it in a tote. This can be a baked chicken that keeps and reheats well, without requiring the oven to be on for hours upon arrival. Or grilled vegetables and pesto on baguette for a picnic in the car en route. It could be quickbread or muffins for breakfast. It could be cookies. But while sweets double as a hostess gift, they don’t necessarily count as a meal. When you bring a fully made meal, you prevent group decision-making and shopping. You can buy the ingredients at a store you’re used to and where you know where the bargains are. Plus, you’ve got your pantry and your tools to cook with. And no friends hanging around to distract you. People will be really happy to sit down to a whole meal, especially after a long trip.

Portable Recipes: Chicken Marbella (pictured); Ancho Chicken Sandwiches with Avocado and Chipotle Mayonnaise; Carrot Cake

Delegate the Meat
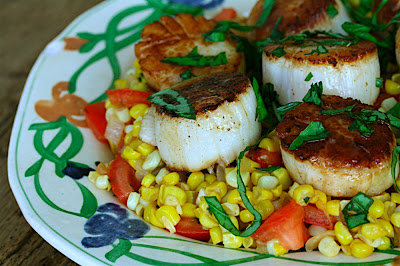
We’re forward-thinking, modern women, but we’re able to admit the truth in some gender stereotypes. Which is why we say: Grill for dinner, and put the dudes in charge. They’ll shop, marinate the meat (which they’ve spent more money on than you would have), light up the barbecue, all with great enthusiasm and pride. The meat will be good, genuinely really good. This may not have been the case if you tried to delegate say, the salad. While the guys are grilling, everyone else can make sides: bread, corn, salad, pasta—whatever.

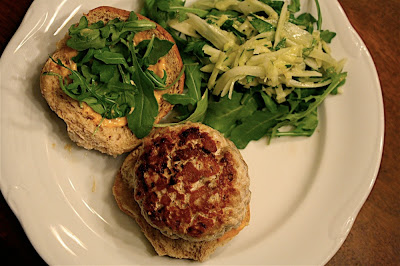
Recipes: Guinness-Marinated Steak (recipe follows); Carne Asada with Chipotle Mango Salsa; Man Burgers; Turkey Burgers; Mediterranean Lamb Burgers

Make Guacamole
Guacamole is the most delicious summer snack food. Everyone likes it. We think we have the best recipe (find it below). Granted, if you make it in a group, you’ll find that everyone thinks that. But since you can’t mess up guacamole (with the exception of using unripe avocados...don’t do that), that’s an acceptable delusion. One guy Cara spent a weekend with sprinkled dried cumin in his guac. She was skeptical, but it was great. And the best part of guacamole is that it’s a unifier. It’s vegetarian, not unhealthful, and satisfying. All you need for completion are tortilla chips, and maybe some carrot sticks for dipping. You don’t need any other snacks around at all if you have enough chips and guacamole, though we do allow for a purchased salsa or two. This preserves focus at the grocery store, and it saves money.

Recipe: Guacamole

Breakfast
Breakfast may be the best meal to take complete control of, especially if you’re an early riser—or are relegated to sleeping on the couch by the kitchen. No one cares exactly when it happens, and people tend to be much less picky about how it happens. You can spend a nice quiet 45 minutes in the kitchen before anyone gets up, which can be a nice pause in a weekend full of people, drinking, and fun.

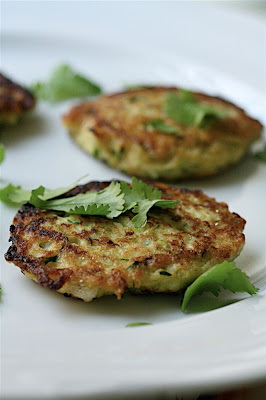
Recipe: Breakfast Burrito Buffet; Yogurt Pancakes; Spinach Hash Browns

Find the Cleaner-Uppers
There’s not much worse than waking up after a night of boozing by the pool to find browning guacamole on the dishes that are scattered all over. In a given group, there will be people with high guilt reflexes. These are the people you need to locate. Make one tiny reference to the fact that you’ve done all the cooking and they’ll jump on the chance to clean. Suddenly, you’re no longer in charge. Bring in a few plates from the table, ask if you can do anything to help, but you’re no longer the one responsible. However, if it’s the host who gets stuck spearheading the clean-up, our morality says you do need to get back on the bandwagon, pick up a broom, and get moving.

**Recipes**

Guinness-Marinated Steak
Makes 10 servings

2 cloves garlic, pushed through a press, or finely minced
1 tablespoon Dijon mustard
2 teaspoons salt
1 pint Guinness
4 pounds flank steak

In a large dish or bowl, combine the garlic, mustard, salt, and guiness. Stir to combine. Place the steak in the marinade and place, covered lightly, in the fridge for 1-2 hours (it may take this long for the guys to figure out how to use the grill). Grill to medium-rare. Slice and serve.

Read more...

Friday, August 27, 2010

Cooking For Others: New Chickpeas

MORE ABOUT MOROCCO: What I Ate in Morocco; Fish Tagine with Chermoula, Mint, and Preserved Lemon; Fig and Walnut Cake; Merguez and Green Chard Tagine; Preserved Lemon Aioli

Getting back from Morocco, everybody (including Ms Phoebe) warned me that my culinary predilections would take a turn towards the North African. Whereas I've returned from some vacations tired of local food and aching to get back to my regular meals ("no more croissants!" "please, enough of the gelato!"), when I arrived home after ten days away, I wanted to keep eating the tagines, flatbreads, and simple sautes I'd been enjoying. Not to mention the Schweppes Citron, which grew on me as an afternoon refresher perhaps more than I should admit.

Though I left Morocco with only taste memories of certain foods, I did import my fair share of ingredients. In my carry-on were cinnamon (ground and in stick form), awesome saffron, ras el hanout, m'sakhen, and preserved lemons. A day or two after arrival, these chickpeas are what I made.

One thing I learned from eating--and cooking--in Morocco is the difference between spiced and spicy. At home, I don't go crazy with the spices, but I have been known to overdo it on the cayenne. I'm used to making spicy foods. In Morocco, hot pepper doesn't seem so important. But the spoonfuls of pretty much every single other spice were far more copious than I'd seen or imagined. I also discovered a high proportion of onions in Moroccan food. For every small onion in my standby tomato sauce, there would be three to four onions, I think, if the tomato sauce were Moroccan.

When I went to make these chickpeas, I was much less modest than I usually am about drowning them in cumin, paprika, turmeric, and my new baggie of ras el hanout. It was fun to be so extravagant about something, even if it was just spices, which unlike money sort of do grow on trees.

The other part of this meal, a flatbread, was my first attempt to recreate the rich, flaky, stretch flatbreads that were everywhere in Morocco. Though what I made were definitely good, they were by no means what I was after. I'm going to consult some Paula Wolfert, some more internet recipes, and look into Jamaican roti, which are actually sort of similar. Then I'll report back on the flatbread. For now, be content with these spiced, melt-in-your-mouth chickpeas and the flatbread recipe-in-progress.

From my kitchen, spicing up beans, to yours,

Cara, THE QUARTER-LIFE COOK

**Recipes**


Moroccan Chickpeas
Makes 3 servings

Ingredients
1 tablespoon olive oil
1 medium onion, diced
2 cloves garlic, minced
2 teaspoons turmeric
1 teaspoon cumin
1/2 teaspoon paprika
1 1/2 teaspoons ras el hanout
1/2 teaspoon freshly ground black pepper
1 1/2 teaspoons salt
2 cans chickpeas
2 tomatoes, peeled* and coarsely chopped

*To peel tomatoes, bring a small pot of water to the boil. Submerge them in the water for 1-2 minutes. Remove. When cool enough to handle, slip off the skins.

Warm the olive oil in a Dutch oven over medium-low heat. Add the onion and cook for 5 minutes, until translucent. Add the garlic and cook for about another minute. Put in all the spices, substituting a little extra of each for the ras el hanout if you don't have any. Pour in the chickpeas with about half of their liquid, and add the salt, the chopped tomatoes, and 1/3 cup water. Bring to a boil, then reduce the heat and simmer, partially covered, for fifteen minutes, checking to make sure the chickpeas don't dry out (add some more water if so). Taste for seasoning, and serve.

Attempted Flatbreads
Makes 4 breads

Ingredients
1/2 cup flour
2 tablespoons cornmeal
1/4 teaspoon yeast
1/2 teaspoon sugar
1/8 teaspoon salt
1/2 cup oil

Mix all the dry ingredients together in a small bowl. Pour 1/4 cup of lukewarm water over, and stir to turn into a ball.

Turn out onto a floured surface and knead for 5 minutes. Cover with the overturned bowl and leave for another ten minutes.

Divide the dough into four pieces. Take one, and using your fingertips, stretch it out as thin as it will go without breaking.

Brush liberally with oil. Fold it into thirds, by folding the two edges in towards the middle. Turn ninety degrees, then fold into thirds again. Repeat with the remaining breads.

Heat a castiron pan over medium heat for several minutes. When it's hot, stretch one of the breads out slightly, so it's about 3 inches by 5 or 6 inches. Cook it in the dry pan for 2-3 minutes until it has developed some dark marks, then flip it. Brush the top with more oil. After another 2-3 minutes, flip the bread again, brushing the second side with oil. Flip once more, cook for just 1 more minute, then remove. Repeat with the remaining breads, keeping the finished ones warm under a cloth.

Serve as soon as you're done cooking all the breads.


Read more...

Wednesday, August 25, 2010

Recipe Flash: Creamy Gazpacho

WEEKEND LUNCH: Creamy Gazpacho; Radicchio and Mozzarella Toasts; Coffee-Toffee Ice Cream Sandwich Squares

I didn't notice this recipe published in the Times (oops), but luckily someone else did: my mom's friend Shelly. She served it to my mom for dinner, (complete with the pecorino crisps Melissa Clark paired with the soup), and it made such an impact I was duly notified of it the next day. The following weekend, Mom and I made it for lunch, starting off with this beauty of an heirloom tomato.

Altogether, it was a very, very easy meal, not just because we paired the gazpacho with cleaned and cooked shrimp and pre-made cocktail sauce. Whereas in many gazpachos, you've got to dice lots and lots of vegetables, in this one you stick everything into the blender and boom, lunch is served.

How have you tweaked basic gazpacho recipes? I'm curious to hear about experiments with this soup, from the most authentic to the most bizarre. Do share in the comments!

From my kitchen, albeit small, to yours,

Cara, THE QUARTER-LIFE COOK

**Recipe**

Creamy Gazpacho
Adapted from The New York Times
Serves 2

If you don't have a regular blender, try using this space-saving immersion blender. Purchase your own here.

Ingredients

1 large tomato (about 1/2 pound), cored and roughly chopped
3/4 cup (6 ounces) plain yogurt, nonfat, lowfat, or regular
2 tablespoons extra virgin olive oil, plus extra for drizzling
10 basil leaves
1 clove of garlic, roughly chopped
1 scallion (white and light green parts), roughly chopped
1/2 jalepeno pepper, cored and minced
2 ice cubes
1 teaspoon kosher salt
1 teaspoon red wine vinegar, more to taste
Ground black pepper to taste.

Place tomatoes, yogurt, olive oil, 6 basil leaves, garlic, scallion, jalepeno, ice cubes, salt, vinegar, and black pepper in a blender. Purée until smooth. Taste and add more salt and vinegar, as necessary.

Pour the soup into two bowls and garnish with olive oil and the remaining four basil leaves. Give it a good grind of fresh pepper.

Read more...

Monday, August 23, 2010

Working With What You Have: Preserved Lemons


DISHES: Zucchini-Fennel Slaw; Tuna Burgers with Lemon Paprika Aioli
TYPE: Casual Weeknight Dinner
MAIN INGREDIENT: Preserved Lemons

Over the course of the past year, three of my close friends have been to and from Morocco. For me, this has meant lots of gifts, in the form of lots and lots of spices. I transferred most of them from their various plastic baggies, jars, and sacks into empty canisters on my spice rack. And now that time has passed and the Berber blends have doubled, I have no idea what any of them are.

When Cara returned from Morocco last month, I knew she wouldn't come empty handed. I was even more thrilled, however, to see that in her hot little hand was not a bundle of spices, but a jar of preserved lemons. I've been told you can make these from scratch, but when my mother and I have tried our hand at various tagines--mainly this fish version--she's always ordered them from here.

I was very excited to have the real thing at my disposal. Preserved lemons have this incredible flavor that almost tastes like perfume. In fact, when I worked in fragrances, I often thought how someone should attempt to recreate the taste of preserved lemons as a scent. As you can imagine, this quality means a little goes a long way. But that didn't stop me from adding the rind, and a hint of that perfume-y quality, to every aspect of this meal.

I made this dinner for Caitlyn, who, since she is no longer my roommate for the summer, I don't get to see as much as I would like to. She came uptown, and I hoped she didn't mind that I went a little crazy with the preserved lemons. The slaw I made was reminiscent of some of the cold vegetable salads that usually start a meal in Morocco--less due to the fennel, and more the heaps of cilantro, lemon juice (regular), and lemon rind (preserved) I used to flavor it.


But perhaps my best success with Cara's gift was the lemon-paprika aioli I used to top these tuna burgers. I've since used it to jazz up a turkey sandwich and as a condiment for fries, which has kept the preserved lemon love flowing for quite some time.

From my kitchen, where a little lemon goes a long way, to yours,

Phoebe, THE QUARTER-LIFE COOK

**Recipes**


Zucchini-Fennel Slaw with Preserved Lemons and Cilantro
Makes about 3-4 cups

Ingredients
1 fennel bulb, trimmed and thinly sliced
1 medium zucchini, coarsely grated
1/2 cup roughly chopped cilantro leaves
2 tablespoons lemon juice
1 teaspoon minced preserved lemon peel
1 tablespoon mayonnaise
1/2 teaspoon sugar
1/2 teaspoon salt
1 tablespoon olive oil

Combine all the ingredients in a medium mixing bowl and toss to combine. Serve alongside the burgers, or use it to top them.


Tuna Burgers with Lemon Paprika Aioli
Makes 2 burgers

Ingredients
1/2 pound yellowfin tuna, finely chopped
1 tablespoon hot Dijon mustard
1 small shallot, minced
1 garlic clove, minced
1 tablespoon lemon juice
1/2 teaspoon salt

2 whole wheat burger buns, toasted
1/4 cup lemon paprika aioli (recipe follows)
1 handful arugula

Combine the tuna, mustard, shallot, garlic, lemon juice, and salt in a medium mixing bowl. Fold together with your hands until well combined. Form the mixture into two large patties. Set aside on a plate and chill, covered, in the fridge until ready to use.

Coat a large skillet with olive oil and set it over high heat. When very hot, add the burgers. Cook on the first side until very brown--the sides will begin to become opaque--about 3-4 minutes. Flip the burgers and cook for another 2 minutes, until the other side is beginning to become opaque, but the burger is still raw in the center.

Slather both sides of the buns with aioli, top them with a burger and a handful of arugula. Serve immediately.


Lemon Paprika Aioli
Makes about 1/2 cup

Ingredients
1/3 cup mayonnaise
2 tablespoons Dijon mustard
2 tablespoons lemon juice
1/2 tsp minced preserved lemon peel or lemon zest
1 garlic clove, minced
1 teaspoon hot smoked paprika
1/4 teaspoon salt
dash cayenne pepper

Combine all ingredients in a small food processor, or whisk together by hand. Store in an airtight container in the fridge for up to 2 weeks.

Read more...

Thursday, August 19, 2010

Baking For Others: Watermelon Cake

Surprise!

This green semi-sphere is not something Shrek shed on my mom's counter.

It's a watermelon cake. And I'm posting about it to celebrate my sisters' birthdays--Jill's was yesterday and Kate's is tomorrow. Happy Birthday Jill and Kate!!

I've got an autumn birthday myself so I don't know the pain firsthand, but from what I remember of elementary school, summer birthday kids got a little short-shrifted when it came to celebration. Those of us with birthdays from September to June got our own day, our own batch of cupcakes, and our own rendition of "Happy Birthday to You," and it wasn't hard to plan weekend birthday parties, since no one's on vacation in October.

But before everyone dispersed for family vacations or camp, I remember the summer birthday kids would share one batch of cupcakes, on one afternoon, to the tune of one "Happy Birthday to You [plural]." My sympathy was not even lessened by the thought that they were guaranteed good weather or by the fact that we always had fun celebrating my sisters' birthdays.

As we've mentioned before, we don't love turning on the oven in the heat. In August, birthday cakes are therefore often less involved than their winter and springtime counterparts. Kate and Jill sometimes got the famous chocolate cake for dessert, but they sometimes requested something cooler. Such as this watermelon cake.

My mom first made this dessert at some time during my childhood. It was as awesome then as it is now, and it inspired a lifelong affection for raspberry sorbet topped with chocolate chips aka watermelon seeds. It's simple in that it only requires four ingredients, but it is a little complicated in terms of technique--you're working with melty ice cream in the heat, and that can turn thing sticky. Crazily enough, Phoebe and I made this in the makeshift condo kitchen on our spring break trip to Costa Rica a few years ago, somehow serving it to twenty friends before it melted.

I think it's become harder to find green ice cream or sherbet recently. We used to buy a cheap, unbranded gallon of pastel green lime sherbet from the supermarket, but apparently health consciousness has done away with the availability of that. My mom's friend Renee suggested using green tea ice cream, which she found at Walbaum's. After spending a while at the freezer case, I wound up buying three cartons of Edy's Spumani ice cream and fishing out the green pistachio from the strawberry and chocolate that shared the gallon. The pistachio tasted delicious, so it was all for the best. Worst case scenario, you can use vanilla--just dye it green with food coloring before using. And don't criticize me for using fake green ice cream. This cake is worth it. Just imagine the delight of your sisters or guests when you slice into this big round green thing to find it looks just like a watermelon, and tastes even sweeter.

From my kitchen, wishing my sisters the happiest of birthdays, to yours,

Cara, THE QUARTER-LIFE COOK

**Recipe**

Watermelon Cake
Makes about 20 servings

You can modify this recipe according to what you have. If your bowl is smaller, reduce the quantities; if larger, increase them. Just be sure to clear a space in the freezer for the bowl you choose, and make sure that space also fits whatever platter you serve the cake on. On the off chance that there are leftovers.

Ingredients
3 cups green ice cream or sherbet
2-3 cups lemon sorbet
5 cups raspberry sorbet or sherbet
1 cup mini chocolate chips

Clear a space in your freezer that will fit the bowl you're using. I like to turn down the freezer temperature a notch or two.

Leave the green ice cream out on the counter until it reaches an icing-like consistency. You want it to be easy to spread, but not at all liquidy.

Meanwhile, cover a 10-12 cup bowl with overlapping sheets of tin foil.

Spread the softened green ice cream evenly across the bowl. If it starts to slide down from the top edges, freeze it for 30 minutes or so, then press it into place. Freeze the bowl for about 2 hours, until the ice cream is quite hard.

While the green layer is chilling, soften the lemon sorbet. Spread a thin layer across the surface of the green ice cream, smoothing to cover it completely. Freeze again, until the lemon sorbet is hard.

Soften the raspberry sorbet and place it into a large bowl. Sprinkle in the chocolate chips and stir to distribute them evenly.

Remove the green and white watermelon cake from the freezer. Spoon the raspberry sorbet into the cavity and smooth the top. Cover with plastic wrap, then a tight layer of tin foil.

Freeze overnight.

When you're ready to serve, invert the cake on a flat serving platter. Lift off the bowl, then carefully peel off the foil. Smooth the cake with a plastic spatula dipped in warm water before. Serve immediately--quick! before it melts.

To store the cake, flip it back into the bowl in which you made it. Cover with plastic wrap and foil and freeze.

The damage: a sorbet and ice cream-soaked paper towel, with candles

Read more...

Wednesday, August 18, 2010

Recipe Flash: Capellini with Roasted Yellow Tomatoes

TOP 5 SUMMER PASTAS: Linguine with Littlenecks, Tomatoes, and Corn; Garlicky Angel Hair with Shellfish; Pomodoro Fresco Pasta Salad; Summer Squash Angel Hair; Rainbow Rice Noodle Salad with Chicken

If you're not already outside firing up the grill, pasta is as good a way as any to get in and out of the kitchen very fast. Capellini or angel hair takes only 4 minutes to cook, so if your strategy is to minimize heat and maximize speed, these long skinny shapes will be your savior.


But this summer I'm not afraid to turn on my oven--especially when the result of doing so is baked tomatoes. After my success with the larger versions, I popped a few cherry tomatoes in the oven to let them get blistered, sweet, and caramelized. After 10 minutes or so, they burst, and the pan became saturated in their juices. As they continued to cook, the sauce thickened and became an ideal topping for a vehicle like simple chicken breasts or, in this case, pasta.

You can roast the tomatoes in advance, then toss them with the capellini, and a little bit of the pasta water when you are ready for dinner.

From my kitchen, albeit small, to yours,

Phoebe, THE QUARTER-LIFE COOK

**Recipe**


Roasted Yellow Tomato Capellini
Makes 2 servings

Ingredients
1 pint yellow cherry tomatoes (you can use regular)
1 teaspoon salt
1 teaspoon sugar
2 tablespoons olive oil
1/2 pound capellini
1 tablespoon fresh chopped basil
2 tablespoons grated parmesan (optional)

Preheat the oven to 300 degrees.


In a large cast iron skillet or baking dish, toss the tomatoes together with the salt, sugar, and olive oil. Bake in the oven for 15 to 20 minutes, until the tomatoes have released a lot of liquid and their skins have begun to burst.

Turn the heat up to 500 degrees and cook for another 10 minutes, until the skins are blistered. Set aside to cool.


In the meantime, bring a pot of salted water to boil. Cook the pasta according to package directions until al dente (about 3 minutes). Drain and add to the pan with the tomatoes. Toss to combine and taste for seasoning. Sprinkle with fresh basil and parmesan (if using), and serve immediately.

Read more...

Monday, August 16, 2010

Working With What You Have: Blueberries & Peaches

FRUIT-FILLED MENU: Avocado Quesadillas with Peach Salsa; Chicken Marbella; Blueberries in Lemon Cream

On Friday, Phoebe opined on one of the best ways to use up summer vegetables (zucchini and scallions; fry them into patties). Today, I've got another aspect of summer's bounty on my plate--two kinds of fruit--and they're figments of Phoebe's worst nightmare. She is, as you may or may not know yet, our resident fruit hater.

Last summer, I combined the plentiful peach harvest with the almost-as-abundant blueberry yield into a pie that was enjoyed, even by Phoebe, without any fruit apathy at all. Just two weekends ago, I made a similar dessert: blueberry and peach crisp, which we ate, topped with vanilla ice cream, after a lobster dinner. Both desserts were delicious. Peaches and blueberries combine well in sweet things, I've apparently discovered.

But to pigeonhole them as fruits that go together, and only in sweets, would be unnecessary. I've been using them separately, of course, and in savory dishes too. (I'm curious if anyone has a recipe for blueberry chicken, by the way? It sounds like it'd be good.)

My mom invented this peach salsa at the beginning of peach season. We've been making it a lot since then, to top poached cod and roasted chicken, and to use instead of tomato salsa or pico de gallo in tacos (especially good with grilled flank steak tacos). My mom thinks it's the abundance of fresh herbs (mint and basil) and freshly ground pepper that makes this sauce so good, while Jill and I think it's the sugar.

The blueberries are my own creation. I was having my old roommate Lisa over for dinner, and I had the tacos with peach salsa all ready to go. But the Q train decided to pause, and Lisa texted, saying she'd be late. I hadn't been sure I would serve dessert, but with the extra time, I decided I had to. The blueberries that week were ethereal: large, firm, and extraordinarily sweet. I made some lightly whipped, lemon-flavored cream to eat with them, and when I still had more time, I went on to make simple candied walnuts as a topping. The result was a simple dessert, the kind of thing you make when the fruit is perfect, since it shows off the blueberries like nothing else.

From my kitchen, in love with the fruits of the season, to yours,

Cara, THE QUARTER-LIFE COOK

**Recipes**


Blueberries in Lemon Cream
Serves 2

This cream lies on the softer side of whipped cream, and it's made slightly tangy by the addition of sour cream and lemon zest, which complements the blueberries perfectly.

Ingredients
1 cup blueberries
1/2 cup heavy cream, very cold
1 tablespoon sour cream
zest from half a lemon
3 tablespoons confectioners' sugar

1 tablespoon chopped candied walnuts (you can also use plain toasted walnuts)

Rinse the blueberries and pick out any soft ones. Set them aside.

Beat the whipped cream with the sour cream, lemon zest, and confectioners' sugar. You want it to be thickened, but not overly fluffy. Set aside.

Chop the candied walnuts.

Arrange the cream in two small bowls. Top each with half the blueberries, then sprinkle with the candied walnuts. Serve immediately.

Peach Salsa
Makes 2 cups

Ingredients
4 peaches, in a 1/4" dice
juice of 1 lemon or 2 teaspoons red wine vinegar
3 tablespoons sugar
1/2 teaspoon salt
pinch red pepper flakes
3 tablespoons chopped fresh herbs: cilantro, basil, or mint, or a combination
generous grind of black pepper

Combine the peaches, lemon juice, sugar, salt, red pepper flakes, 2 tablespoons of the herbs, and the black pepper. Stir to combine.

Cover and refrigerate for at least an hour, and up to several hours. Taste for salt, and add more lemon juice or sugar to make the salsa as sweet or tangy as you like it.

Serve with grilled meats, on sandwiches, or in a taco spread.

Read more...

Saturday, August 14, 2010

Big Girls, Test Kitchen: Homemade Fresh Ricotta

EVENT: Diva's Uncorked Wine & Food Festival
VENUE: Nectar's, Martha's Vineyard
PARTY-SIZE: 200+
TYPE: Tasting Event & Partnership with Plum TV
MENU: Cherry Tomato Bruschetta with Fresh Ricotta and Three Herb Pesto

Since deciding to spend most of August on Martha's Vineyard, I've been trying to make the most of my time here by inserting myself into the island's fabulous food culture any way I can. This has meant knocking on a lot of doors. And one that I gave a particularly emphatic rap tap tap to was Plum TV's.

My annoying squeeky wheel behavior paid off eventually.

I was thrilled when Tina Miller called a few weeks ago and offered me the opportunity to represent Plum at the Diva's Uncorked Wine & Food Festival and help make a dish for their Grand Tasting Event. My mind immediately began scanning our past catering menus for finger food items that would work best with the island's local produce. But Tina, who's written two fabulous cookbooks about the island's local cuisine, offered some advice from previous years: stick with tomatoes and crusty bread. As a crostini-obsessed cook, I could not have been happier to hear those words.

To add my spin to the dish, and make my life more difficult in the process, I decided to experiment with making my own ricotta to slather on the Pain Levain from Rickard's Bakery. I began with this recipe which called for heavy cream and lemon juice instead of buttermilk. Perhaps it was impatience that got the better of me, but the experiment turned out to be rather disasterous. My parents watched in horror as I splattered hot milk all over myself and their kitchen. And the recipe yielded but a 1/2 cup of ricotta, for one very big mess.

Without the natural acid in buttermilk, the curdling process took forever. After more research (and a tip from Cara), I found that Jennifer Perillo seemed to have found the right balance between heavy cream and buttermilk. I gave her recipe a go, but again, got impatient, and decided to add the tablespoon of lemon juice anyway to speed things up. Whether or not this last addition was the key to success, the result was fantasticly smooth and creamy, and after 4 more batches for the festival, I feel I can officially give Jennie's recipe my stamp of approval.

For those of you who I won't be seeing this afternoon, below are the building blocks for making my Cherry Tomato Bruschetta at home. Simply toast or grill fresh bread, top with Homemade Ricotta, Three Herb Pesto, and some gorgeous cherry tomatoes.

Make sure to subcribe to our newsletter, and we'll let you know when the Plum footage of me in my BGSK apron sippin' with the sisters is up!

From my island kitchen, spackled with cream, to yours,

Phoebe, THE QUARTER-LIFE COOK

**Recipe**
Homemade Fresh Ricotta
Makes about 1 cup

Adapted from Jennie's Kitchen

Jennie has some really great images of the cooking process on her blog. My only change was adding a little bit of lemon juice towards the end to coax the curdling process along. Also, be careful when doubling the recipe and make sure you begin with a large enough pot--when the milk comes to a boil it has the potential to foam up and spill over the sides. This caused a big ol' mess during one of my first attempts. If you see this happening, simply skim off some of the foam and curdles off the top and add it to the cheese cloth--there will be some clumps forming on the top before the rest of the liquids have fully separated.

Ingredients
1 quart whole milk
1 cup heavy cream
3/4 cup buttermilk
1/2 teaspoon salt
1/2 tablespoon lemon juice
Cheesecloth

Add the milk, cream, buttermilk, and salt to a large heavy pot (a 5 or 6-quart Dutch oven will do the trick) and set it over medium heat. Bring to a boil, and be careful that the liquids don't spill over the top.

Meanwhile, line a fine mesh sieve or strainer with a few layers of cheesecloth--you will need about a yard, folded into a neat square. Place the strainer over a large pot or bowl (you may need a second one on hand in case the first gets too full).

Once solids begin to form on the top, add the lemon juice. The curds will begin to separate from the whey. Once most of the liquids in the pot have curdled (you will see fine little bits in your ladle), remove from the heat. Spoon the curds into the cheese cloth and allow to drain for about 30 minutes. Once very little liquid is seeping out of the bottom of the cloth, gather it together into a buddle and chill in an airtight container in the fridge for at least 2 hours. Remove the cloth and store covered for up to 2 days.

Three Herb Cashew Pesto
Makes about 1 cup

1 garlic clove
1/4 cup roasted or toasted cashews
1 cup tightly packed basil leaves
1 cup snipped chives
1 tablespoon lemon thyme (or regular)
Juice of ½ a lemon
¼ cup olive oil
1/4 cup grated parmesan
1/4 teaspoon salt

In a small food processor pulse the garlic and the nuts until finely chopped. Add the basil, chives, thyme, and lemon juice and blend until the herbs have begun to break down. Add the olive oil, and puree until the mixture is smooth and at your desired consistency, adding more oil as necessary to break down the nuts and herbs. Fold in the Parmesan and taste for seasoning. Add salt and extra lemon juice for acidity as needed.


Read more...

Thursday, August 12, 2010

Working With What You Have: Zucchini & Scallions

OTHER WAYS TO USE YOUR ZUCCHINI: Zucchini-Shallot Frittata; Green Goddess Soup with Zucchini, Chard, and Cilantro; Baked Orzo Ratatouille; Mediterranean Vegetable Hash; Squash Chips with Basil and Balsamic Drizzle; Parlsey Zucchini

The other day, a friend of my family came over for dinner and brought with him one fat kid of a zucchini from his garden. It might have been larger than my femur. He advised my mother to break it down into slices and slowly roast them at a low temperature, 250 degrees, for around 2 hours. She obediently followed his instructions the following week and, as promised, the 5 pound vegetable shrank down to but a cup or two of perfectly caramelized pieces.

When I moved back into my parents' apartment earlier this summer, I inherited a few smaller zucchini that my mother had bought at the farmers' market, no doubt with this soup in mind, but which she had left behind when she migrated to Martha's Vineyard. Instead of finding a way to reduce it to nothing, I decided to stretch the little guys and make many delicious bites.

The little zucchini patties I ended up making were not terribly dissimilar from my corn cakes from last summer. And though I savored the fresh zucchini flavor, and that of a few crunchy green scallions--also left behind in my mother's fridge--by eating these cakes plain, they would benefit from the addition of a creamy summer sauce like the corn cakes' lemon creme fraiche, or a version of this cilantro crema.

Whether you are stretching your teeny tiny zucchini or trying to get rid of vegetables as large as a giant's appendages, these cakes make for a perfect summer appetizer. I hope you inherit some of your own so you can give them a whirl.

From my kitchen, up to my ears in zucchini, to yours,

Phoebe, THE QUARTER-LIFE COOK

**Recipe**

Zucchini-Scallion Cakes
Makes 10 small cakes

Ingredients
1 medium zucchini, grated ( about 1 1/2 cups)
2 scallions, thinly sliced (about 1/4 cup)
1/4 cup flour
1 teaspoon sugar
1/2 teaspoon salt
1 egg, beaten
1 tablespoon lemon juice
1/2 teaspoon lemon zest
1 tablespoon butter (optional)

Combine the zucchini, scallions, sugar, and salt in a medium mixing bowl. Toss to combine. Add the egg, lemon juice, and zest and stir until well incorporated.

Heat 1 tablespoon of olive oil and 1 tablespoon of butter (you can use more olive oil if keeping this recipe dairy-free) in a large cast iron skillet. Once the butter is melted and the oil is fairly hot, drop in the zucchini mixture in tablespoonfuls, making sure not to crowd the pan (about 5 at a time). Cook for about 1 minute on each side until browned and semi-firm. Remove to a paper towel to drain and repeat with the remaining zucchini mixture, adding more oil as necessary.

NOTE: this can be done a day in advance. Simply reheat the cakes in a 350 degree oven for 10 minutes.

Read more...

Wednesday, August 11, 2010

Recipe Flash: Tomato & Sweet Onion Chutney

TOP TEN WAYS TO USE UP SUMMER TOMATOES: Baked Tomatoes with Thyme; Sweet Tomato Jam; Pomodoro Fresco Pasta Salad; Arugula Caprese; Rice Salad with Cherry Tomatoes, Almonds, and Herbs; Salmorejo Cordobes; Quinoa Tabouli; Cooked Salsa; Panzanella Salad with Lemon-Basil Vinaigrette; Roasted Tomato Soup with Crispy Pancetta; Greens with Dried Tomatoes and Roasted Chickpeas

I can't seem to stop buying tomatoes when I see a beautiful specimen before me. And since my parents' friends bring over goodies from their garden every time they come to dinner, we have been up to our ears in tomatoes. Sometimes I feel guilty eating these any other way than in huge raw slices with a drizzle of olive oil. But lately I've been trying to work my way through the yield on the stove, with condiments like this chutney.

I made a similar Tomato-Ginger Chutney in the fall for Jordana's birthday--but this version was more like a gingery tomato sauce (we paired it with Asian meatballs) and used canned tomatoes. The cooking process of this tomato chutney is closer to the way I've been making the Red Onion Jam I've become so fond of. It's an excellent condiment to have around to dress Seared Salmon or Scallops.

From my kitchen, albeit small, to yours,

Phoebe, THE QUARTER-LIFE COOK

**Recipe**


Gingery Tomato and Sweet Onion Chutney
Makes 1-2 cups

1 small sweet onion, halved and thinly sliced
1 tablespoon minced fresh ginger
1 tablespoon sugar
1/2 teaspoon salt
2 tablespoons unsalted butter
1 large garlic clove, minced
3 plum tomatoes, seeded and roughly chopped
1/4 cup white wine
1/2 lime, juiced
2 tablespoons chopped fresh basil

In a medium sauce pan with a lid, combine the onion, ginger, sugar, salt, and butter over low heat. Cook covered for 20 minutes, until the onions are soft and have released their liquid. Add the garlic, tomatoes, and wine. Cook uncovered until some of the juices have cooked off and the sauce has thickened, about 15 minutes.

Add the lime and basil off the heat. Taste for seasoning, and spoon over grilled or seared fish.

Read more...

Monday, August 9, 2010

Cooking For One: Lunch From the Farmers' Market


DISH: Radicchio and Fresh Mozzarella Toasts; Grandpa Caprese Panzanella
TYPE: Summer Lunch
MAIN INGREDIENTS: Whole Grain Bread, Fresh Mozzarella, Tomatoes, Radicchio

A few Saturdays ago, after my mom had gotten back from her tennis match and I had finished up a long bike ride on my new and very cool road bike, we went out to the farm stands for vegetables. Our favorite stop is at Marilee Foster's farm. The labels by the vegetables are artistic endeavors in their own right, and, even more charmingly, business used to be conducted on an on-your-honor system. (There's now a staffer there most of the weekend, though we don't like to imagine what depravity caused the system to change.) Marilee's guinea hens run around, and her tractors idle on the land behind the stand, reminding you that you really are in farm country.

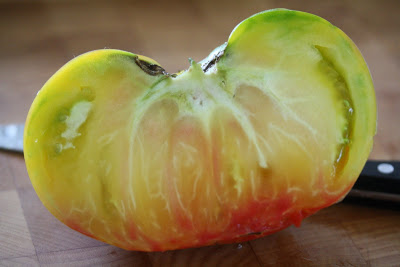
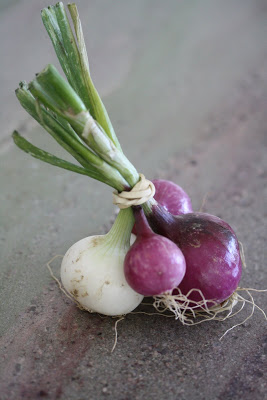
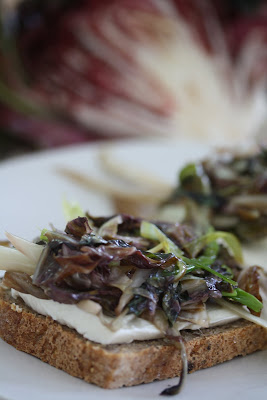
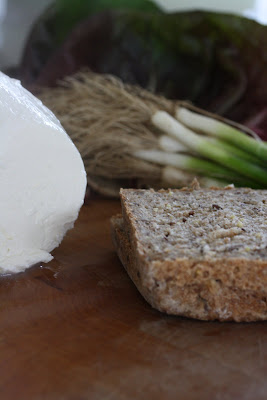
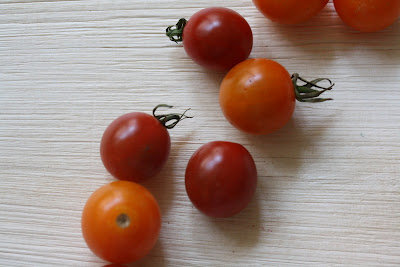
We drove home with paper bags crowding the backseat. Radicchio two times larger than the heads we'd bought the weekend before. Tomatoes, both red little guys and large, tie-dye heirlooms. Lots of kirby cucumbers. Gorgeous scallions. A bundle of multicolored onions.

In the kitchen, we got to work. Though we were using the same ingredients, the same prep area, and the same mentality (fresh is good), we made pretty different lunches. I headed towards a sandwich, albeit one topped with a salad of sorts. Mom made a real salad, albeit one that incorporated bread.

Grandpa Salad has a long history in our family--one that I seemed to have recorded inaccurately last year. Apparently cucumbers, tomatoes, and chopped onion dressed with olive oil and salt was my paternal great-grandfather's go-to salad. We eat it a lot. To make it a full meal, Mom added chopped mozzarella and cubed toasted bread. She brought her bowl outside as I put the finishing touches on my lunch of choice: Toasts with Mozzarella and Radicchio.


I love the slight bitterness of radicchio. I think it spices up dishes as mundane as slaws, and it is complemented by ingredients with a hint of sweet, like the breakfast sausage in Phoebe's Rigatoni Treviso. In my lunch, the sweet was the sweet of dairy: a hefty slice of creamy fresh mozzarella. I didn't add it this time, but if you wanted to go once step further, a schmear of fig preserves or red onion jam beneath the mozzarella might just be delicious. I went about stir-frying half the head of radicchio with scallions and a sprinkling of salt, then topped my bread and mozzarella with it. The heat from the vegetables melted the cheese so it was soft but not stringy.

I know you're wondering whose lunch was better...

Mom's salad...

or my toasts?

I'm afraid to turn this into a competition, since that would pit me not just against my beloved mother but also against a chain of ancestors. So we'll leave it as a tie. Both simple, both healthful, both straight from the garden. Both delicious only in summer.

From my kitchen, where food goes straight from the ground into our lunches, to yours,

Cara, THE QUARTER-LIFE COOK

**Recipes**

Radicchio Mozzarella Toasts
Serves 1

Ingredients
1 tablespoon olive oil
1/2 head radicchio, trimmed and cut into ribbons
2 scallions, white and light green parts cut in half lengthwise, then into thirds
2 slices wholegrain bread
2 thick slices fresh mozzarella
1/4 teaspoon salt
1/2 teaspoon balsamic vinegar

Heat the olive oil in a frying pan over medium heat. Add the scallions and cook for 1-2 minutes, until they start to wilt. Add the radicchio ribbons and cook, stirring constantly, until they have wilted and turned a much duller purple.

Add the vinegar and the salt, then turn off the heat.

Meanwhile, toast two slices of good, thickly-cut bread. Arrange the mozzarella on top.

Scoop the hot radicchio on top of the mozzarella. Grind some fresh pepper and eat immediately.


Grandpa Caprese Panzanella
Serves 1

Ingredients
1 tomato, cut into a 1-inch dice
1 cucumber, cut into about a 1-inch dice
1/4 small red onion, minced
3 tablespoons olive oil
1 cup toasted bread, cut into cubes (about 2 slices)
1/2 cup fresh mozzarella, cubed
salt
pepper

Mix the tomato, cucumber, and red onion in a large salad bowl. Toss with the olive oil. Add the bread and mozzarella, and toss again. Taste, then season with salt and pepper before eating.

Read more...

Friday, August 6, 2010

Big Girls, Test Kitchen: Summer Scallops, Version 2008

EVENT: Ina's On Island
VENUE: Phoebe's Parents' House, Martha's Vineyard
PARTY-SIZE: 6
TYPE: Casual Summer Dinner
MENU: Bluefish Potato Cakes; Summer Scallops with Sweet Corn & Tomato Succotash; Farm Greens with Spiced Shrimp and Lemon Vinaigrette

Last summer
, I revealed my obsession with seared scallops. The recipe I shared, version 2009, included tomatillo guacamole and a corn salsa. The latter was a spin on my favorite version, the one I’ve been making ever since I got my hands on my first scallop—the dish that became permanently engrained in my repertoire in the summer of 2008, when Ina Garten came to dinner.

It took me a while to gain my cool when cooking for company. I used to be quite the nervous wreck, especially when certain boys, girl crushes, or parents’ friends were involved. And two summers ago, that was definitely the case when the parents’ friend at hand was a Food Network superstar.

I’ve cooked with Ina a handful of times. The first was for my dad’s 50th birthday, which I reminisced about in this post. The next was in Paris. I arrived at Ina’s apartment early and we made potato gratin and haricot vert with caramelized shallots to go with a mustard-crusted rack of lamb. I remember my hands shaking as I thinly sliced potatoes and tried to look competent and skilled. Then I was told to be careful of my fingers, as Ina handed me a mandoline to finish the task.

Back in the summer of 2008, we had yet to start the blog. Cooking was no higher on my list of hobbies than jewelry making or singing in the shower. I had yet to cook for Ina, and I was still searching for the kind of confidence in the kitchen that would prevent me from having a panic attack when entertaining important people in my life. But the time had come, and I had only a few days to prepare a menu and find my chi.

We were on Martha’s Vineyard, so I decided to resort to my favorite scallop dish—perfectly seared and plopped atop a colorful summer corn succotash with juicy heirloom tomatoes and just a hint of cumin. Though I usually don’t like to be stuck in the kitchen with friends over, I was happy to tuck myself away for the last minute scallop preparation--that way I wouldn’t have to nervously watch Ina take her first bite of my blue fish and potato cakes, I'd just hope for favorable sound effects.


The dinner turned out to be the perfect casual summer meal, and I managed to find some sort of cooking poise, the kind I’ve so often admired in my guest of honor. The scallops themselves have made a few comebacks since, most recently when my cousin Jason—a venerable home cook in his own right—came to dinner.

If you have a favorite scallop dish of your own, tell us about it. Who knows, it just might become Phoebe’s Summer Scallops, Version 2010.

From my kitchen, bringing back scallops from 2008, to yours,

Phoebe, THE QUARTER-LIFE COOK

**Recipe**

Summer Scallops with Sweet Corn & Tomato Succotash
Makes 4 servings

Ingredients

2lb scallops
2 tablespoons olive oil
1 medium sweet vidalia onion, finely diced
1 garlic clove, minced
5 ears of corn, kernels removed
1 1/2 teaspoons cumin
1/4 teaspoon turmeric
1 teaspoon salt
3 plum tomatoes, seeded and roughly chopped
1/2 lemon, juiced
2 tablespoons chopped basil, plus 3 leaves julienned for garnish
1 tablespoon butter

Rinse the scallops under cold water and set aside on a dish towel. You want them to be dry by the time you are ready to cook, without breaking them by prodding with a towel.

In large nonstick or cast iron skillet, heat a tablespoon of olive oil over a medium flame. Saute the onion slowly until translucent and beginning to brown, about 10 minutes. Add the garlic and corn and continue to saute until the corn is bright yellow and tender, about 5 minutes. Add the cumin, tumeric, and salt. Cook for another few minutes until the corn is beginning to caramelize. Turn the heat down to low and add the tomatoes. Stir slowly until the tomatoes heated through, but have not begun to release their juices, about 5 minutes. Add the lemon and the basil off the heat, and transfer to a platter.

NOTE: the corn can be served warm or at room temperature if you want to make it in advance.

In a large nonstick or cast iron skillet (you can remove the corn mixture to a platter, clean out the pan and use it for the scallops), heat one tablespoon of olive oil over a high flame. Once the oil is hot, but not smoking, add the butter. Gently pat the scallops with a paper towel to make sure they are nice and dry and season them with salt on one side. When the butter is melted and the pan is smoking, add the scallops, making sure not to crowd the pan (you will likely need to do this in 2 or 3 batches). Turn the pan to keep the butter and oil evenly distributed, but DO NOT move the scallops until they have properly browned, about 2-3 minutes depending on the size of your scallops. When they have a good sear (dark brown crust), flip them and cook for another minute. The scallops should still be slightly translucent in the center--if they are opaque throughout, they will likely be overcooked by the time you serve them. Remove finished scallops to the corn platter, making sure to put the beautiful seared side facing up. Repeat with the remaining scallops.

Squeeze a little extra lemon juice over the scallops and garnish with julienned basil. Serve immediately.


Read more...

Thursday, August 5, 2010

Giveaway: Imersion Blender Winner!

Thank you to everyone who participated in our Summer Soup & Smoothie Imersion Blender Giveaway courtesy of Just Vanities.

We chose a winner randomly from the list of commenters and recent newsletter subscribers. Congrats to reader Jackie Borchardt!

Here's what Jackie had to say:

I either make tuna salad (yellow pepper, green/red onion, grapes, yogurt, mustard) to eat on crackers or I just cut some cheese and put in on a plate with whatever fruit I have on hand and some crackers.

Thank you again for sharing all the creative ways you've gone about feeding yourselves when it is too hot to cook. We'll be stealing some of your ideas soon.

We'll have more questions, and more exciting kitchen toys, to give away soon--so keep coming back for seconds!

From our kitchen, albeit small, to yours,

Cara and Phoebe, THE QUARTER-LIFE COOKS

Read more...

Wednesday, August 4, 2010

Recipe Flash: Tomato & Dinner Roll Panzanella

SALAD BUFFET: Tomato & Dinner Roll Panzanella; String Beans with Mustard Dressing and Cured Shallots; Blue Potato & Green Onion Salad; Lemony Tarragon Chicken Salad

Tomato season is here! We know we can't resist all the tomatoes this time of year, and since we assume you can't either, all our August Recipe Flashes will feature them in an ode to the season. Here goes...

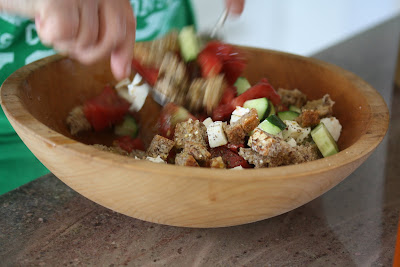
On Monday, as I was baking off a second vanilla cake layer for the birthday cake in yesterday's book photo shoot, I was listening to The Splendid Table, Lynne Rossetto Kasper's radio show, on podcast. Though the cake batter looked pretty good, and tasted even better, Lynne's go-to summer salad, which she described on air, sounded a whole lot more like lunch.

Bread Salad is hearty but simple, filling without being wintry, and as Lynne's description went on, I mentally compared her steps to what I had in my fridge. Leftover bread: check (dinner rolls from a recent catering event). Tomatoes: check (cherry tomatoes, from the farmstand). Spices: check. Oil: duh. Vinegar: of course. I followed the guidelines to the letter, moistening stale bread with water and vinegar, and seasoning tomatoes with oil and spices. Still, the beauty is that they are just guidelines; my salad is made-up, perhaps not much like any of Lynne's, and the variations on it are limitless.

From my kitchen, albeit small, to yours,

Cara, THE QUARTER-LIFE COOK

**Recipe**

Tomato & Dinner Roll Panzanella
Serves 1

Ingredients
1 1/2 dinner rolls, torn into bite-sized pieces (or about ¾ cup of any torn bread)
2 teaspoons white wine vinegar
1 tablespoon olive oil
¼ teaspoon smoked paprika
¼ teaspoon salt
pinch red pepper flakes
2 tablespoons scallions, white and light green parts, plus more for garnish
about 1 ½ cups halved cherry tomtaoes
2 tablespoons crumbled feta

Arrange the bread in a bowl. Sprinkle with several teaspoons of water and the white wine vinegar, to moisten it. Set aside for 30 minutes.

Warm the olive oil in a small saucepan over medium heat. Add the paprika and red pepper flakes, and cook for about 2 minutes, until fragrant. Add the scallions and and salt, and cook until they’re just wilted, another minute or two.

Place the tomatoes in the bowl you’ll eat out of. Pour this oil over them, tossing to mix. Taste for salt. Add the feta and the moistened bread and toss to distribute evenly.

Grind black pepper over the top. Garnish with a few extra scallions if you’d like.


Read more...