Pages

Showing newest 15 of 16 posts from June 2009. Show older posts

Tuesday, June 30, 2009

Cooking For One: Lazy Afternoon Salads


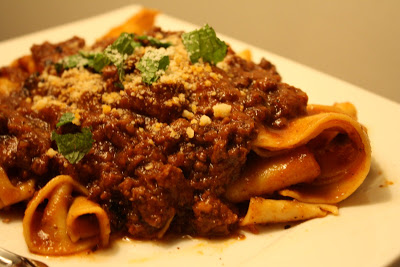
DISH: Lemony Tarragon Chicken Salad; Shrimp Salad with Basil and Chives
TYPE: Lazy afternoon lunch
MAIN INGREDIENT: chicken/shrimp, fresh herbs, mayonnaise

During my childhood, I’d always make sure to take a few weeks away from the summer’s main event—camp, community service adventures and, eventually, the all-important internship—to spend a few lazy weeks on Martha’s Vineyard with my parents and extended family. When the sun was shining, there were plenty of active ways to spend my time. But when the weather decided to offer up no means of outdoor distraction, it was fairly easy, and not without pleasure, to simply hunker down with a book in front of the sprawling gray ocean, zone-out, and eat.

Now, I’ve been lucky enough to salvage 10 days of relaxation away from what has been, over the course of the last few weeks, a very rainy city life. Unfortunately, it seems that the whole Northeast has fallen prey to post-April depression, and decided to plague us all by making weather.com’s favorite prediction—scattered thunder showers—a reality. This year, I take the downtime gladly, and with it, one of my favorite lazy summertime meals.

When the daily cardio will warrant it, my lunches on the vineyard will consist of the many indulgences I attempt to fit into my one week of meals, namely: fudge, ice cream, fried clam rolls, and the ever tempting fried green tomato BLT, which I force myself to bike 7 miles in order to eat. These activities and eats are usually shared with my dad, whose sweet tooth and love for lobster rolls usually direct him town-bound (with me as company) for every meal. But when it’s gray and gloomy, I am more than happy to join my mother in front of the TV to watch tennis and eat whatever she’s decided to whip up.

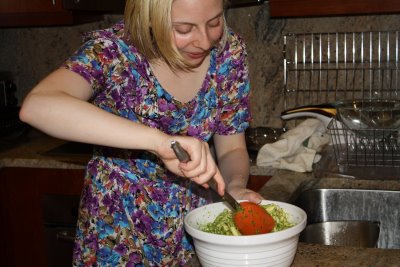
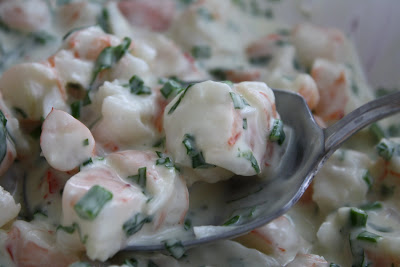
Given her affinity towards mayonnaise, it’s no surprise that my mother’s cooking-for-one go-to involves a creamy, mustard base and whatever fresh herbs Morning Glory Farms has been able to salvage from the persistent rainfall. Since she was cooking for two this time, I requested one of my childhood favorites: shrimp salad with a combination of fresh basil and chives. Aside from the bike ride to Edgartown Seafood to pick up shrimp, this salad is an easy way to get your slow-moving bones back in the kitchen, mix up some condiments in large, lazy spoonfuls, and in less than a few minutes, return to the couch where, without an inkling of guilt, you are happy to temporarily belong.

From my kitchen, always open for a lazy day of vacation, to yours,

Phoebe, THE QUARTER-LIFE COOK

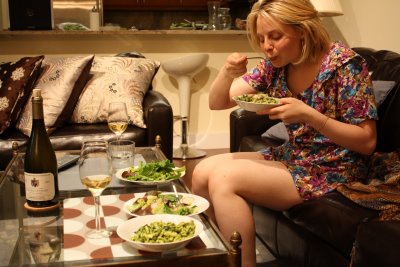
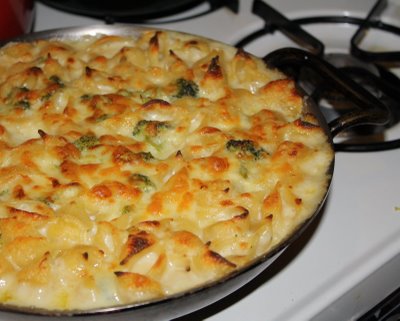
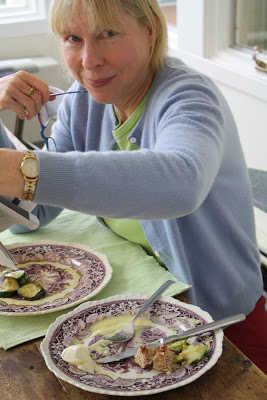
my mother, who may never make me another salad again after this photo,
beside her friends, Mayonnaise and Turkey (for dipping).

**Recipes**

Shrimp Salad with Basil and Chives
Lemony Tarragon Chicken Salad

Makes 2 servings (each)

These two salads share the same composition with slight modifications to suit the protein at hand. For the shrimp, my mother used fresh, bright basil and just a hint of dried mustard to give it a bit of heat. For the chicken salad, she used Dijon mustard to give a more full bodied mustard flavor to the sauce, and tarragon as the main herb since the stronger anise flavor holds up better against a less delicate meat.

Ingredients

For the shrimp:

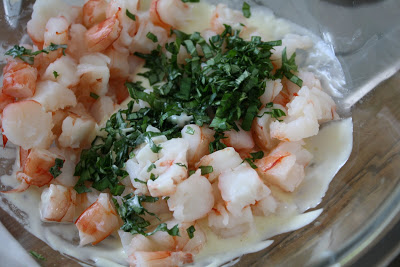
1 lb cooked shrimp, peeled and tails removed, chopped
½ tsp dry mustard
2 tbsp chopped fresh basil leaves

NOTE: If buying uncooked peeled, deveined shrimp, cook for a few minutes in boiling water until they turn pink. Drain and reserve in an ice bath to stop the cooking.

For the chicken:

1lb roasted chicken breasts (about two), skin-on and bone-in
2 tbsp Dijon mustard
1 tbsp chopped fresh tarragon

NOTE: roast seasoned chicken breasts, skin-side up, at 350°F for 35-40 minutes. Allow to cool, then remove the skin and break chicken apart with your hands into large chunks.

For the base:

3 tbsp lemon juice
2 tbsp olive oil
¼ cup mayonnaise
10 chives, snipped with a scissor
white pepper
salt
Whisk together: lemon juice, mustard, and olive oil. Add in the mayonnaise and continue to whisk until combined. Add white pepper and salt to taste.

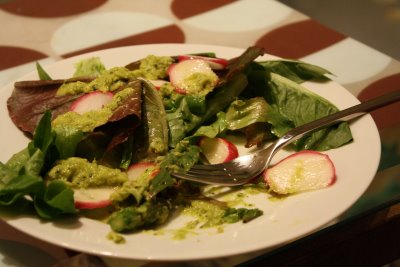
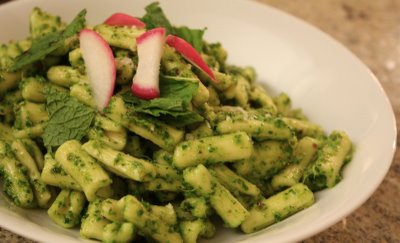
Mix in the fresh herbs, snip chives directly into the bowl, and toss together with the shrimp or chicken.Serve piled on top of a simply dressed salad (mixed greens, olive oil, and white vinegar) or sandwiched between two crusty pieces of wheat bread.
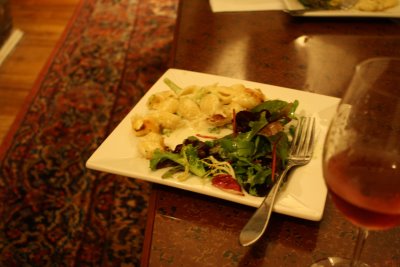
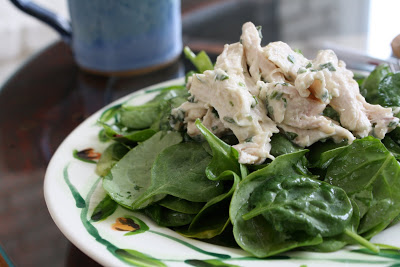

a lazy lunch

Read more...

Monday, June 29, 2009

Quarter-Life Coaching: Chef Jennie on Browning and Bolognese

EVENT: Twin dishes for twins
VENUE: Phoebe ‘s Apartment, Flatiron
PARTY SIZE: 8
TYPE: Weekend experiment; executing the teachings of Chef Jennie
MENU: Jennie's Tuscan Spaghetti Bolognese; Parpadelle with Lamb Bolognese; Spinach Fettuccine with Mushroom Bolognese; Shortbread Two Ways and Airy Chocolate Mousse (Cara)

Though we QLCs receive far more cries for help now than during the dark years (before the blog), we are always thrilled when the opportunity arises to get a little coaching ourselves. Some time back, Cara and I asked our old friend Jennie to share with us some key learnings from her stint at the French Culinary Institute that could help even those of us who’ve never cooked in professional kitchens.

Jennie graduated culinary school last fall, and though she’s now working long hours at an expensive restaurant uptown, we’ve still been lucky enough to benefit from her contributions to our high school potlucks. When we’ve all gotten together, Jennie’s dishes have remained as down-to-earth as her pre-professional offerings, if superior in composition: the vegetables in her peanut noodle salad are finely sliced on a mandolin, all perfectly crisp, thin, and even.


New kitchen contraptions aside, her greatest strength is in knowing how to please a crowd. And for the quarter-lifers, Jennie knows full well that this means pasta. Her recipe of choice for a casual dinner party: meaty pasta Bolognese. Below is Jennie’s authentic Tuscan Bolognese recipe, along with the original teachings (5 chef Jennie-isms that apply to the dish), straight
from the horse’s mouth. The two versions that follow—one using lamb, the other mushrooms—are my Mediterranean and vegetarian spins on Jennie’s technique.

I decided to make these two twin pasta dishes for, well, twins. My friends Mark and Dan have been two of my favorite eating partners and guests over the years, not only because it’s fun to confuse fellow guests who can’t tell them apart, but also because their identically large appetites ensure that no pot is left empty, and you can usually convince them to split the last four cupcakes so they are not left in my fridge to tempt me. Though I’m pretty sure serving the twins a rich meaty pasta was a guaranteed pathway to success, my results (no leftovers) prove Chef Jennie’s brilliance when it comes to theories on browning: her recipe provides a gateway for foolproof and creative versions of this Italian classic, simply by following her central guidelines.


From my kitchen, made better by the teachings of a quarter-life chef, to yours,

Phoebe (and Jennie), THE QUARTER-LIFE COOK(s)

**Tips and Tricks**

Though these tips and tricks were written to keep in mind while making the Bolognese, they
are not mutually exclusive to the particular meal at hand.

Top 5 Chef Jennie-isms for the BGSK Quarter-Life Cook:

1. Heavy on the salt. I think most would agree that probably around 90% of the time you go to someone’s house for dinner (a non-professional) and their food is flavorless, it’s because it lacks salt. Don’t be afraid. Obviously taste as you gradually add the salt. But again, do not be alarmed by how much you are using.


2. Brown bits, or sucs = flavor! If you’re making a stew or even cooking a steak stove top, you need to get your pan super hot (smoking) before you add your meat. Add the salt after you’re
done searing because salt brings out moisture.

3. Keep a garbage bowl for scraps. And no, I did not get that tip from Rachel Ray (ew). I learned that in school. Keeping your space clean is a necessity in a kitchen, especially if it's small. Never work in a cluttered area. A clean area means a clean mind. This is especially important if you’re cooking for a large group of people.

4. Every kitchen should have one chef’s knife and a paring knife. Once you own a good knife that you feel comfortable with, don’t be afraid of it. It’s your pal. If you’re scared of it you are going to cut yourself. Think of your knife as an extension of your hand. Choke up on the handle so
your thumb and index finger are touching the base of the knife itself.

5. When a recipe calls for parsley, always buy Italian flat leaf parsley. Curly parsley is used for decoration at Applebees. When buying parsley, don’t be confused with cilantro. Take a sniff and you’ll figure out the difference.

**Recipes**

Tuscan Spaghetti Bolognese
Makes 4 servings
Adapted from Anne Burrell's Pasta Bolognese

While I was studying in Florence, Italy I learned what I thought at the time to be a crazy way to make Pasta Bolognese. It consisted of mirepoix (finely chopped in a Cuisinart), ground meat, tomato paste, water, red wine, aromatics, and salt and pepper. That’s it. The reason why I felt it was strange was because there were no crushed or whole canned tomatoes. It was the most flavorful Bolognese I’ve ever had and the reason why is because you brown all the ingredients, including the mirepoix. Everything sticks to the bottom, but do not panic. All of those bits of flavor will be removed and become part of your sauce once you deglaze with the wine.

Ingredients

2-3 tablespoons olive oil
1 large onion
2 large carrots
2 ribs celery
4-5 cloves garlic
1 ½ tsp salt
2.5 pounds ground chuck or round (something pretty high in fat)
2 cups tomato paste
3 cups red wine
Water (lots of it)
2 bay leafs (fresh if available)
Small bunch of thyme (tied)
1 lb. spaghetti
flat leaf parsley, coarsely chopped, for garnish

In a food processor, pulse the onion, carrots, celery ribs, and garlic until it becomes a coarse paste. Coat a large skillet with a thin layer of olive oil. Season the pureed veggies generously with salt, and slowly sauté over medium-high heat, stirring frequently, until all the water has evaporated and they become nice and brown, about 15 to 20 minutes. Brown bits will begin to develop and stick to the bottom of the pan—this is a good thing.

Push the veggies to the side of the pan, and add the ground beef to the center. Season the meat generously with salt. Brown the beef (thoroughly), using your spatula to break the meat apart and allowing all the color to develop, about 15-20 minutes. It’s ok if the veggies brown more along with the meat.

Fold in the tomato paste and cook until well incorporated and the “paste” flavor has mellowed, about 4 to 5 minutes. Add the red wine and cook until the liquid has reduced by half, making sure to scrap up any brown bits on the bottom of the pan—you want to make sure all that flavor becomes part of the sauce.

Add water to the pan until it is about 1 inch above the meat (if there is room, otherwise you will need to keep adding it in gradually as the sauce cooks down). Carefully stir in the bay leaves and the bundle of thyme and make sure they are submerged. Bring the sauce to a boil. Return heat to medium-low and simmer, stirring occasionally, for at least 2 hours, and up to 4 (the more time it sits on the stove, the richer the sauce). As the water begins to evaporate, gradually add more. Stir every so often and taste for seasoning, adding more salt as necessary.

When you are almost finished with the cooking process on the sauce, bring a large pot of water to a boil for the pasta. Salt the water very well--saltier than you'd think. Cook the spaghetti according to package directions until al dente, reserving ½ cup of the pasta water before you drain it.

Remove 1/2 of the ragu from the pan to make room for the pasta. Toss the pasta to coat in the sauce. Add a little of the reserved pasta water to make it easier to toss, and cook together over a medium heat until the water is well integrated with the sauce.

NOTE: If you are using a fresh parpadelle or taglietelle you will only want to cook for a minute or so. If it is too fragile, toss the pasta with a little olive oil and top with a generous spoonful of the sauce on top (see my image above and below).

To serve, top the pasta with another spoonful of the reserved sauce, a handful of Parmesan cheese, and a drizzle of extra virgin olive oil. If you are using an herb (I used mint below), add a few coarsely torn leaves for garnish.

Parpadelle with Lamb Bolognese

Makes 4 servings (plus some leftover sauce)

Ingredients
1 large onion
2 large carrots
2 ribs celery
4-5 cloves garlic
1 ½ tsp salt
2.5 pounds ground lamb
2 cups tomato paste
1 ½ tsp ground cumin
1 tsp ground cinnamon
1 tsp ground ginger
½ tsp ground red pepper flakes
3 cups red wine
Water (about 2-3 cups)
2 bay leafs (fresh if available)
Small bunch of thyme (tied)
1/2 cup fresh mint leaves, roughly chopped
1 lb fresh parpadelle
grated parmesan for garnish

See above for basic instructions. When you add the tomato paste, also add the cumin, cinnamon, ginger, and red pepper flakes. When the sauce is almost finished, add ¼ cup of the mint. Use the rest for garnish along with the parmesan.

Spinach Fettuccine with Mushroom Bolognese
Makes 4 servings

Ingredients
1 large onion
2 large carrots
2 ribs celery
3 cloves garlic
1 ½ tsp salt
2.5 pounds mixed mushrooms (portabella, cremini, button), finely chopped
1 cup tomato paste
½ tsp ground red pepper flakes
2 cups red wine
Water or Mushroom broth
2 bay leafs (fresh if available)
Small bunch of thyme (tied)
1 lb fresh spinach fettuccine

The browning process does not apply to the mushrooms as much as it does for meat. Regardless, they will take some time to sauté and soften. You want the end result to be equally as browned and caramelized.

Twin, curious. Twin, strange.

Read more...

Thursday, June 25, 2009

Big Girls, Test Kitchen: Airy Chocolate Mousse


I was going to Phoebe's a couple Friday nights ago. She was making pastas and had invited a nice round group of 10 to eat before going out into the (rainy) evening. I, of course, volunteered to bring dessert.

Since the pastas would be rich and carb-loaded, I decided I would make something less heavy than ordinary. While not weightless, the chocolate pudding I had planned would leave us more likely to actually leave Phoebe's apartment than after downing, say, a buttercream-iced cake or some such. When I decided to make two kinds of shortbread to go with the pudding, the whole not-too-heavy idea underwent a slight revision, but still, I had balance in mind.

Little did I know, when I started mixing that second batch of shortbread, that an even bigger revision was in store. My chocolate pudding wouldn't set. I usually thicken puddings with a mixture of egg and cornstarch, and so far this has worked just fine. It didn't work at all that Friday. Perhaps I didn't heat the pudding long enough, perhaps I skimped on the cornstarch or tried to overload the dessert with more chocolate than it could bear, but after an hour spent cooling in the fridge, the pudding was no thicker than the moment I'd put it in.

Since I still had plenty of time, I decided to have a second go. At this point I lacked milk or half and half, I only had two eggs left, and I had little desire to go to the market. But I remembered reading, long ago, an old Alice Medrich (champion of chocolate) recipe that made mousse without adding any dairy. I thought about where the airy texture would come from, and I finally remembered that eggs alone could support a mousse--though many mousses have it, you don't really need to fold in whipped cream.

So I melted the rest of my chocolate, my fingers tightly crossed, and I started whipping up eggs. I kept those fingers crossed while the mousse was setting in my fridge, being transported on the subway, and chilling some more at Phoebe's before serving. Luckily, by the time we'd devoured Phoebe's pastas (more on those soon) and were complaining how we had no room for dessert, the mousse was ready to be spooned out and garnished with shortbread. By then I had almost forgotten my kitchen disaster, and I kept my mouth shut about it, so no one had to know the mousse was born of out of desperation.

From my kitchen, albeit small, to yours,

Cara, THE QUARTER-LIFE COOK
**Recipe**

Lightest Chocolate Mousse
Serves 8-10

This also works well with milk chocolate. Just omit the butter and reduce the sugar sligthtly. What's also nice about it is that it's nearly dairy free, so people who don't each much dairy can still indulge. Ingredients
1 cup chocolate chips
1/4 cup water
2 tablespoons butter
3 extra large eggs (or 4 large)
pinch of salt
1/4 cup sugar

Melt the chocolate in a microwave-safe bowl with the water and the butter. This takes about 2 minutes in my microwave--you want to remove the bowl when the chips still hold their shape, then finish the melting by stirring. This way the chocolate never gets too hot.

In a double boiler (or makeshift double boiler: use a heatproof bowl set over a skillet or pot of simmering water), heat the eggs with the sugar. Stir constantly with a fork or a whisk until the eggs are incredibly foamy and a drop of the liquid on your wrist feels legitimately hot If you have a candy thermometer, this should measure about 180 degrees. But be careful not to let the eggs curdle.

Remove the heated egg mixture from the stove and start beating it with electric mixers on high speed. Beat for about 5 minutes, or until the eggs are very light yellow, quite enlarged, and nearly cool.

Mix about a quarter of the eggs into the cooled chocolate to lighten. Fold in the rest of the beaten eggs very carefully, trying to keep in all the air you can. It's okay if there are a few swirls of chocolate.

Transfer to a container and refrigerate 2 hours or more before serving. (It's also wonderful frozen, when it starts to resemble ice cream.) Scoop into pretty flutes or bowls, and garnish with cookies or fruit.


Read more...

Wednesday, June 24, 2009

Recipe Flash: Shortbread, Two Ways


Brown Sugar Shortbread
Coconut Shortbread
Makes 16 cookies each

A really nice thing about shortbread is that you don't have to cream the butter and sugar the way you do for a lot of the best desserts. There's something a whole lot less fussy about it, and then there's the added plus that if you don't own any kind of mixer, you'll save your forearms the arduous task of mixing. Because in shortbread, you use your fingers to wedge the flour particles into the butter, making for a tender, crumbly cookie. In fact, the ingredient list is so minimal and the process so simple I was driven to re-complicate, making two flavored versions: coconut and brown sugar.

Being a bit plain, these cookies make a great garnish for things, and they also look beautiful in tins, if you're ever in need of gifting some food.

Ingredients

For the Brown Sugar Shortbread

1 cup plus 2 tablespoons flour
1/8 teaspoon salt
1/4 cup brown sugar
1/2 cup (1 stick) butter, at cold room temperature (not quite spreadable)

For the Coconut Shortbread

1 cup plus 2 tablespoons flour
1/8 teaspoon salt
1/3 cup shredded sweetened coconut
1/4 cup sugar
1/2 cup (1 stick) butter, at cold room temperature (not quite spreadable)

Preheat the oven to 350°F.

Combine the flour, sugar, salt, and coconut (if using). Cut the cold butter into 16 pieces, then work it in gently with your fingertips, smearing it into the flour and squeezing the dough together.

When you can gather the dough into a ball, press it evenly into a 9" round fluted pie tin with removable bottom. Prick in several places with a fork. Bake for 10-12 minutes, turning once, then remove and cool in the pan for 5 minutes before cutting it crosswise into 16 pieces.

Read more...

Tuesday, June 23, 2009

Quarter-Life Coaching: The Farm Fresh Fledgling

EVENT: Baby’s First Kitchen Flight
VENUE: Wendy's Apartment, Financial District
PARTY SIZE: 2
TYPE: Market to Table
MENU: Mixed Greens with Baby Radishes and an Asparagus Drizzle; Cavatelli with Radish Leaf Almond Pesto

My friend Wendy has all the ingredients to warrant the title of hostess with the most-ess. She has an expertly decorated apartment, in which she entertained 30 hungry mouths at this year’s holiday party, an innate gift for organization and planning, and an appreciation for all things food-related. So it came as a surprise to me, as I searched aimlessly through her kitchen drawers for a spatula with which to serve Alexis’ holiday chicken, that Wendy not only had no idea what lurked behind her cupboard doors, but had actually never turned on her oven.

Wendy might be one of the most connected people I know, in the least obnoxious way. To use her reach for the greater good, she began organizing a monthly supper club last year—choosing interesting, inexpensive, and often unexpected venues, and spreading the word to the countless (her listserve is secret) twenty-somethings interested in meeting new people over good food.

During the first 15 minutes of every supper club session, after the name game has revealed various connections within the group, everyone inevitably asks the age old question: "how the heck do you know Wendy?" The answer is usually a hodgepodge of coincidences and referrals—the classic New York City tale of friendships found. Mine was certainly no exception. I met Wendy on the street.

The run-in occurred on Bastille Day, as I was licking Nutella off my palm after a successful purchase at the crepe vendor, when Wendy, baguette in hand, tapped the friend I was with on the shoulder. The two launched into their latest life details, which revealed that Wendy is an avid theater goer and knew every loophole and trick to getting cheap seats. I expressed interest, and before I knew it, there was a friend request in my facebook inbox, and we were sitting 10th row center (at half price) watching Daniel Radcliffe in the nude. That is the beauty of Wendy.

Many shared meals (and shows) later, Wendy had yet to try her hand in the kitchen. So after the last Supper Club, she asked me to help her design an easy meal for her first test run, and perhaps give a few pointers on the way. The inspiration came by way of our latest (non-supper club) meal at Blue Hill at Stone Barns (which had already inspired another meal), and the fantastic afternoon we spent together courtesy of Food For Thought, our friend Carolyn’s tour company that teaches about sustainable food through local adventures in green cuisine.

The asparagus salad and pesto pasta incorporated farm fresh produce from the Union Square farmer’s market, and was simple enough that she could execute all prep work before my arrival. More importantly, it didn’t require our fledgling to turn on the oven. We’ll leave that for the next lesson.

From Wendy’s kitchen, where baby steps are key, to yours,

Phoebe, THE QUARTER-LIFE COOK

**Recipes**

Mixed Greens with Baby Radishes and an Asparagus Drizzle
Makes 4 servings

The first course of our tasting at Stone Barns included a delicate salad of mixed baby greens, tiny asparagus, crisp radishes, and but a drizzle of fresh asparagus puree. Save a hint of mint, salt, and lemon, there was nothing masking the freshness of each ingredient, and the aroma of the asparagus drizzle only intensified the flavor of the baby asparagus scattered throughout. Though our asparagus from the market were beautifully in season, the dish did not compete with the refined, melt-in-your-mouth quality of the Stone Barns versions. Still, I’ll eat the imitation by way of Wendy’s execution any day.

Ingredients
5 oz baby greens
1 bunch asparagus
6 radishes, thinly sliced
1/2 shallot, skin removed
10 mint leaves
½ lemon, juiced
¼ cup olive oil
½ tsp salt

Cavatelli with Radish Leaf Almond Pesto
Makes 4 servings

As we learned during our private tour of the property, the restaurant at Stone Barns strives to incorporate every part of each ingredient it includes on its menus. Having always discarded my radishes’ greens, I decided to turn over a new leaf, and use them as the base for our pesto pasta. The radish leaves are a bit peppery, similar to the slightly bitter bite of arugula, so I added a little fresh mint (also in the salad) to cut the flavor.

Ingredients
1 1/2 lb fresh cavatelli
2 garlic cloves
1/4 cup almonds
2 cups radish leaves
1/2 cup mint leaves
½ lemon, juiced
¼-1/2 cup olive oil
3/4 cup grated parmesan (reserve ¼ for garnish)
1 tsp salt


Instructions

What You Will Need:

2 large mixing bowls
1 large pot for the pasta
a colander
a mini food processor
tongs

Prep work:

Remove the radishes from the stalks. Rinse really well. Trim the top and bottom of the radishes, and slice into very thin rounds. Set aside in a mixing bowl for the salad.

Remove the radish leaves from the stalks. Rinse really well and set aside for the pesto.

Wash the asparagus and remove the bottom of the stalk. To do so, snap the ends of each individual stalk—they will naturally break at the correct point. Set aside.

Active Cooking:

Bring a large pot of salted water to boil.

In a food processor, combine the garlic cloves and nuts and pulse until finely chopped. Add the radish leaves, mint, and lemon juice, and pulse to combine. Add half of the olive oil and blend until the greens are finely chopped and the mixture has become light and fluffy. Incorporate more olive oil as needed to obtain your desired consistency. Add the parmesan and salt and blend until just combined. Taste the mixture for seasoning, and add more salt as needed.

Pour the mixture into the bottom of one of the large mixing bowls. Set aside.

Once the water comes to a boil, drop in the asparagus and blanche for a few minutes until they are bright green and just barely tender. Remove with tongs to a colander, and rinse in the sink under cold water to stop the cooking.

Return the water to a boil.

In the meantime, make the dressing. Cut the asparagus stalks into 1-inch pieces. Add the pieces from the top half of the stalk to the salad bowl, and place the remaining bottom pieces of the stalks in a food processor.

In the food processor, pulse together the asparagus, shallot, mint leaves, lemon juice, and salt until the mixture is very well pureed. Add olive oil as needed to thin the mixture. Taste for seasoning and adjust as necessary.

When the water returns to a boil, add the pasta and cook according to the package directions until just al dente. For fresh pasta, this should only take three minutes. Be careful not to over cook. Drain pasta in colander in the sink. Add the pasta to the pesto bowl and toss together to combine.


To plate, place a handful of mixed greens on each individual salad plate. Top with a smaller handful of radish slices and asparagus heads, and drizzle a generous spoonful or two of the asparagus vinaigrette over the top. Serve along side the pasta in individual bowls, garnished with a slice or two of radishes and a leaf of fresh mint.

the "fledgling," amazed at her own culinary feat, enjoying the farm fresh feast

Read more...

Monday, June 22, 2009

Working With What You Have: The Saddest Pantry in the World


DISH: Middle-Eastern Pasta Salad
MAIN INGREDIENT: Whole Wheat Pasta

Between weekends away and long days at work, I hadn't had time to food shop in a while. I had been eating lunches out, mainly, and dinners too, and when I was home, I reverted to good old stables of pasta, eggs, and toast. (Cereal, even, was out, since I was too lazy to buy milk.) I tried to get my veggies in at lunch, with salads, and that way I felt less guilty about not having anything terribly nutritious if I did wind up needing to eat at home.

Still, a girl can grow homesick for her own tiny kitchen. She can also grow sick of eating out, and her wallet can become weak and flimsy from forking out so much cash. That's when it's time to revert to good old habits of eating at home, even when it appears that there is nothing really to work with.

Though the ingredients in this pasta salad, which I brought in for lunch a couple days running, may seem peculiar, I promise this dish is not only the result of bare cabinets: I really was also thinking about what would taste good together. In fact, if the cooking gods would will it, I'd make this pasta again, nearly as is - only perhaps with the addition of a little something green.

From my kitchen, where the pantry sometimes suffers from depression, to yours,

Cara, THE QUARTER-LIFE COOK

**Recipe**

Middle-Eastern Pasta Salad With Dates
Serves 2-3

If adding spinach sounds like a good idea to you, put in about 2 cups of washed leaves when you add the dates and the reserved pasta water. Cook until wilted. A tablespoon or two of chopped parsley would also work well as an accent.

Ingredients
2 teaspoons olive oil
1 large clove garlic, minced
1/2 teaspoon ground coriander
1/4 teaspoon cumin
pinch each of: cayenne pepper, cinnamon, and turmeric
4 ounces whole wheat pasta—not spaghetti
5 dates, diced
1 cup chickpeas, drained
1/2 ounce aged cheese—gouda, if you have it, or Parmesan, about 1/3 cup grated
1/4 teaspoon salt

Bring a large pot of salted water to the boil. Cook the pasta according to package directions, then drain, reserving about a cup of pasta water.

Meanwhile, warm the oil in a saucepan over medium-low heat. Add the garlic and cook, stirring occasionally, until the garlic is golden and fragrant, adjusting the heat as necessary so it doesn't burn. Add the coriander and other spices, plus the salt, then add the chickpeas. Let them cook about 5 minutes, being careful still not to burn the garlic, until firmed and covered in spices. Add the dates and about 1/4 cup of the pasta water, and cook until thickened. Put as much of the drained pasta into the saucepan as will fit, stir to mix, and then dump the whole thing into a large bowl. Add a bit more pasta water as necessary to distribute the spices, dates, and chickpeas evenly, and then mix in the cheese. Taste for salt. Serve warm, room temp, or cold.

Read more...

Friday, June 19, 2009

Baking For Others: Baking for Bike Repair

EVENT: Better Biking
TYPE: Gratitude
GOODS BAKED: Oversized Chocolate Chip Muffins

For a long time, I rode hybrid bikes.They're very comfortable, have lots of gears for going up and down hills, and they're intrinsically non-committal, being hybrids and sort of like road bikes and sort of like mountain bikes. However, they don't go very fast, they're annoyingly heavy to carry in and out of apartments, and, frankly, they're not very cool. That's why, when my friend from work, Junie, who woke up one morning last year an avid and knowledgeable cyclist, found a little Bianchi track bike for sale on a cycling website, I decided to get it and let him fix it up for me.


It is gray with purple grips, and it's amazing. I race around Prospect Park and I ride around Brooklyn, and though I'm working on that whole fear-of-cars thing, I think I'm getting the hang of it. At first, of course, I couldn't even get my feet into the clips and I wasn't very good at stopping and starting at lights. But the more I ride, the more I feel like a pro.

Except, of course, when it came time to alter the bike a little. Then I remembered what a novice I am. I wasn't super happy with the way the seat was fitting, and as my legs got stronger and more used to pedalling around, I wanted the gearing to be a bit harder. So I brought my bike to Junie, since he operates a bona fide repair shop out of his apartment, and he went to work on it. I know deep down Junie is thrilled to work on my bike, but of course I still think he deserves payment more tangible than gratitude but less awkward to a friendship than a check—though I didn't really offer the latter, and perhaps given the choice Junie would prefer that. It would allow him to purchase more bike parts of his own, and that may just be more valuable than my friendship. Who really knows?

Anyway, I made muffins. Large, sugary muffins, that, if they would talk, would express the heartfelt enthusiasm I feel towards my bike and the genuine thanks I owe Junie. And I made him eat like 6 of them. The rest I gave to other colleagues as down payment on using their expertise in the forseeable future.

From my kitchen, where biking and baking are related,

Cara, THE QUARTER-LIFE COOK

**Recipe**

Oversized Chocolate Chip Muffins
Makes 12 very large, very rich muffins

In this recipe, "muffin" is more or less code for "cupcake." These are only breakfast fare if you tell yourself they are.

Ingredients
3 1/4 cups flour
1 1/3 cups sugar
1 tablespoon baking powder
1 3/4 teaspoons salt
1 cup butter, melted and cooled
3 eggs
1 1/4 cup milk (low-fat is fine)
1 teaspoon vanilla
1 1/3 cups chocolate chips*

*I used regular-sized bittersweet chocolate chips. I'd definitely try it again with a mix of dark and milk chocolate chips, or perhaps with mini chips.

Preheat oven to 375°F. Grease 12 muffin cup pan, then line it with muffin papers.

Combine the flour, sugar, baking powder, and salt. In a separate bowl, whisk together egg, butter, milk and vanilla. Add the wet ingredients to the dry, folding in with big strokes, but not overmixing. Sprinkle in the chocolate chips, and give the batter another fold or two.

Divide evenly among the muffin cups (they will look enormous). Bake for 10 minutes, then turn the pan back to front, lower the heat ot 350, and bake for another 12-14 minutes, until golden and cooked through. Cool for 10 minutes, then turn out of the pan. Serve immediately, or pack up and bring to your nearest bike enthusiast.

Read more...

Wednesday, June 17, 2009

Recipe Flash: Mashed Avocado and Pink Radish Crostini


Mashed Avocado and Pink Radish Crostini

Makes about 15

This recipe could not be simpler, or more suited for the season (not to mention my refrigerator), and yet, I don't think I would have thought of the combination had it not been for Chocolate and Zucchini. I'll admit that before Spring hit this year, I was never the biggest radish fan. If I were, it would have been inevitable that I'd have topped a crunchy sliver with a bite of avocado as I do with most any vegetables year round, and in the summer, mashed avocado might as well be bottled as a condiment for my exclusive use. When I came across these radish and avocado canapes, I didn't fully envision the extent of their tastiness. In the words of Cara: they are so good, I could eat them forever.

Ingredients

5-7 pink radishes, removed from stems and rinsed well
1-2 avocados, cored and peeled
1 crusty French baguette
1/2 lemon, juiced
salt to taste

Preheat the broiler.

In a small bowl, mash the avocado with a fork. Add the lemon juice and a dash of salt. Mash together and taste for seasoning.

Slice the radishes into thin rounds. Set aside.

Cut the baguette into pieces 1/2 inch thick. On a cookie sheet, arrange the slices and toast under the broiler until just beginning to turn golden brown, about 2 minutes.

To assemble crostini, top each piece of toasted baguette with a thin layer of avocado mash and two to three slices of radish. Sprinkle with coarse salt and/or a drizzle of olive oil and serve.


Read more...

Tuesday, June 16, 2009

Cooking For Others: Annie's All Grown Up

Anna, with a mischievous grin she borrowed from childhood

EVENT: Old Friend, Old Flavors
VENUE: Phoebe’s Apartment, Flatiron
PARTY SIZE: 2
TYPE: Casual Weeknight Dinner
MENU: All Grown-up White Cheddar Broccoli Mac n’ Cheese; Mixed Greens with Lemon-Basil Vinaigrette

My friend Anna was like my sister growing up. Our families spent all their time together, her friends were my friends, and though our eating habits could not have been more different in our respective homes, we shared a lot of meals. I had always thought of my house as the black hole for childhood snacks: the only fruit roll-ups we had were from the health food store and tasted like fruit which, in those days, was a far cry from the waxy mystery colors of the individually packaged Shark snackpacks. The only cereal our cabinets contained was Cream of Wheat, and our granola bars were not Chewy (literally)—and were speckled with strange seeds and carob chips. Since my mother forbid any food that contained cottonseed oil on the premises, I would usually choose to go over to Anna’s, and when I did, I went crazy.

We’d fill giant trays with cookie dough and chips and Oreos and milk and Gushers, and play Mario party (yeah, she also had Nintendo) for hours. We’d take breaks from our grueling ritual only to allow time for the proper consumption of a Fruit by the Foot—best if wrapped around your thumb and sucked—and to practice for the fashion show we were putting on later that night, an event that basically consisted of us prancing around to Ace of Base in outfits that our parents helped us purchase at the mall, and forcing them to watch. For hours.

The one thing that my house had going for it was the mac and cheese. Before Whole Foods was a chain, and Annie’s was a specialty brand only to be found on strange ‘healthy’ household shelves like my own, my mother—like Cara's—would serve white shells with cheese heated slowly in a pot and made creamy with the addition of some whole milk and patient stirring. Though of course I craved the Kraft mystery yellow variety, the few times Anna would come over to my house, my mom would have a pot waiting for her, back by popular demand.

Now, officially in quarter-life (and eating more healthfully: even Anna now loves salad), we psuedo-sisters are living on the same coast for the first time in 5 years with but a bridge dividing us, and yet we can rarely seem to find the time to hang out. Anna’s career is heating up, and though our old dreams of fashion shows and clothing lines together have been retired along with the Nintendo controllers, it gives me an indescribable thrill to see her on the verge of finally achieving the one she’s always put first: music.

The night after her show at the Living Room, I finally lured Anna to Flatiron to celebrate, and knew the perfect thing to have waiting for her. With a little more milk (and butter), real cheese instead of powdered, and the addition of some green to an old white favorite, my pot of mac had all the comfort of our childhood, just a bit grown up.

From my kitchen, where a little milk, some extra stirring, and old friends are back by popular demand, to yours,

Phoebe, THE QUARTER-LIFE COOK

why me, oh my: I do believe there was caffeine in that soda!

**Recipes**

White Cheddar Broccoli Mac and Cheese
Makes 4-5 servings

For me, always a lover of green, my ideal comfort dish would be a fusion of creamy broccoli cheddar soup (in a bread bowl), and a rich baked macaroni and cheese. I’m sure some Midwestern mother took this combination literally back in the 70’s, and answered my dreams with a heavenly cream of broccoli casserole. But since Anna was once put off by dishes that contained green, I wasn’t going to push the envelope by serving her a plate of pasta that actually was green. Restraint paid off, and the classic white cheddar sauce was as enhanced by the addition of crunchy broccoli as the pasta shells were by a healthy trip to the broiler.

Ingredients

4 tbsp unsalted butter
3 tbsp all-purpose flour
3 cups whole milk
2 ½ cups shredded sharp cheddar (10oz)
1 tsp salt
½ tsp freshly ground black pepper
1 ½ cups finely cut broccoli florets (about 1lb with stems)
1 lb conchiglie (medium shells)

Preheat the oven to broil.

Bring a large pot of salted water to boil over high heat.

In a large oven-proof skillet or casserole dish, melt the butter over medium-high heat. Whisk in the flour and cook until fully incorporated, about two minutes. Add the milk and whisk over a high flame until the mixture has bubbled and thickened, about 5-7 minutes.

Once the water has boiled, blanche the broccoli until just barely tender, about 3 to 5 minutes. Remove with a slotted spoon to a colander and rinse with cold water to stop the cooking.

Bring the water back up to a boil and add the pasta. Cook pasta according to the package instructions until two minutes shy of al dente. The pasta should still have a bite to it.

Add the all the cheese except for a small hand-full to the milk mixture and whisk until fully combined. Taste cheese sauce for seasoning. Stir in the broccoli florets and the pasta. Distribute evenly throughout the skillet or dish and sprinkle the remaining cheese over the top.


Broil the dish for 5 or so minutes, until the sides are bubbling and the top has browned.

Serve immediately with a side salad.


Mixed Greens with Lemon-Basil Vinaigrette

Makes 4 servings

I’ve been told that the true sign of maturity is being able to care for another living thing. Since I’m currently single, and not looking for any pets or babies to fill that void in the near future, I decided to test out my grown-up conscientiousness by buying (and potting, mind you) a basil plant. It’s been a few weeks now, and after giving the majority of its leaves to this dressing, my baby is back in action, and my how he’s grown.

Ingredients

5oz mixed greens
¼ cup basil leaves
½ lemon, juiced
1 tbsp Dijon mustard
½ tsp honey
1 tsp white vinegar
½ tsp salt
¼ cup olive oil

Combine all ingredients in a food processor. Blend until herbs are completely incorporated and the dressing is light and frothy. Taste for seasoning and add any additional olive oil as necessary for desired texture.

a big girl bite, washed down by a glass of what was once water, and now is definitely wine

Read more...

Thursday, June 11, 2009

Big Girls, Global Kitchen: A Meatless Morocco

a real dining room table, complete with full place settings, and crusty bread


EVENT: The Rents Woke Up One Day and Decided to be Social
VENUE: Phoebe's Parents’ Apartment, Upper West Side
PARTY SIZE: 8
TYPE: Sunday Supper, Moroccan Feast
MENU: Carrot Salad with Orange Flower Water; Fish Tagine with Chermoula, Preserved Lemon, and Mint; Haricot Vert; Couscous; Assorted Tarts

The summer after my senior year of college, my mother’s graduation gift brought me to Morocco. She was returning to the country for the first time in 15 years—30 since she lived in Marrakech during her period of quarter-life adventures. Though she knew the country and customs better than the guidebooks, I was a little wary of the two weeks we’d be traveling together. For one, she planned the trip start to finish, which, for a (paradoxically) fly by-the-seat-of-your-pants control freak like myself, was difficult to cope with. During my four years away from the nest, I did my fair share of solo traveling, and it made me realize more that I’d rather experience a country by eating $1 dollar street meat than by starting off my days in a plush hotel dining room.

Luckily, my mother was more or less on the same page—though we began the trip in a gorgeous Riad in Fez (where I spent most of my time battling food poisoning), we stayed with her friend’s in Tangier and rented a small apartment in Essouira, where we attempted to make a Moroccan-spiced bouillabaisse with the local seafood. We took a cooking class, wandered through the souks, and though I was able to buy four poufs for my living room at half price (after an epic haggle with a deaf-mute vendor), my mother’s Moroccan Arabic, complete with expressions for “get away from me, you pig,” was a vital asset to our tall blonde tag team.

More importantly, there was a lot of eating, and during these meals, a lot of stories.

Back in 1979, I learned, Morocco wasn't as hospitable to women living or traveling alone. When my mother arrived, she acquired a Fatima (house-keeper), a young divorced woman who had been shunned by her family in their small village. As her feminist tale goes, my mother saved Naima from the provincial, repressive values of her mining town and brought her to the big city of Marrakech, an initial experience that was likened to walking through Times Square for the first time.

The two women became more than employer-employee; a special ceremony was performed to make them blood sisters (the details of which are a whole other story), so they looked out for one another. I’m not sure what this entailed for my mother, but I do know that for Naima this meant tracking down decent seafood to cook for her Fishatarian friend in a more or less landlocked city, lined with freshly slaughtered lamb and goat carcasses. Though her own frustration and cravings mounted (as mine occasionally do when I spend too much time in Cara’s veggie kitchen), Fatima was able to come up with innovative solutions in the small kitchen they shared, and with the help of nothing more than a hot plate and a dull knife, whipped up some of my mother’s favorites to this day: sardine kefta (meatballs), and fish chermoula tagine.

Though she looked no heavier in pictures, my mother claims that she was never better fed than the one year she spent in Marrakech. I can guess this was partially due to the large portions of these main dishes (easily feeding ten), and the lack of refrigerator in which to store the leftovers. But it also can be attributed to the robust spice combinations and flavors that made me plow through bread basket after bread basket, soaking up every last drop of rich sauce on my plate.

A few weeks back, my parents got a new dining room table and decided to start things off on the right foot by actually using it. The news was shocking enough to warrant my attendance. To feed their eight friends, my mother decided to reinvent Naima’s fish tagine. Though there was not a pescaterian amongst them, the rich tomato stew won over the crowd, leaving hardly any leftovers to store in the luxury of our modern refrigerator.

Though the evening’s stories mostly took place on this continent, and didn’t involve the details of how one becomes “blood sisters,” when I recreate the memories of Morocco in my kitchen (with or without meat), I can’t help but sit on my pouf and tell the tales of our trip, the gift we experienced together.

From my kitchen, where you can experience a meatless Morocco, to yours,

Phoebe, THE QUARTER-LIFE COOK

**Recipes**

Carrot Salad with Orange Flower Water
Makes 8 amuse-bouche servings

Ingredients

1 lb carrots, peeled and finely grated on a micro-plane
1 lemon, juice only
4 tbsp sugar
1/4 tsp ground cinnamon
1 1/2 tbsp orange flower water
1 tbsp white vinegar
Salt

Mix all the ingredients together in a bowl, then leave to marinate for at least 45 minutes in the refrigerator.

Taste and adjust seasoning as desired, then serve either chilled or at room temperature.

Fish Tagine with Chermoula, Preserved Lemon, and Mint
Makes 8-10 servings

My mother's used our teacher Lahcen's technique of grating the onions so they thicken the sauce. If you want to cut some additional corners with this recipe, use a prepared chermoula spice blend from the same place where I order preserved lemons: http://www.zamourispices.com/.

Ingredients
4 lb flaky white fish, such as cod, haddock, or Mahi Mahi
2 large Vidalia onion, grated
2 preserved lemons, finely chopped
1 28 oz can diced plum tomatoes with their juice
1 ½ cups fish stock or water
1 ½ cups dry white wine
2 cups mint leaves, finely chopped
1 cup green olives

For the marinade, “Chermoula:”

5 garlic cloves
2 cups cilantro
4 tsp ground cumin
1/3 - 1/2 cup olive oil
2 lemons, juiced
1 tbsp salt
Pinch saffron threads (optional)
1 small red chile pepper, seeded and chopped (optional)

In a small food processor, combine all ingredients for the chermoula. Reserve ¼ cup of the mixture, and combine the rest with the fish fillets in a mixing bowl. Cover with plastic wrap and marinate in the refrigerator for 1 -2 hours.

my mother, slaving away in her best not-so-Moroccan couture

Meanwhile, heat 3 or so tablespoons (enough to coat the bottom of the pot) in a large Dutch oven or casserole dish over a medium flame. Sauté the onion and carrots until softened. Add the reserved chermoula, preserved lemon, and tomatoes. Gently simmer for ten minutes uncovered, stirring occasionally. Add the stock, wine, and olives, and bring the mixture to a boil. Cover the tagine, reduce the heat to medium-low, and simmer for an additional 10-15 minutes.

When the fish has finished marinating, add it to the pot, and cook covered for 6-8 minutes, until the fish is cooked through. Stir in half the mint, and garnish with the remaining leaves.


Serve with couscous, haricot vert, and lots of crusty bread.

Read more...

Tuesday, June 9, 2009

Recipe Flash: Zucchini-Tofu Croquettes

Zucchini-Tofu Croquettes
Serves 8 as appetizers

I brought these to a potluck recently. I thought of a) reheating them, and b) topping them with a sauce, but in the end, I did c) none of the above. The same amount of tofu-zucchini mixture would make burger-sized croquettes for 3 or 4 people, and they'd be good served à la Phoebe's chickpea burgers, with raita and slaw.

Ingredients
1 large zucchini
4 ounces firm tofu
2 teaspoons salt
1 tablespoon olive oil, plus more for frying
1 tablespoon fresh basil, finely chopped
1 egg
1/2 cup bread crumbs, preferably fresh

Grate the zucchini into a colander. Toss with the salt and let rest for 20-30 minutes. Usuing a dish towel, squeeze as much water as you possiblycan out of the zucchini.

Blot the tofu, then crumble it into a mixing bowl so it looks like ricotta. Add the olive oil; mix well; then add the rest of the ingredients, including the zucchini.

In a large pan over medium heat, warm enough oil to cover the bottom. Form into balls—about golf ball size—and add to the oil carefully. Cook for about 4-5 minutes a side until nicely browned, flipping very carefully, as these are slightly delicate. Remove to a paper towel to absorb extra oil. Serve warm or at room temp.

front: croquettes, back: croquette grease on paper towel


Read more...

Monday, June 8, 2009

Cooking For One: A Few of My Favorite Foods


DISH:Saturday Salad with Walnuts, Zucchini, Dates, Radishes, and Gouda
TYPE: Favorite Foods
MAIN INGREDIENT: Lettuce

The other day, I was walking down Park Ave, back to the office from Just Salad, my favorite lunch take-out place in Midtown. It is a design-your-own-salad venue; you pick greens, add-ins, and dressing, and the guys behind the counter assemble, chop, and charge you (kind of a lot). So there I was carrying an enormous salad in a bag, wishing that there were fewer than six and a half blocks between salad and my cube, because I was looking forward to eating my current favorite combination (sundried tomatoes, tofu, carrots, broccoli, beets, and radishes), but also because I was looking forward to what I would eat after the salad, as a midafternoon snack: ice cream.

It's been a while since I've thought about my favorite foods to eat, since I've been so busy thinking about new and interesting things to cook. That can be very distracting as well as very fun. But last week on in Midtown, I came to the sudden and obvious conclusion that if I was only thinking about eating and not about cooking, I could easily reduce about 95% of my intake to the following four meals: cereal, salad, grilled cheese, and ice cream.

Think about it. Cereal satisfies the breakfast component, and salad takes care of any and all health needs. Grilled cheese might be the most soul-nourishing meal out there, and then ice cream, the treat to end all treats, is something so craved that it dispels other potential cravings, like French fries, cupcakes, and eggplant parmesean heroes. (The remaining 5%, by the way, I would devote to take-out Thai/Chinese/sushi, and to chocolate chip cookies.)

What's more, all of these meals are open to interpretation and creativity. Cereals can (must) be mixed with other cereals, as well as with raisins and nuts and milk. The variety of cheeses, breads, and fixings like roasted peppers save grilled cheese from monotony. And if you get me started on ice cream concoctions, from sprinkle-topped dishes to brownie sundaes, we will be here all day. I really love ice cream.

Still, this post is actually about salad. I like the salad take out places because they let me get exactly what I want, without keeping things like fresh lettuce, roasted eggplant, cooked lentils, and crumbled goat cheese all ready to go in my refrigerator. I also like them because they chop up the salads with the ingredients I've chosen, so that everything is mixed together, and each bite coordinates the tastes of the various parts. In truth, with the exception of the fresh lettuce, these kind of hodge-podge salads can indeed be pantry affairs, so long as the ingredients are carefully balanced, proportionate, and well dressed. I may not have the perfect mezzaluna Just Salad's employees use, but my knife on a cutting board works just fine in the end. More to the point, I made this salad on a farmer's market Saturday, and, as any cube worker in her right mind will confirm, you do not go to Midtown on Saturdays if you have any say in the matter.

From my kitchen, where the lettuce is fresh, to yours,

Cara, THE QUARTER-LIFE COOK

Saturday Salad with Walnuts, Zucchini, Dates, Radishes, and Gouda
Serves 1

about 2 cups fresh lettuce
1 teaspoon olive oil
1/2 zucchini, cut into thin half moons
3 walnuts, chopped
2 dates, sliced
1 small radish, sliced
1/4 ounce gouda cheese (about 2 teaspoons, grated)
lemon juice
salt and pepper to taste

Combine lettuce, dates, walnuts, radish, and gouda in a large salad bowl. Set aside. (Alternatively: dump onto a cutting board and chop it into pieces. Return to the bowl.)

Heat the olive oil in a small pan. When hot, add the zucchini, and cook, stirring occasionally, until browned and limp, about 5 minutes. Season with salt and pepper. Pour over the salad, making sure to drip the olive oil in too, and then season with lemon juice. Add an extra drizzle of olive oil if you'd like.

Read more...

Thursday, June 4, 2009

Baking For Others: Midnight Cake

DISH: Chocolate Chip Cake
TYPE: In the Night Kitchen

Phoebe thinks I have a weird obsession with freezing things. I don't, really. Growing up, all the freezer held besides ice and ice cream was butter. We didn't freeze meat, and we didn't eat many frozen vegetables (except peas; I have fond memories of eating frozen peas—undefrosted). With a few exceptions, I've stuck to the rule of thumb that food is generally better from the fridge or the pantry than it is reheated from the freezer. (If you've ever been to Picard, in France, you might beg to differ, and likewise if you regularly partake of Trader Joe's frozen meals.)

To the point: we had a high school potluck last summer, before we started Big Girls, Small Kitchen, and I labored over this three-layered lemon cake as my contribution. It was very rich, and 10 girls, already full from all the savory food, only got through about half of it. Because I couldn't bear to see the product of my labor go to waste, I insisted that Phoebe put the rest in Tupperware (she was hosting), so we cut it into two pieces, fit it into airtight containers, and stuck it in the back of her freezer.

It is still there.

the lemon cake, circa September 2008

She has no idea when or why she would ever eat it, though she sometimes offers it to me when I'm over and she's making fun of my predilection to save things in the freezer. I argue that I really don't have this predilection at all, I just don't like things like cake to go to waste.

But since I get these cravings, especially since having the blog, to bake—even more than to eat—I've been leaning on my freezer as the master preserver so that I can bake when I feel like it and then eat or serve my treats at a convenient time. Unlike, say, midnight on a Tuesday.

portrait of my kitchen, a Tuesday, 2:30am

For whatever reason, I recently spent a very insomniac week. I'd get home exhausted, go to bed at a normal hour, then pop up around 3am totally awake and bored out of my mind. Once it was apparent that sleep was off the table, I found myriad ways to entertain myself. I caught up on a couple TV shows. I read for work and for fun. And I baked. In fact, one of those ill-fated nights was just before the last mag club meeting, and the result of my middle-of-the night baking was the black-bottomed blondies that the mag club members ate to the very last crumb. But I also made two other cakes, both humble pantry affairs, not too sweet and not too heavy. (One needs a bit more daytime tweaking before the recipe is right to post, so stay tuned.)

I'm not exactly sure when I'll eat them, but I probably will eventually. I think both will be great toasted, as breakfast, or warmed and served with ice cream to guests. Freezing them right after baking means they never went stale, and if they're warm, I doubt people will guess they came from the freezer and not the oven. It doesn't make them any less homemade.

From my kitchen, which often smells best at midnight, to yours,

Cara, THE QUARTER-LIFE COOK

**Recipes**

Chocolate Chip Cake
Makes 1 cake

Ingredients
1 stick butter
1 cup sugar
2 eggs
1 teaspoon vanilla extract
1 cup whole wheat pastry flour
3/4 cup flour
2 teaspoons baking powder
1/4 teaspoons salt
1/4 cup plain yogurt (you can subsitute milk here)
1/2 cup chocolate chips

Preheat the oven to 375°F. Butter a 9" round cake pan with removable bottom.

Cream the butter with the sugar until fluffy. Add the eggs and vanilla and beat until even fluffier.

In a separate bowl, stir together the dry ingredents. Add to the butter-sugar mixture and fold to combine. When flour is somewhat incorporated, stir in the yogurt, followed by the chocolate chips.

Bake for about half an hour, until the top is browned and a toothpick stuck in comes out clean. Cool on a rack to nearly room temp, then serve or cut into wedges and freeze.


in the freezer bags, awaiting preservation

Read more...

Wednesday, June 3, 2009

Recipe Flash: Fusilli with Asparagus-Mint Pesto

Fusilli with Asparagus-Mint Pesto
Serves 4

Walk through any farmers' market or well-stocked supermarket aisle and you'll see bundles upon bundles of fresh, local asparagus. Likewise, the table at Blue Hill at Stone Barns, where I went for a lunch a few weekends ago, on a trip organized by Food For Thought Tours. There, I was served asparagus on top of fresh baby greens, and, most unusual, it was all drizzed with a puree of more asparagus and mint. I tried to recreate these fresh flavors in this dish, using the asparagus stalks to create a creamy, thick pesto that amplifies the full flavor of the ingredients.

Ingredients

2 lb asparagus
1 lb fusilli
1 cup frozen peas
1 cup mint leaves, tightly packed
2 cloves garlic
1 lemon, juiced
½ cup grated parmesan
¾ cup pinenuts, toasted
¼ cup olive oil
salt

Bring a large pot of water to boil. Blanche the asparagus for a few minutes, until just tender. Remove with tongs to an ice bath or a colander until running cold water. Set aside. Return the water to a boil and cook the pasta according to package directions. During the last minute of cooking, add the peas. Drain in a colander.

While the pasta is cooking, cut the asparagus into 1 inch pieces. Using the bottom third of the stalks, add 1 cup of asparagus stalks to a small food processor. Pulse the asparagus along with the mint, garlic, lemon juice, and ¼ cup of the pinenuts. Mix in the parmesan and salt to taste.


Toss together the pasta, peas, remaining asparagus, toasted pinenuts, and pesto. Best if served immediately. If serving room temperature, make sure you re-taste for seasoning once the pasta has cooled.

From my kitchen, albeit small, to yours,

Phoebe, THE QUARTER-LIFE COOK


Read more...

Tuesday, June 2, 2009

Working With What You Have: Last Week's Take-out

sad...

...happy

DISH: Broccoli-in-Garlic-Sauce Fried Rice
TYPE: Transforming Take-out

Sometimes even we food bloggers get take-out. It's such a New York delicacy that it feels unduly austere not to take advantage of it at all. And as long as you're careful with the menu and exercise some form of self control, things from paper and plastic containers can sometimes be just as budget friendly as supermarket shopping.

I have an obsession with Hunan Delight in Park Slope, which I count not only as the best Chinese food in my neighborhood, but even as some of the most delicious food to come out of a takeout container—ever. Of course I can't speak for Hunan's entire menu (though I've heard others speak passionately for Sesame Chicken and Pork Buns), because I always only get two things: Cold Sesame Noodles and Broccoli in Garlic Sauce. I also get the brown rice. One time I tried the scallion pancakes and one time I dipped my chopstick in the Sesame Chicken, but adventurer though I may be in other areas of my culinary life, when it comes to this menu, I can't but stick with what I know.

I also can't get through an entire portion of either the broccoli or the noodles. The two dishes plus the rice can sometimes even last me four days, though the final meal will sometimes be based on two sad spears of broccoli floating in sauce (see photo, above). However, after a three-meal-long take-out fest, I'm usually aching to cook again anyway. Recently, on a Thursday after a Sunday of take-out, I took advantage of the nicely dried out brown rice and the remaining broccoli and sauce to make an excellent main dish fried rice.

Fried rice, like rice pudding cereal, was a standard in my family's dinner repertoire. It's one of those leftover dishes that doesn't quite feel like leftovers, since it really is different than what came before. A case of the sum transcending its parts?

From my kitchen, where take-out is transformed, to yours,

Cara, THE QUARTER-LIFE COOK

**Recipes**

Broccoli-in-Garlic-Sauce Fried Rice
Serves: variable, depending on leftover quantity

Ingredients
Leftover Brown Rice
Leftover Broccoli in Garlic Sauce—cut into bite-sized pieces
1/2 onion, diced
1 clove garlic, minced
1 egg
about 1 cup mustard greens, washed well and chopped
Hot sauce

Coat a nonstick wok or large pan with cooking spray. Set it over high heat. Add the onion and stir fry for about a minute, then add the garlic and stir fry another minute or two more, then throw in the mustard greens and stir fry until wilted.

Add the rice and toss it around so it all gets slightly browned and parts even get crispy. Add the broccoli and however much sauce you desire (careful here: that stuff can get greasy), then push the whole mixture over to the side, and crack the egg into the hot pan. Mash it around until it's cooked, then add hot sauce to taste and mix the whole thing together. Serve immediately, then finally deposit your take-out containers in the recycling bin.

Read more...