Pages

Showing newest 10 of 16 posts from June 2010. Show older posts

Wednesday, June 30, 2010

Recipe Flash: Mini Corn & Leek Flautas

MEXICAN FINGER FOOD MENU: Black Bean Cakes; Chorizo Pigs in a Blanket; Chips and Guacamole
WHAT YOU'LL NEED: Cookie Sheet/Jelly Roll Pan

As you very well know, we love us some quesadillas. But for large finger food parties, they just don't make sense. When cut into triangles, the result is a bit messy, and for catered cocktail parties, we tend to want something neater. But when we were throwing around ideas for Sarah's 25th birthday, we felt like we needed something cheesy, crispy, and delicious--like a quesadilla, but not. Something vaguely, if not authentically Mexican. Something like these flautas.

Flautas are traditionally deep fried, but I thought we could get away with baking these mini versions in the oven to achieve a sufficiently crispy result. When I asked my friend Rodrigo if I could still call these little puppies "flautas," he assured me that if they resembled little flutes, I was good to go.

These corn & leek flautas were a huge hit at the party, but I definitely encourage you to try out any variety of fillings, so long as the end result still looks like a flute.

From my kitchen, albeit small, to yours,

Phoebe, THE QUARTER-LIFE COOK

**Recipe**


Mini Corn & Leek Flautas

Makes 80 flautas

Ingredients
16 large tortillas
1/2 lb smoked cheddar cheese (or sharp white cheddar), shredded
1/2 lb Monterrey Jack cheese, shredded
1 cup leek confit (recipe follows)
1 15oz can corn, rinsed (If in season, use 5 ears of fresh corn, kernels removed)
1 tsp cumin
1 tsp salt
dash cayenne
Cilantro-Lime Crema for dipping

Preheat the oven to 425 degrees.

Using a 3-inch round, cut each tortilla into 5 smaller rounds.

In a medium mixing bowl, combine the cheeses, leek mixture, corn, cumin, salt, and cayenne and toss to combine. On a clean work surface, brush each round with a little bit water. Place 1 tablespoon of filling in the center of each round, and roll together so the edges overlap (they should look like mini tacos, and the water will help the edges bind). Place the flautas seamside-down on a cookie sheet lined with parchment, about 20 per sheet.

Bake the flautas in the oven for 10 minutes, until the tortilla is nicely browned, and the cheese is bubbling. Allow the flautas to rest on the cookie sheets until cool enough to touch. Arrange on a platter and serve immediately with some sour cream or cilantro-lime crema for dipping.

NOTE: you can bake the flautas in advance, and then reheat them in a 400 degree oven until they recrisp.

Leek Confit
Makes 1 cup

2 large leeks, white part and light green part only, cut in half and finely sliced
2 tbsp butter
1/4 cup of water or stock
½ tsp salt

On the stove, melt 2 tbsp of butter over medium-low heat in a lidded sauté pan or Dutch oven. Add the leeks and sauté for 3-5 minutes until translucent. Add the water or stock, turn the flame down to low, cover and cook for 20-25 minutes stirring occasionally, until the leeks are completely soft and beginning to turn to mush. Take the lid off and cook uncovered until most of the liquid has evaporated, about 5 more minutes.

Read more...

Monday, June 28, 2010

Baking For Others: Peanut Butter Granola Bars

This is less a post and more a plea for help. How do you make great peanut butter granola bars?! I've made them again and again, and I'm having trouble solving a few issues. So rather than give you a recipe (though I've given you my working formula, which is delicious if not quite perfect), I'm imploring you readers for a recipe.

I like crunchy granola bars, so the method I've come to use is heating a sticky mixture, made of honey and/or sugar, peanut butter, and oil. Then I pour that over a dry mixture: toasted oats and nuts, puffed brown rice cereal, even ready-made granola and spread it in a pan to come to room temperature and harden. I know some people actually bake the bars, but when I've tried to make bars like that, I've consistently turned out fragile, crumbly, cookie-like things. I don't like those.

The aforemetioned stovetop method I've been experimenting with reminds me a lot of how you make Rice Krispie Treats, and it has its own problems. Because, of course, granola bars aren't supposed to remind me of a rice krispie treat--one's a snack while the other's dessert. And yet, when I try to decrease the sugar in my bars--especially the honey, which I find a bit grating in large amounts--the texture suffers big time. Suddenly, instead of granola bars, I find I'm dealing with granola. Which turns out to be really good for breakfast, but unfortunately not what I was after.

So that leaves me asking you, readers, for your peanut butter granola bar recipes and ideas. I'll be eternally grateful if you might deign to help me find what I'm looking for. And of course if I like what you send, you can be sure I'll feature the peanut butter granola bars of my dreams right here on the blog.

From my kitchen, in search of granola perfection, to yours,

Cara, THE QUARTER-LIFE COOK

**Recipe**


Help-Me! Peanut Butter Granola Bars
Makes 16

Ingredients

1 1/4 cups crispy rice cereal
1 1/3 cups rolled oats
1/4 cup blanched sliced almonds
1/3 cup peanut butter
1/3 cup oil
1/4 cup honey
1/4 cup brown sugar

Line an 8" square pan with parchment and spray with oil.

Toast the oats in a 350°F oven for 5 minutes until slightly golden. Cool. Take 1/3 cup and process in a mini prep until it looks more or less like flour. Combine it in a large bowl with the rice cereal, remaining oatmeal, and sliced almonds.

Meanwhile, combine the peanut butter, oil, honey, and sugar in a small saucepan and bring to a boil over medium heat, stirring nearly constantly. Let it boil for a minute. Pour over the oatmeal mixture and stir until all the dry ingredients are moistened. Pour into the prepared pan. Press down very firmly and evenly--this will be important for your bars' consistency.

Cool to room temperature. Turn the bars out of a pan onto a cutting board. Carefully cut in half lengthwise, then cut each rectangle into 8 bars, for a grand total of 16.

Read more...

Saturday, June 26, 2010

Cooking For Others: Unresolved Tacos

EVENT: Not Quite Sure...
VENUE: Phoebe's Apartment, Flatiron
PARTY SIZE: 4 mystery eaters
TYPE: Taco Tuesday...or something like that
MENU
: Ancho-Rubbed Chicken & Chorizo Tacos with Mango Salad, Avocado, and Chipotle Crema

It’s a sad story when you’ve made so many tacos in a month that you can’t remember who came to eat them and why. I made these ancho-rubbed chicken tacos sometime before April 17th. I know this because the ancho chili powder inspired the marinade for these backseat chicken sandwiches. But I cannot for the life of me remember the dinner. I even checked my calendar. Nothing.

So let’s talk about the why part.

Since the book really got rolling these past few months, my entertaining and cooking habits have gone through some changes. You might have noticed that there have been far fewer Cooking For Others posts on the blog. But this is not for lack of having friends over. In fact, I’ve been entertaining more than ever, mainly because there always seems to be something specific on the agenda that needs to be cooked. We just aren’t going to share those recipes with you just yet (wink).

When I am not deliberately inviting over 4 people to taste-test paella, I’m trying to use up the leftover onions, peppers, and chorizo that the paella generated (I usually halve the larger recipes). For that, the answer has been tacos.

If someone wants to come over for a quiet dinner, I’ll pick up a pack of tortillas at the corner grocer, and perhaps an avocado, and throw together some fillings. These black beans have been a staple, but really it’s a “whatever works” kind of system. Dinner is on the table quickly and cheaply, and I can usually count on using up one of my many book leftovers in the process.


These particular chicken-chorizo tacos were inspired by one of the variations in the May's Food and Wine Taco World spread. The recipe calls for you to make your own chorizo by buying ground pork and adding the spices as you brown the meat. Thanks to the paella, I had some pre-made links on hand, but if you are starting from scratch, I would encourage you to try F & W’s version (and report back!).

I remember how delicious these tacos were, but very little else. So please, if you enjoyed them with me, speak up. I think my memory’s negligence means I owe you another dinner.

From my kitchen, dishes out tacos to whoever walks through the door, to yours,

Phoebe, THE QUARTER-LIFE COOK

**Recipe**


Ancho-Rubbed Chicken & Chorizo Tacos
Makes 4 servings

Ingredients
1 tablespoon ancho chili powder (or any chili powder you have on hand)
1/2 lime, juiced
1 tbsp Dijon mustard
1 tbsp olive oil
1 tsp salt
1 1/2 lbs boneless skinless chicken thighs
1/2 lb chorizo (about 2 links), casings removed

4-6 tortillas
1 avocado, sliced
1/2 cup Chipotle Crema
Mango Salad (recipe follows)
Cilantro leaves

In a mixing bowl, combine the chili powder, lime juice, mustard, oil and salt. Add the chicken and toss until coated in the marinade. Place a nonstick or cast-iron skillet over high heat and brown the chicken in batches. Remove to a plate and allow to rest for 5-10 minutes.
Add the chorizo to the pan, breaking apart with your spatula as you cook, until browned and cooked through. Set aside.

Slice the chicken into strips and combine it with the chorizo along with any juices.

Arrange the chicken-chorizo mixture alongside warm tortillas, sliced avocado, chopped mango or mango salad, and chipotle crema and serve immediately. Let guests (whoever they may be) roll their own tacos.

Mango Salad
Makes about 2 cups

Ingredients
1 medium mango, diced
1 garlic clove, minced or pushed through a press
1 lime, juiced
1 tsp siracha
½ tsp salt
fresh cilantro, roughly chopped (optional)

Combine all ingredients in a medium mixing bowl and toss to combine. For best results, make the salad the night before to allow the flavors to intensify.

Read more...

Thursday, June 24, 2010

Working With What You Have: Sweet Pea Puree


DISH: Sweet Pea Ravioli with Scallion Cream Sauce
TYPE: Sunday Night Dinner
MAIN INGREDIENT: Pea Puree, Wonton Skins, Cream

Wonton skins are truly a random, unwanted leftover's best friend. I discovered using them for making ravioli a few months ago, and it really opened up a world of possibility, giving a second life to the odds and ends in my fridge. With all the testing for the book, there has been a constant array of leftovers in stacked plastic containers. I usually welcome these bits and pieces. But lately, that stray cup of risotto, half-eaten bean dip, or macaroni and cheese has just been sitting in Tupperware containers until time has taken its toll and the leftover is pronounced dead. Which, for me, usually means the dish has changed color.

After both of our big photo shoots, which featured around 15 dishes each, I tried to pawn off the food on friends by having big buffet parties. I called them smorgasbords and hoped my guests wouldn't mind that the spread featured Spaghetti and Meatballs side by side with Chicken Tagine and Creamy Enchiladas. But still, no matter how enthusiastic the eaters, there was always a cup or so of each dish leftover.

Recently, I had a few friends over on a Sunday, just few enough that these leftovers of leftovers could become a main component of the meal. I looked in my fridge and saw the same stray cup of risotto, the three cubes of beef stew, and the large container of pea puree from these crostini. I decided that I would save the peas.

Out came the frozen wonton skins, which have been sitting in my freezer since January. And miraculously, there were just few enough for me to deplete my stash completely. It felt good to finally use up the whole pack. But with only a tablespoon of filling placed within the sheets, I still had about a cup of pea puree leftover. So it goes.

I stuck the container in the freezer, where it will probably sit for another year.

From my kitchen, using up leftovers a cup at a time, to yours,

Phoebe, THE QUARTER-LIFE COOK

**Recipe**


Sweet Pea Ravioli with Scallion Cream Sauce
Makes 4 servings

Ingredients
24 wonton wrappers
1 cup sweet pea puree
2 tablespoons butter
2 scallions, thinly sliced
1 garlic clove, minced
1/2 cup white wine
1/2 cup heavy cream

Bring a large pot of salted water to a boil.

On a work surface, arrange 12 of the wonton wrappers. Place a tablespoon of pea puree in the center of each sheet. Brush the sides of the wrapper with water. Cover each with the remaining wrappers and seal the sides with your fingers, making sure there are no air pockets in the center. Set aside.
In a large non-stick skillet, melt the butter. Saute the white parts of the scallions and the garlic for a few minutes over medium-low heat until soft. Add the wine and cream and increase the heat to high. Simmer gently until reduced by 1/3. Turn off the heat and add the green parts of the scallions, reserving some for garnish.

Cook the ravioli in batches until each rises to the top, about 2 minutes. Remove the finished ravioli with a slotted spoon and add to the sauce.

To plate, divide the ravioli between four shallow bowls, spoon some of the additional sauce over the pasta and garnish with scallions.


Read more...

Wednesday, June 23, 2010

Recipe Flash: Rainbow Rice Noodle Salad


LIGHT SUMMER BUFFET: Rainbow Rice Noodle Salad; Spicy Thai Beef Salad; Eggplant with Sweet Sesame Soy; Berry Yogurt

I'm starting to think that if you gave me a plate of noodles for most any meal, from whatever cooking tradition--Asian or European--I'd be without any complaints. Especially with regard to simplicity, there's just nothing more satisfying than a bowl of my favorite carbs.

This rainbow rice noodle salad was made for a picnic on a sweltering day, with an eye toward flavor and lightness. It's inspired by the Vietnamese bun I sometimes get at restaurants--oodles of rice vermicelli topped with vegetables, meat, shrimp, or chopped-up spring rolls, and dressed with nuoc cham. The fresh herbs in Vietnamese cooking are part of why I like it so much, and so I made sure to use some leftover basil (you can also add cilantro and/or mint) in this lovely salad.

From my kitchen, albeit small, to yours,

Cara, THE QUARTER-LIFE COOK

Rainbow Rice Noodle Salad with Chicken
Serves 3-4

Ingredients

For the Chicken:
2 boneless skinless chicken breasts
2 teaspoons sesame oil
1/4 teaspoon red chili puree with garlic or hot sauce to taste
1/4 teaspoon honey
1 garlic clove, minced with 1/4 teaspoon salt
1 teaspoon oil, for cooking

For the Rice Noodle Salad:
8 ounce rice vermicelli
2 teaspoons neutral oil
1/4 cup freshly squeezed lime juice, rice wine vinegar, or a mixture of the two
1/4 cup fish sauce
2 tablespoons sugar
salt to taste
2 carrots, julienned
1/3 cup fresh basil leaves, torn
1/3 cup fresh cilantro or basil leaves, torn (optional)
1/3 cup cherry tomatoes, halved
1/2 yellow pepper, julienned
toasted black or white sesame seeds or chopped peanuts

Pound the chicken by placing it in a sealed plastic bag and applying pressure with a meat pounder, a rock, or whatever else you can find, until the chicken is an even 1/2" thick. Add the remaining ingredients to the baggie with the chicken. Marinate for 15-30 minutes (you can marinate for up to a few hours, just do it in the fridge). Heat a large skillet over medium-high heat and brush it lightly with oil. When hot, add the chicken in one layer and let cook for 1-2 minutes, so it gets nice and brown and ceases to be translucent. Flip the chicken and cook on the second side until cooked through, another 2-3 minutes. Transfer to a cutting board and let cool slightly before cutting. Slice into thin pieces and set aside.

Cook the vermicelli by bringing a large pot of salted water to the boil. Turn it off, add the vermicelli and give them a stir, then cover and let sit for 4 minutes. Drain in a colander and rinse with cold water. Drain again. Place in a large bowl and toss with the oil.

Make the dressing by whisking together the lime juice or vinegar, fish sauce, sugar, 1/4 cup water, and a pinch of salt. Taste and adjust the balance of flavors to your liking.

Scatter the vegetables and herbs on the noodles and toss slightly. Pour the dressing evenly around. Arrange the chicken across the top, sprinkle with sesame seeds, and serve.


Read more...

Monday, June 21, 2010

Cooking For Others: BFF Pizza Party

EVENT: New BFF Pizza Party
VENUE:
Phoebe's Apartment, Flatiron
PARTY-SIZE:
9
TYPE:
Get-to-know-you Buffet Dinner
MENU:
White Pizza with Ricotta, Sundried Tomato, and Scallion; Pepperoni & Shallot Pizza; Margarita Pizza with Fresh Mozzarella & Basil; Spinach Salad with Avocado, Red Onions, and Pecans; Make-Your-Own Cupcakes (Vanilla Cupcakes with Cream Cheese Icing and Blueberries, Toasted Coconut, and/or Chocolate Chips)

Though on a day-to-day basis we talk about how best to stretch a can of chipotle chiles or how to make cookie-like scones, the sub-plot of our blog has everything to do with friendship.

We’ve known each other since 1997, when we met in 7th grade, in the middle school corridor. Since graduating college, moving back to New York, and starting this blog, we’ve been lucky enough to have those very same friends from 7th grade often at our table, eating our food and hanging out. For the most part, we catch up with our high school girls over elaborate potluck buffets. Of course, we’ve made friends outside this circle too, and we invite them over too to share in our cooking. But unlike most non-New Yorkers living here, we haven’t had the experience of starting over in a new city, without the people we grew up with.

Our friend Rachel, whose father was the beloved dean of our middle school, recently moved to Chicago for love (as in her boyfriend, now husband). To New York, she left behind Cara’s older sister, Jill, and many other close high school girlfriends. To chronicle her social journey, Rachel has started the blog MWF Seeking BFF about the search for a best friend in her new city.

Though she seems to be doing amazingly fine on her own (both off-line and on), Rachel enlisted our help in planning an at-home friend gathering for some of the potential BFFs she’s met over the last few months whom she otherwise mainly sees one-on-one. We happily obliged, deciding to test our menu out on some new New York faces. We each invited two girlfriends from different circles and had Phoebe’s roommate Caitlyn do the same.

Since Rachel doesn't think of herself as a practiced home cook, we did try to think of a meal that was stress-free, but we were more focused on what sort of menu would best facilitate the kind of easy bonding that we know we'd want at a dinner party with new friends. We landed on a pizza party. The pizza party can be interpreted in one of two ways. If you're feeling enterprising, and you have lots of oven space, it can be a make-your-own affair. This is awesome if you have lots of oven space and best if you have a fear of awkwardness: making the pizzas together gives you and your guests something to do--and then talk about--to break the ice.

But, since it was a hot night and we wanted to have the oven on as little as possible, we decided to customize the pizzas ahead of time. This actually works pretty well for a new friends party too. We figured Rachel might not be familiar with her guests’ dietary restrictions, and a make-your-own pizza party could potentially create chaos and/or reveal character flaws that Rachel might not yet want to see. There might be the girl who leaves the cheese off her pizza because of a new diet she’s trying, or someone who hogs all of the cheese and greedily snatches up pepperoni slices before anyone else has had a chance to include the ingredient on their pie. These things aren’t so deplorable. But after much thought, we would say it’s a safe bet to get to know new friends’ tastes and habits by seeing who goes for which flavor, rather than by judging them on how neatly they arrange onion slices.

Caitlyn, proudly displaying her cupcake

We did, however, leave definitive room for creativity when it came to dessert, putting out cupcakes, icing, and toppings in front of our guets. Though we know her well enough to have expected such precision, Caitlyn did take the (cup)cake when it came to chocolate chip decoration. (Watching her, we were reminded of these OCD Christmas Cookies and why she and Phoebe make great roommates). More importantly, the cupcake station right on top of Phoebe’s coffee table, was a lot of fun.

faces new & old

We hope Rachel has as much success with her pizza party as we did--she'll be posting about it later this summer and we'll be sure to pass the link on to all of you. In the meantime, we are grateful to her for giving us the excuse to invite over a few new faces, and we'll keep on following her blog.

From our kitchens, where making pizza means making friends, to yours,

Cara and Phoebe, THE QUARTER-LIFE COOKS

P.S. If you find yourself with any (non-urgent) quarter-life cooking dilemmas, we'd love to hear about them! You can contact us or just leave a comment below. As we did with Rachel, we'll consider the problem from all sides and recommend, and post about, an awesome kitchen solution.

**Recipe**

Pizza Dough
Makes 3 pies; serves 8-10

This is the simplest pizza dough we know: just mix together and leave alone to rise. However, if dough making intimidates you, try buying 3 pies' worth of ready-made dough from your local pizza parlor. They often carry this in the regular grocery store as well, but why not go with a crust you already trust?

Ingredients
7 cups flour
2 teaspoons sugar
5 teaspoons salt
2 3/4 cups warm water*
2 packages active dry yeast
5 tablespoons olive oil

*Run the tap water warm and stick your wrist in the stream. When you can't feel the water, because it's the same temp as your body, fill up your measuring cup.

Mix together the flour, sugar, and salt in your largest bowl.

In a smaller bowl, whisk together the water and the yeast until dissolved. Add the olive oil. Pour over the dry ingredients, and, using a rubber spatula, mix together. You'll have a wet, raggedy dough. Turn it out onto an oiled piece of plastic wrap and wash and dry the bowl. Brush the bowl with olive oil, and place the dough back in. (If you have a second large bowl, you can oil it and transfer the dough straight to that.) Cover with the plastic wrap and leave in a warm-ish spot for 1 hour. Then, with an oiled hand, punch the risen dough down. It will deflate. Cover with plastic wrap and leave for another 30 minutes.

When you're nearly ready to eat, ease the dough out from the bowl onto a floured countertop. Divide it into three balls, cover them with plastic wrap, and let them rest for 10 minutes. Then shape them into your desired pizza--rectangular, circular, or totally free form--using your hands or a rolling pin. Transfer the dough to parchment-lined baking sheets.

Pizza Sauce
Makes about 2 cups sauce

Ingredients
2 garlic cloves, minced
1 28 can crushed tomatoes, or whole tomatoes pureed in a food processor
6 basil leaves, coarsely torn
1/2 teaspoon salt
dash of red pepper flakes

In a large saucepan or Dutch oven, saute the garlic in 1 tablespoon of oil until fragrant, about 1 minutes. Add the tomatoes and bring to a simmer. Cook uncovered, stirring occasionally, for 20 minutes, or until the sauce is reduced to about 2 1/2 cups. Add the basil, and season sauce with salt and pepper. Cook for 5 minutes more, then turn off the heat and cool to room temperature. (You can make this 3-4 days in advance).

White Pizza with Ricotta, Sundried Tomato, and Scallion

Ingredients
1 ball pizza dough (see above)
1 1/2 cups fresh ricotta cheese
1/2 - 3/4 cup shredded whole milk mozzarella
1/2lb fresh mozzarella, thinly sliced
3 scallions, cut into 1 inch pieces
1/2 cup thinly sliced sundried tomatoes
1/2 cup pizza sauce (optional)
1/4 cup freshly grated Parmesan cheese (optional)

Preheat the oven to 500°F.

Spoon the ricotta over the pizza dough and spread with the back of your spoon. Sprinkle the shredded cheese over the top of the pizza. Arrange the fresh mozzarella, scallions, and sundried tomatoes on top. If using, dot the top of the pizza with small spoonfuls of tomato sauce.


Bake for 10-15 minutes, until the crust has browned and the cheese is bubbling and brown in spots. Remove from the oven, sprinkle with salt, hot pepper, and grated parm if you like. Rest for a minute or two, then cut into slices and serve.

Pepperoni & Shallot Pizza

Ingredients
1 ball pizza dough (see above)
3/4 - 1 cup pizza sauce (see above)
6 oz (3/4 cup) shredded whole milk mozzarella
1 large shallot, thinly sliced
6 oz pepperoni, thinly sliced
1/4lb fresh mozzarella (optional)
red pepper flakes

Preheat the oven to 500°F.

Spoon the sauce over the pizza dough and spread with the back of your spoon. You want every inch to have some sauce, but not be overly saturated. Sprinkle the cheese over the top of the pizza. Arrange the shallot and pepperoni slices over the top. Add some coarsely torn fresh mozzarella (if using).


Bake for 10-15 minutes, until the crust has browned and the cheese is bubbling and brown in spots. Remove from the oven, sprinkle with salt and hot pepper or oregano if you like. Rest for a minute or two, then cut into slices and serve.

Margharita Pizza with Fresh Mozzarella & Basil

Ingredients
1 ball pizza dough (see above)
3/4 - 1 cup pizza sauce (see above)
1 lb fresh mozzarella, thinly sliced
10 basil leaves

Preheat the oven to 500°F.

Spoon the sauce over the pizza dough and spread with the back of your spoon. You want every inch to have some sauce, but not be overly saturated. Arrange the fresh mozzarella and half of the basil leaves on top.

Bake for 10-15 minutes, until the crust has browned and the cheese is bubbling and brown in spots. Remove from the oven, sprinkle with salt and hot pepper and the remaining basil leaves. Rest for a minute or two, then cut into slices and serve.

Make-Your-Own Cupcakes
Makes 12 cupcakes

For the Vanilla Cupcakes:

1 stick butter, melted
1/2 cup sugar
2 eggs, at room temperature
1 teaspoon vanilla extract
3/4 teaspoon salt
1 cup flour
2 teaspoons baking powder
1 cup milk, at room temperature

For the Cream Cheese Icing:

10 tablespoons unsalted butter, at room temperature
1 8-ounce package cream cheese, at room temperature
1 1/2 cups confectioners' sugar
pinch salt
1 teaspoon vanilla extract

For the Toppings:

1/2 cup mini chocolate chips
1/2 cup rainbow sprinkles
1 cup blueberry compote or other chopped fresh fruit
1/2 cup toasted coconut flakes

To make the cupcakes, preheat the oven to 350°F. Grease a 12-cup muffin tin and line each cup with a paper or foil liner.

Beat together the butter and sugar until fluffy. Add the eggs, one at a time, beating well between each addition. Beat in the vanilla extract.

In a small bowl, combine the flour with the baking powder and the salt. Add 1/3 of this mixture to the butter-sugar-egg mixture and beat together. Now add half of the milk and beat that in. Repeat with 1/3 more of the flour mixture, then the remaining milk, then the last 1/3 of the flour.

Divide the batter evenly among the cups. Bake for 20-25 minutes, until golden. When you lightly push on the cupcakes, they should easily bounce back. Cool completely.

To make the icing, beat together all the ingredients with an electric mixer until completely combined and very creamy. You can make this ahead and store in the fridge, but be sure the icing has been at room temperature for 1-2 hours before you try to ice the cupcakes.

Arrange the toppings in small bowls. Place lots of butter knives in the icing bowl, and arrange the cupcakes on a plate. Let guests get creative!


Read more...

Saturday, June 19, 2010

From My Father’s Kitchen: Oatmeal Obsession

MEATY MEALS FOR DAD: Mustardy Turkey Meatloaf; Five Spice Brisket; Parpadelle with Lamb Bolognese; Penne Gratin with Sausage, Fennel and Mushrooms; Broiled Flank Steak with Sautéed Wild Mushrooms and Chive-Parsley Butter

Oftentimes, the grill is still considered a man’s domain. My friend Keith even went so far as to say (perhaps obnoxiously) that if a girl grilled for him on a date, it would make him uncomfortable. As Father’s Day approaches, the web has been saturated with man food—not just stuff to throw on the grill, but also bacon hash for breakfast, Brisket Sandwiches for dinner, and the like.

But my dad is not a grill guy, nor a meat guy. In fact, even though my grandfather and uncle founded a family business that primarily distributes Weber grills, I’m not sure my father knows how to use one (though he expressed an interest in learning this summer). And, last winter, after dining with a group of militant vegans on New Year’s Eve, he changed his food philosophy and decided to no longer eat meat. His new pescatarianism has driven my mother, the household cook and devout lover of red meat, into a state of fish-induced delirium.

But beyond seafood, and beyond the white carbs that have been our joint indulgence for years, my dad’s eating habits, manly or not, are defined by oatmeal. Pretty much the only time he will pick up a pan (with intention to use, not clean it) is in the morning, when it’s time for his daily bowl of rolled oats. Since I’m hard-pressed to find an interesting recipe for such a humble breakfast, especially close to Father’s Day, I decided to ask the man himself for the secrets to his extraordinary oatmeal-making skill.

Full disclosure: as of last week, I moved back to my parents’ apartment for the summer and have begun subletting my room to my friend Alix. It’s a strange adjustment after two years of living with Caitlyn, and if the state of my childhood bedroom (with piles of clothes lining the floor) is any indication, I am still in denial about where my home currently is. But if I’m going to have to get used to sharing frying pans, remote controls, and daily routines with my parents, I might as well get used to eating my dad’s daily oatmeal, if he happens to be in the mood to share that too.


Tuesday morning, I watched my dad carefully measure out his oats and water, slice up some fruit, and pull the whole magical health nut breakfast of champions together in less than ten minutes. Tomorrow night, I think I’ll stick to more traditional Father’s Day fare, if not from the manly arsenal of grilled meats, than at least from the category of dinner (I'll probably make Linguine with Littlenecks, Tomatoes, and Corn or Lightly Fried Tilapia with Caper Brown Butter with Squash Chips with Basil and Balsamic Drizzle). But when the next special day arises, I’ll know just how to surprise my dad with his favorite breakfast, even if he would probably make it better himself.

From my kitchen, wishing Puff Daddy J a happy day, to yours,

Phoebe, THE QUARTER-LIFE COOK
**Recipe**


"City" Oatmeal with Blueberries and Dried Cherries
Makes 1-2 servings (depending on how manly you are)

The secret to this oatmeal is the brand of grains my dad likes to use--Old Wessex All Natural 5 Grain Cereal (if using a different brand, make sure to check the cooking instructions on the packaging as they might be slightly different). He likes to call this version his "city" oatmeal because you don't need fresh ingredients to make it. His summer "Island" oatmeal uses fresh peaches and blueberries, while this one just requires frozen (which turns the oats a bluish color). But the true brilliance comes at the end of the cooking process, when he covers the pot with his bowl to warm it.

Ingredients

1/2 cup oats or grain mix
1/4 cup fresh or frozen blueberries
2 tablespoons dried cherries
1 tablespoon brown sugar (to taste)
Greek yogurt (optional)

In a small saucepan, bring 1 cup of water to boil. Slowly stir in the oats. Cook for 5 minutes, then add the blueberries, cherries, and an additional 1/4 cup of water (this will make the cherries plump up). Cook until most of the liquid has evaporated.

Turn off the heat, and cover the saucepan with the bottom of your bowl (see above). Let the oatmeal rest for a minute. Then scoop the cereal into your (warm!) bowl, and top with brown sugar and a spoonful of Greek yogurt (if using). Enjoy.


Read more...

Thursday, June 17, 2010

Cooking For One: Steamed Artichokes


LADIES LUNCH MENU: Artichokes with Caper-Scallion Mayonnaise; Biscuit Club Sandwiches; Apple Crumb Coffee Cake

I grew up eating whole artichokes with homemade mayo for dipping. These were a treat, something my mother and I would share or, when I was big enough, eat side by side. If we were eating the same head, there would always be a bit of tension when we got down to the heart, the best part. My mother would usually give it to me, after making sure to scrape out all remnants of the choke. I had pictured my death at the hand of an artichoke many times, but so long as there was someone around to double check my cleaning job, the danger only made the heart all the more desirable.

I never remembered artichokes as a seasonal treat, but now I realize they must have been. Lately, the markets have been full of them, and when I see a beautiful bin, I can't help but grab a pair (carefully) for my weekday lunches.

Whole steamed artichokes are still one of my favorite meals when I am alone. I remember calling my mother up on the phone the first time I tried to make them myself. And, even a week ago, I'll admit that I picked up the phone again for her to remind me how best to prepare them without a steamer. She told me to simply use my Dutch oven, and to fill it up with enough water to cover the artichoke's heart. While my artichoke cooked, I made the mayo from scratch, using fresh scallions and a sprinkle of capers to add a fresh/briny punch.

Forty minutes later, my artichoke was ready. It took me less than half the time to devour it, all the way down to the heart, which I cleaned delicately, and then enjoyed all to myself.

From my kitchen, savoring the heart, to yours,

Phoebe, THE QUARTER-LIFE COOK


**Recipe**

Artichokes with Caper-Scallion Mayonnaise
Makes 2 servings Ingredients

2 artichokes
1 large egg yolk
1 teaspoon Dijon mustard
1 cup vegetable oil
1/2 lemon, juiced
2 scallions, green parts only, thinly sliced
1 tablespoon small black capers
salt to taste

Trim the stems of the artichokes so there is just a half inch of stalk left at the base. In a medium pot or Dutch oven, place the artichokes side by side so they are standing upright. Fill the pot with water until it covers just the base of the artichokes, about 1 inch. Cover the pot and bring the water to a boil. Turn the heat back down and simmer until the artichoke leaves are tender (I just pluck one and try it), about 40 - 50 minutes. Remove from the pot and allow to cool slightly before serving.

While the artichokes cook, whisk (you can use a fork) an egg yolk in a bowl with the Dijon mustard and a tablespoon of lemon juice. Slowly and steadily pour in the oil, whisking constantly. The mixture should thicken up quickly. When you’ve finished pouring in the oil, add the additional lemon juice, scallions, and capers. Taste for salt, and serve alongside the artichokes.


Read more...

Wednesday, June 16, 2010

Recipe Flash: Peanut Butter & Jelly Thumbprints

AFTERNOON PICNIC: Sundried Tomato-Sausage Frittata Sandwich; Fennel-Cabbage Slaw; Peanut Butter & Jelly Thumbprints; Spiked Lemonade

Peanut Butter and Jelly: an enduring combination.

Since childhood, my sisters and I have loved to make and eat Thumbprint Cookies. To me, a chocoholic more than a fruit dessert person, I regained my skepticism each time we set out to make these fruit-filled little cookies: shouldn't we be making Chocolate Chip? But then each time I'd take a bite of the fresh-from-the-oven Thumbprints, I'd remember how good the combination of crumbly cookie and sweet jam really is. Of course you can fill thumbprints with anything, including melted chocolate chips, if you're a more devoted chocoholic even than I. And here, I added peanut butter in addition to the standard jelly. If regular thumbprints don't evoke your childhood the way they do for me, I trust that this flavor combination, stolen from the quintessential kid sandwich, will.

From my kitchen, albeit small, to yours,

Cara, THE QUARTER-LIFE COOK

**Recipes**

Peanut Butter & Jelly Thumbprint Cookies
Makes about 25

Ingredients

¼ cup packed light brown sugar
1 stick butter, softened
½ teaspoon vanilla
1 egg yolk
1 cup all-purpose flour
¼ teaspoon salt
jelly—preferably smooth, seedless raspberry
1 1/2 tablespoons natural peanut butter
3 tablespoon sweetened condensed milk

Preheat oven to 350ºF.

Mix brown sugar, butter, vanilla, and egg yolk in a medium bowl. Stir in the flour and the salt and mix until dough holds together.

Shape dough into 1-inch balls. Place about 1 inch apart on a parchment-covered cookie sheet. Press thumb deeply in center of each.

Combine the peanut butter and sweetened condensed milk and drop about ½ teaspoon of this mixture into the depression in each cookie.

Bake for 6 minutes. Remove the pan from the oven, and press the thumbprint again (over the peanut butter), using a 1 teaspoon measuring spoon, since they’ll be too hot to touch. Top the peanut butter with ¼ to ½ teaspoon of jelly—no need to smooth it.

Return to oven and bake for another 4 minutes until the cookies are slightly golden. Smooth the jelly and let cool completely.

Read more...

Monday, June 14, 2010

Cooking For Others: Sarah's 25th


EVENT: Sarah's 25th Birthday
VENUE: Sarah's Parents' Apartment, Upper West Side
PARTY SIZE: 45
TYPE: Thursday Night Drop-in with Finger Food and Impromptu Punch
BGSK Catered Menu: Caprese Skewers with Herbed Croutons; Shrimp & Mango Salad in Wonton Crisps; Corn & Leek Flautas with Jack Cheese; Pulled Chicken Sandwiches with Marinated Red Onions on Mini Brioche; Individual Teriyaki Noodles with Pickled Carrots and Black Sesame Seeds; Sweet Pea & Crab Crostini with Sugar Snap Peas; Panko-Crusted Spinach Dip with Pita Chips; Yellow Cake with Peanut Butter Filling and Chocolate Icing; Sarah’s Birthday Chocolate Bark

Though we shouldn't admit to taking for granted that we cater Jordana's birthday parties, we sort of do expect her to hire us year after year. In fact, we've got a Saturday night in November penciled in on our calendars. But none of our other friends have asked us to cook for their parties, professionally or out of the goodness of our hearts. So we were delighted, if not surprised, when Sarah asked if we'd cater a party at her parent's apartment for her 25th birthday.

For some reason, the menu came to us right away. We were aiming for refined but hearty finger food, as per our usual BGSK style. And since cooking for a friend's party does not mean we want to stay in the kitchen all evening, we choose all room-temperature fare that could be set out en masse for grazing.

We're posting about the desserts here. We'll discuss most of the savories in future posts (well, one we already got to), but we're including the noodle boxes in this post because they've become a bit of an obsession for us. We buy big packages of cup-sized take-out boxes, fill them with the noodle of our choosing, and stick a pair of chopsticks in. Since everyone loves noodles, we're thrilled to have found a foolproof way for making such a utensil-friendly dish part of our finger food buffet.

But before any of this, any recipes, savory or sweet, we present you with a slideshow of the celebratory evening.

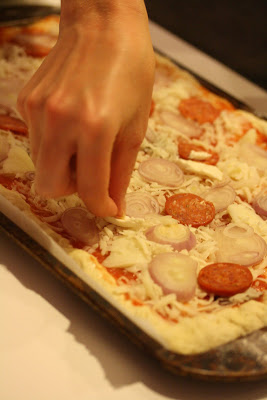
Corn & Leek Flautas, on a Parchment-Covered Baking Sheet, Getting Crispy

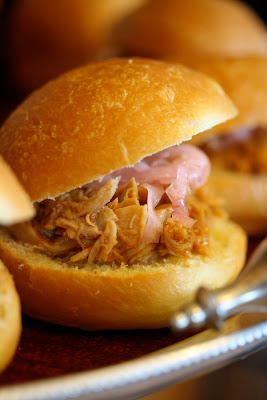
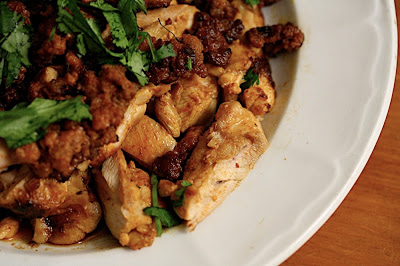
Plated Pulled Chicken Sliders with Marinated Onions

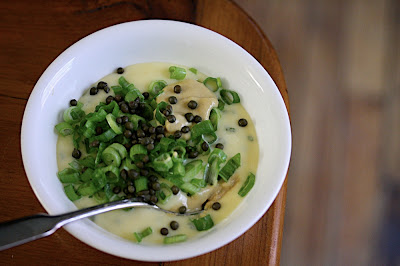
Flautas Ready for Dunking in Their Green Chile Crema

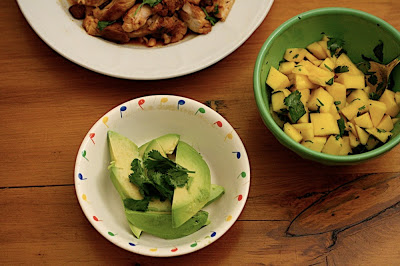
One of Our New Classics: Wonton Cups with Shrimp-Mango Salad

Caprese Skewers with Herbed Croutons

How many noodle containers make a dinner? 4? 5?

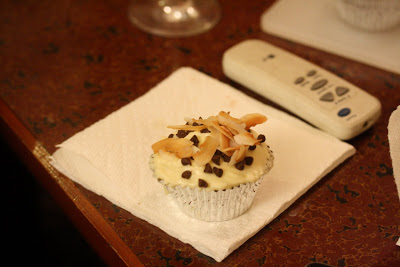
Going for the Chocolate Bark

The Quarter-Life Cooks, sneaking into the kitchen for extra noodles

BGSK and the Birthday Girl

The cake, pre-candles

We had the best time cooking, transporting, plating, and helping Sarah entertain. We can't quite convey how grateful we are to have friends and clients who love our food and are willing to hire us to cook for them.

From our kitchens, larger when we're catering, to yours,

Cara and Phoebe, THE QUARTER-LIFE COOKS

**Recipes**

Teriyaki Rice Noodles
Makes 15 appetizer servings and 6 main course servings

Ingredients

½ cup soy sauce
¼ cup mirin (rice wine)
¼ cup rice wine vinegar
2 tablespoons sugar
1 tablespoon honey
2 slices peeled fresh ginger
1 whole clove garlic, peeled
3 tablespoons safflower or other neutral oil
1 16-ounce package rice vermicelli

Combine the soy sauce, mirin, rice wine vinegar, sugar, honey, ginger, and garlic in a small saucepan. Bring to a boil, then reduce the heat to medium-low and let the sauce simmer and reduce until it has thickened slightly, about 15-20 minutes. Turn off the heat and set aside.

Bring a big pot of water to boil for the noodles. Salt it, then add the noodles and turn off the heat.

Yellow Cake with Peanut Butter Filling and Chocolate Icing
Makes 1 cake

For the cake:

Ingredients
2 large eggs, at room temperature
2/3 cup sour cream, divided
1 teaspoon vanilla extract
1 3/4 cups flour
1 cup sugar
1/2 teaspoon baking powder
1/2 teaspoon baking soda
1/2 teaspoon salt
12 tablespoon unsalted butter, at soft room temperature

Preheat the oven to 350°F. Line a 9" springfrom cake pan with a circle of parchment. Spray with oil or smear evenly with softened butter.

Whisk the eggs with 3 tablespoons of the sour cream and the vanilla.

In a separate bowl--the bowl of a stand mixer if you have one--whisk together the flour, sugar, baking powder, soda, and salt. Add the butter, cut into rough tablespoon-sized chunks, and the remaining sour cream, and, using your hand-held mixer or your very strong arm if you don't have a stand mixer, beat this together for nearly two minutes. It will be quite creamy. Pour in the egg mixture in two parts, beating for nearly a minute after each.

Pour the batter into the cake pan and bake for 30-40 minutes until a toothpick inserted comes out clean and the cake bounces back when you press it lightly. Remove the sides of the pan and cool completely.

When cool, peel off the parchment. Using a serated knife, cut the cake in half horizontally.

For the Peanut Butter Filling:

Ingredients
1/2 cup smooth peanut butter, at room temperature
scant 1/2 cup cream cheese, at room temperature
4 tablespoons (1/2 stick) butter, at room temp
2 teaspoons sour cream
1/2 cup plus 2 tablespoons powdered sugar
1 teaspoon vanilla extract

In a food processor, beat all the ingredients until very smooth and uniform in color. You can store the buttercream in the fridge, but use it at room temperature. It goes on very smoothly with a knife if, like me, you're not into piping.

For the Rich Chocolate Frosting:

This will make a little extra. I'm sure you'll find a use for it.

Ingredients
6 to 8 oz. (6 to 8 sq.) unsweetened baking chocolate
3/4 c. (1 1/2 sticks) butter
4 c. sifted powdered sugar
6 tbsp. strongly brewed coffee
2 eggs
1 tbsp. vanilla
Pinch of salt

Soften chocolate and butter in top of double boiler over hot, not boiling, water. Stir in remaining ingredients. Place top of double boiler in bowl of ice and beat frosting with electric mixer about 5 minutes or until it reaches spreading consistency.

To assemble the cake:

Lay the top half of the cake on a platter, top side down. Spread the peanut butter filling evenly across. You want this to be 3/4" thick. Now place the other half, cut side down, on top of the filling. Frost with the rich chocolate icing.

Sarah’s Birthday Chocolate Bark
aka Toffee Graham Cracker & Pecan Chocolate Bark
Makes 4 cups

Ingredients
12-14 graham crackers
2 sticks butter
1 cup brown sugar
1/2 teaspoon coarse kosher or sea salt
24 ounces ounces semi-sweet chocolate
1 1/2 cups pecans, toasted and coarsely chopped

Preheat the oven to 375°F.

Line a 9 x 13" pan with aluminum foil. Arrange the graham crackers in one layer, breaking them up as necessary. Melt the butter and brown sugar together in a small saucepan. Bring to a boil, then turn to low and simmer, stirring constantly, for 2 minutes. Pour over the graham crackers, sprinkle with salt, and bake for 1o minutes, monitoring closely to make sure the sugar does not burn.

Remove from the oven and let cool at room temperature until completely cool. Break up the graham crackers into bite-sized pieces.

Melt the chocolate over a double boiler or in short bursts in the microwave. You want it to be just melted—don’t let it bubble or anything. As it’s melting, stir with a heat-proof spatula. Once melted, remove from the microwave or double boiler and add the nuts and the broken-up graham crackers.

Pour the mixture onto 2 parchment-lined pan and spread it evenly with a spatula. Put the pans in the freezer and let the bark sit until hardened. This should take about 1 hour.

Using your hands or a knife, break the bark into bite-sized pieces. Keep in the fridge until ready to serve.

Photos (mostly) by Alex.


Read more...