Pages

Showing newest 12 of 13 posts from July 2010. Show older posts

Friday, July 30, 2010

Giveaway: Imersion Blender [Closed]

This awesome giveaway is sponsored by CSN Stores, where you can buy anything from a bedroom vanity to cookware.

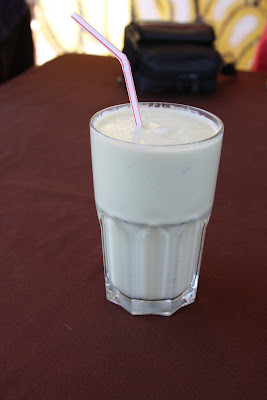
Smoothies are the best summer fare. Cool, sweet, and easy--crucial characteristics when it's this hot.

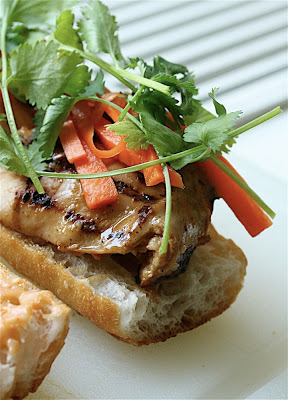
Call it vanity, but we don't like to get knee-deep in cooking when the temperature rises above 90°F. With the oven on and the stove going, our hair frizzes, our pores clog, and our energy levels hit rock bottom. We go for simple stuff instead--panzanella, wraps, and ice cream sandwiches.

We also crave smoothies--or at least Cara does (Phoebe's just not a fruit person). This immersion blender, which we're giving away to one lucky reader this week, makes smoothie creation a cinch. Without breaking a sweat wrangling the blender out from its cabinet hideaway, you can puree bananas with milk and chocolate, or berries with peaches and yogurt, for a cool snack.

It's a little too hot to think about winter, but when the cold arrives, you'll love this gadget for making cozy, comforting soups.

To win, tell us in the comments section below: What do you like to eat when it's too hot to cook?

To gain an extra entry into the contest, subscribe to our newsletter here.

From our kitchen, basking in the heat, to yours,

Cara and Phoebe, THE QUARTER-LIFE COOKS


Read more...

Wednesday, July 28, 2010

Recipe Flash: Grilled Mushroom-Cheddar Melts

HEALTHY-ISH NAUGHTINESS: Grilled Mushroom-Cheddar Melts; Spinach Hash Browns or Sweet Potato Fries; Carrot Cake

I love a good grilled cheese. But sometimes it just feels right to introduce a vegetable to the mix, even if that vegetable is sauteed in butter. This seems to be my rationale come summertime (otherwise known as bikini season). To help this sandwich trim down even further, I decided to grill instead of fry it. Getting a nice charred cross-hatch on hearty country bread really does a summer sandwich good.

I made these mushroom melts for a picnic lunch in Central Park with my friend Joe, who is a musician, and can also take picnic lunches in the middle of the week if he wants to. Joe also turns out to be the mystery dinner guest who ate my unresolved tacos, so I owe him some mention here.

We've had quite the week of summer sandwiches on BGSK. To review, check out these Pulled Chicken Sandwiches with Pickled Onion, and yesterday's Chicken Satay Bahn Mi Sandwiches.

From my kitchen, albeit small, to yours,

Phoebe, THE QUARTER-LIFE COOK

**Recipe**

Grilled Mushroom-Cheddar Melts
Makes 2 sandwiches

Ingredients
2 tablespoons unsalted butter
1 large shallot, thinly sliced
1/2 pound mixed wild mushrooms
1 tablespoon balsamic vinegar
1/4 cup white wine
1 tsp fresh thyme leaves, plus 3 additional sprigs
1/2 tablespoon chopped parsley leaves (optional)
1 large garlic clove, coarsely chopped
4 slices country or sourdough bread (white or whole wheat)
1/3 pound sharp white cheddar cheese, thinly sliced

In a large skillet, melt 1 tablespoon of butter and 1 tablespoon of olive oil over medium-high heat. Add the shallot and the mushrooms, and saute, stirring every few minutes, until the mushrooms have begun to release their liquids, about 5 minutes. Season the mushrooms with a sprinkle of salt, and add the vinegar. Cook for another 2 minutes, then add the white wine and the thyme, making sure to scrape up any of the mushroom drippings from the pan. Saute until the mushrooms are dark and caramelized, and the liquids have been fully absorbed, about 5 more minutes. Sprinkle with parsley (if using) and set aside. (The mushrooms can be made up to 2 days in advance).


In a small bowl, melt the remaining tablespoon of butter, garlic, and additional thyme sprigs in the microwave.

Arrange the bread on a work surface and brush on both sides with the garlic butter. Divide the cheese slices among the 4 slices of bread. Top two of the slices with the mushrooms, and sandwich them together with the remaining bread.

Heat a grill pan over a medium-high flame and brush it with olive oil. Grill each sandwich one at a time: cook the sandwich on the first side for 2 minutes, pressing down with a spatula. Rotate the sandwich 90 degrees and cook for an additional minute. Flip the sandwich, and repeat on this side. Remove the sandwich when the cheese is properly melted, and you have nice cross-hatch grill marks on the bread.


Read more...

Monday, July 26, 2010

Cooking For Others: Banh Mi Boat Ride

EVENT: We’re on a Boat
VENUE: Robbins Family Boat, Long Island Sound
PARTY SIZE: 8
TYPE: Nautical Picnic Lunch
MENU: Chicken Satay Banh Mi Sandwiches; Hummus; Guacamole & Chips

Cara and I are addicted to Num Pang, the small Cambodian banh mi joint right off Union Square. Their sandwiches have actually become a bad influence. One afternoon we were already running late to a meeting in the area, but then we passed the storefront and just couldn’t resist. The hands of the guy we were meeting with probably smelled like pulled duroc pork after we shook them.

A few weeks later, I picked up a Zip Car a block away, and decided to get a pulled pork banh mi to go for my trip out to Long Island for a book-related photo shoot. Bad move. I showed up on Cara’s doorstep reeking of chili mayo, the driver’s side upholstery covered in sauce.

It goes without saying that I’ve been dying to try my hand at banh mi at home. And regardless of the portability problem I mentioned above, I thought they’d be the perfect sandwich to bring on board Sophie’s boat, which has once again made the summer heat wave all the more bearable.


To cut down on the mess, I went with a non-traditional variety of the banh mi, while staying true to the signature accouterments: picked carrot, cilantro sprigs, and, best of all, chili mayo. Instead of the pulled pork, I grilled chicken breasts and then dressed them in some leftover coconut peanut sauce to create a moist, juicy chicken satay. This allowed me to use less chili mayo, while keeping the intense flavor of the sandwiches.

I put such a small amount of chili mayo on the baguette that our captain, James, didn’t even notice it was there at all. James has an irrational mayo phobia, and actually went so far as to thank me for leaving it off. (Sorry buddy.)

The good news is for mayo-haters: these chicken satay banh mi sandwiches are so saucy and flavorful, you don’t even need the extra condiment. Better yet, for the cooks and cleaner uppers, you eliminate the fatty mess of pulled pork grease by using chicken, which tastes (almost as) delicious.

It was a beautiful day on the water, if a bittersweet one, since it was our last day with Steph, who has relocated to Vermont for the rest of her summer boat ride days.

Next time, I’ll have to bring these summer rolls as well. They'd make for a great appetizer.

From my kitchen, wearing evidence of my banh mi cravings, to yours,

Phoebe, THE QUARTER-LIFE COOK
**Recipe**

Chicken Satay Banh Mi
Makes 6 sandwiches

If you're a less staunch believer than I, feel free to leave the mayo out altogether. But I'm a lover, people.

For the chicken:

1 lime, juiced
1/2 tablespoon sugar
1/2 teaspoon salt
2 tablespoons olive oil
2lb chicken thighs
1/2 cup coconut peanut sauce

For the pickled carrots:

1/4 cup rice wine vinegar
2 tablespoons sugar
1/2 teaspoon salt
2 medium carrots, cut into 1/8-inch match sticks

For the sandwiches:

2 baguettes, sliced in half lengthwise
1/2 cup mayonnaise
1/2 teaspoon siracha
1 bunch cilantro, woody stems removed

In a large mixing bowl, whisk together the lime juice, sugar, salt, and olive oil. Add the chicken and toss until well coated. Set aside to marinate for 20 minutes.

In the meantime, whisk together the vinegar, sugar, and salt in a medium mixing bowl until dissolved. Add the carrots and toss until combined. Set aside to pickle for 15 minutes, stirring occasionally.

Brush a grill or indoor grill pan with olive oil and place over a high flame. Grill the chicken in batches: cook for a few minutes on the bottom, rotate a quarter turn, and cook for a few minutes more. When there are nice grill marks formed in a cross-hatch, flip the chicken and repeat on the opposite side. Cook until the chicken is firm to the touch. Set aside to cool. When the chicken is no longer piping hot, toss it together with the peanut sauce in a medium mixing bowl.

In a small mixing bowl, combine the mayonnaise and the siracha. Season with a sprinkle of salt.

Toast the bread on a cookie sheet under the broiler for a few minutes until crusty, but not browned. Slather the top half of bread with the mayonnaise. Arrange the chicken on the bottom half of the bread, cutting the larger pieces to fit. Top with the carrots, making sure to leave behind any excess liquid so that sandwich doesn't get soggy, and a handful of cilantro leaves. Press down the top half of the bread and cut into sandwiches.


Read more...

Friday, July 23, 2010

Working With What You Have: Freshest Walnuts and Figs

OTHER MOROCCAN MEALS: Merguez and Green Chard Tagine; Fish Tagine with Chourmula, Preserved Lemons, and Mint; Moroccan Bouillabaisse

It's a pleasure, when traveling, to be able to stay in someone's home. You see a neighborhood where locals live, which is nice, but most important is that you get to buy food in the market. When I'm staying at hotels, I make a point of visiting local markets, but they are barren excursions. I wander, aimless, wishing I could buy beautiful and exotic ingredients. But there is nothing to do with them in a hotel room. I settle for some street food--crispy flatbreads, little sweets, or juice--take a picture, and move on.

Alex and I made our way through Morocco on a trip that was bookended by time spent with people who lived there--Melodee and Hind. The night we arrived in Rabat, the second-to-last evening of our trip, we were shepherded from the train station to a good, cheap restaurant by these very locals. There, as we ate tagine and pastilla, we learned what was in store for the next night. We were going to be taught to make trid, a chicken dish we'd fallen in love with earlier on the trip. Hind would come to Melodee's apartment and we'd all cook and eat. Awesome, I thought.

The next afternoon found us buying spices, vegetables, and chicken at the market and wine at the subtle storefront nearby. The fruit at the fruit vendor looked so wonderful, it occurred to me I ought to be a good guest, which for me means making dessert. With the help of Melodee's Arabic, we bought green figs and fresh walnuts and a couple eggs.


Later, I got to work. The oven, which resembled a toaster, sat on the counter, like the four-burner hotplate. It was hard to figure out how to open the door. It was also hard to find the right pan for the cake in a cupboard stuffed full of couscousieres and clay pots. And it was hard to realize that the only sugar was in cubes. But I did all these things. With the oven turned on, the pan greased, and the sugar ground up with the walnuts in Melodee's new blender, I was on the right track. I wasn't sure of proportions and I had no measuring cups, but I was going to make a walnut fig cake.

The next obstacle was the lack of a handheld mixer to beat the egg whites. I actually owned an electric mixer before I owned a whisk, so it took me a moment to realize all was not lost. Especially when I realized that Alex made a great substitute mixer. While I attended to the figs and the rest of the tasks, Alex whipped five egg whites into soft peaks.


I have to admit I was a little tense as I finished the batter and put the cake in to bake. My blogging reputation had preceded me to Morocco, and I knew the cake had better be good. But I'd made it without reference to a recipe, and I had no idea how this weird little oven even worked. When one of Melodee's roommates came home and said the apartment smelled good, I gave all the credit to the trid that Hind was simultaneously making. (More on the trid soon.)

But call it what you will--some kind of traveler's luck, perhaps--I beat those obstacles and came out with an excellent cake. The figs perfumed it, the fresh walnuts gave it body, and the little countertop oven-that-could gave it a lovely, crispy top. We ate it for dinner and again the next morning for breakfast before we got ready to make the trip home.

From my kitchen, working with what I find in someone else's, to yours,

Cara, THE QUARTER-LIFE COOK

**Recipe**


Fig and Walnut Cake
Makes 1 cake, serves 10

Ingredients
1 1/2 cups walnuts
1 cup plus 1 tablespoon sugar
4 egg yolks
5 egg whites
pinch salt
1/2 cup flour
6 large fresh figs

Preheat the oven to 350°F. Grease a 9" springform cake pan.

Grind the walnuts with the 1 cup sugar. Transfer to a medium bowl. Add the egg yolks and stir to combine. The batter will appear a lot like a paste.

In a separate bowl, beat the egg whites with the pinch of salt until they hold soft peaks.

Pour about 1/4 of the egg white mixture into the egg yolk-sugar-walnut past. Stir well to combine, loosening up the batter. Now fold in the remaining egg whites in thirds, being careful not to deflate them. Sprinkle the flour across the top and gently fold it in.

Pour the batter into the pan and spread it so it's even. Arrange the figs, flesh side up, in concentric circles (or in another pretty pattern). Sprinkle with the remaining 1 tablespoon sugar. Bake for 45 minutes to an hour, until a toothpick inserted comes out clean. Cool slightly before removing the sides of the pan. Cut into wedges and serve.

Read more...

Wednesday, July 21, 2010

Recipe Flash: Pulled Chicken Sandwiches


How easy is it to sell me on Pulled Pork? I'll answer that: very. Slow-cooked pork tossed with BBQ sauce and piled onto a bun is hard to mess up, since pork butt basically cooks itself if you give it enough time.

But pulled chicken is harder. Even chicken thighs, fattier than white meat, don't naturally pull, and especially when you're making pounds of this for a party, you wind up spending a decent chunk of time shredding the chicken. Sarah, whose 25th Birthday Party we catered (and have been posting about for a while), doesn't like pork, which is the reason we stuck with chicken for the sandwiches. This gave me a chance to play around. I created a super flavorful--and rather sweet--sauce, and I baked the chicken in liquid to keep it tender. It may not be pulled pork but it's pretty delicious.

From my kitchen, albeit small, to yours,

Cara, THE QUARTER-LIFE COOK

**Recipe**

Pulled Chicken Sandwiches with Pickled Onions on Brioche
Makes 30 mini sandwiches or 10 full-sized sandwiches

We made our sandwiches on mini brioche, but full-sized works if you're not having a cocktail party!

Ingredients

3 cups ketchup
1 cup beer
1/2 cup maple syrup
1/2 cup honey
1/2 teaspoon red pepper flakes or 1-2 teaspoons hot sauce
2 tablespoons light brown sugar
2 tablespoons red wine vinegar

4-5 lb boneless, skinless chicken thighs
2 cups chicken broth
2 tablespoons olive oil
1/4 cup barbecue sauce

Pickled Onions (recipe follows)
30 mini brioche rolls or 10 brioche rolls

To make the sauce, combine all the ingredients from ketchup to red wine vinegar in a small saucepan. Bring to a simmer and simmer, uncovered, for about 1 1/2 hours, until thickened and reduced to about 3 1/2 cups. You can make this in advance.

To cook the chicken, preheat the oven to 350°F. Combine the broth, olive oil, and barbecue sauce, and whisk together. Add the chicken. Set the pot on the stove and bring to a boil. Cover and cook in the oven for 35-45 minutes, until the chicken juices run clear.

Remove the chicken from the liquid and put it in a bowl or a baking pan to cool. When cool enough to handle, shred the chicken with two forks, adding some of the liquid from the pot to keep it moist.

When all the chicken is shredded, mix in the barbecue sauce. Start with about 1 cup of sauce, mix it in, and taste the chicken. Add as much sauce as you like, and also feel free to add more of the cooking liquid, if you like your chicken a little wetter.

Pile the pulled chicken onto the bottom half of a brioche roll. Top with pickled onions and the top of the roll.

Pickled Onions

Ingredients
1/2 cup sugar
3 cups red wine vinegar
1 teaspoon whole cumin seeds
1/2 cup olive oil
1 teaspoon salt
1 teaspoon freshly ground pepper
2 red onions, thinly sliced

In a large mixing bowl, whisk the sugar in the vinegar until it is dissolved. Add all the remaining ingredients. Pour everyting into a jar or tupperwarde container and let sit in the refrigerator at least overnight.

Read more...

Monday, July 19, 2010

From My Mother's Kitchen: Updated Tuna Casserole

EVENT: Father's Day
VENUE: Phoebe's Parents' Apt, Upper West Side
PARTY-SIZE: 3
TYPE: Comforting, Nostalgic Dinner
MENU: Tuna Noodle Casserole with Cremini Mushrooms and Scallions; Baked Tomatoes with Thyme; Steamed Broccoli with Garlic and Lemon; Chocolate Chip Cookies

“Before he met me, your father’s favorite home-cooked dish was tuna casserole.” That’s pretty much how my mother sums up my dad’s childhood in the Midwest.

My dad grew up in Ohio. But I’m not sure this actually had too much impact on his mother’s cuisine. The supermarkets were the same on the East Coast, and even after moving to Connecticut, my grandmother sourced over half of every meal from a can. Sometimes around the Thanksgiving table, while eating my mother’s haricots verts with spiced nuts, my dad and his siblings would reminisce about my grandmother’s green beans, which emerged from the can, cooked, only to be boiled to the point of disintegration.

My aunts and uncles found creative ways of joining the clean plate club without bringing a bean to their lips. Most involved hiding the unwanted food in their underpants, then immediately discarding it in a garbage can or toilet far away from the kitchen. My grandmother must have wondered why the interior of my aunt’s bras and my uncle’s button-downs were often stained canned-bean green.

So it wasn’t against stiff competition that Tuna Casserole won my dad’s heart and became his favorite childhood dish. He would request it occasionally when I was growing up. And occasionally, (meaning, once) my mother would oblige.

We both found the concept, along with that of the twice-cooked green beans, horrifying.

But in deference to my dad, Mom stuck to the traditional Campbell’s soup can recipe and turned out the noodle dish of his dreams. But she drew the line at store bought fried onions out of the jar. Instead, she made herbed breadcrumbs from scratch, and topped the baking dish with a thin layer of gruyere. I remember the casserole being set down on the table, and I distinctly remember thinking to myself: “ew.”

When Father’s Day approached this year, my mom and I were at a loss. I had been living at home for a week or so at this point, and had already indulged my dad in his fill of pasta dinners. We talked about fish and chips, tacos, onion rings. Nothing was getting us excited. Then it came to her. “How about tuna casserole?” my mom suggested.

I gagged a little bit. But I remembered how Cara had looked to the past for her mom's birthday (she made Chicken Parm, which her family ate while she was growing up), and I agreed to take on the challenge. Still, I drew a line at one can. Period.

My updated tuna casserole begins with a rich, but not too rich, béchamel sauce and is rounded out by mushrooms sautéed in white wine with a hint of soy sauce, and a handful of fresh herbs. The can of tuna seemed unavoidable, so I made sure to pick up a really nice Italian brand packed in olive oil.

Though I wasn’t quite looking forward to digging in, the end result was so, so good, I just might be bringing it back for my dad's birthday. Perhaps with some green beans on the side.

From my kitchen, curbing my Midwestern judgments while kicking the can, to yours,

Phoebe, THE QUARTER-LIFE COOK

**Recipe**


Tuna Noodle Casserole with Cremini Mushrooms and Scallions
Makes 4 servings

Ingredients
4 tablespoons butter
1 medium yellow onion, diced
8oz cremini mushrooms, thinly sliced
4 scallions, white and green parts separated, thinly sliced
1 teaspoon soy sauce
1/4 cup white wine
3 tablespoons flour
2 cups chicken stock
1 cup whole milk
5oz tuna packed in olive oil*
1 tablespoon lemon juice
1/2 teaspoon salt
8oz egg noodles
1 cup bread crumbs
1 tablespoon parsley (optional)

*When you open the can, push the lid down over the sink to drain out the oil. Then add tuna as outlined below.

Preheat the oven to 350 degrees.

Bring a large pot of salted water to boil.

In a large cast iron pan or casserole dish, melt 1 tablespoon of butter over medium-low heat. Add the onions and cook until translucent, stirring occasionally, about 5 minutes. Add the mushrooms, the white parts of the scallions, and the soy sauce, and continue to cook until the mushrooms are tender, about 5 more minutes. Deglaze the pan with the wine and cook until all the liquid has nearly been absorbed by the vegetables, about 3 minutes. Turn the heat off and scrape the mushroom mixture into a bowl. Set aside.

Add the remaining butter to the pan and melt it over low heat. Whisk in the flour then stream in the broth and the milk 1 cup at a time. Whisk or stir with a wooden spoon until there are no lumps. Turn the heat back up to medium and simmer the sauce until it is thick enough to coat the back of a spoon, stirring continuously, about 5 minutes.

In the meantime, cook the noodles according to package directions until al dente (about 5 minutes). Drain in a colander.


Off the heat, add the mushroom mixture, green parts of the scallions, tuna, lemon juice, and salt to the pan. Stir until combined. Gently fold in the pasta until fully distributed. Top with breadcrumbs and parsley and bake in the oven for 15 minutes, until bubbling. Turn the heat up to broil, and cook for another few minutes, until the breadcrumbs are nicely browned. Serve immediately.

NOTE: casserole can be made a few days in advance (up until the crumb topping step) and kept covered in the fridge.

Read more...

Friday, July 16, 2010

Working With What You Have: Chocolate Milk

WHAT YOU'LL NEED: Good Grips Measuring Spoon Set

I'm a nerd, but I often wake up early on Saturdays, and I like to get to the farmers' market when it opens, around 8am, before the hordes of shoppers, children, strollers, and puppies arrive. I like to get there when it's still cool out in the summer, and when I have first pick of the goodies and don't have to wait on line to buy them.

When I can get myself out of bed to go running that early, which is a much, much rarer occurrence than simply getting out of bed, I'll stop at the market on at Grand Army Plaza on my way back home from the workout. I tuck a twenty dollar bill into my sports bra or my sock before my run and then spend the sweaty money until it's gone. The condition of the bill after it has made contact with my sweat may be a little off-putting for the vendors, but otherwise this is a pretty good system, since it prevents me from spending an entire week's worth of grocery money in one fell swoop. All I've got is a twenty.

I'm always hungry in the morning, but after I run it's a different story altogether. I'm starving. I need to eat. I think I heard once that chocolate milk is a superlative post-run snack, better than gatorade or vitamin water or power bars. So a couple times, I've headed straight for the Ronnybrook stand and broken my damp twenty dollar bill there. I have to get milk and sometimes butter anyway, so adding a small container of chocolate milk isn't such a big deal. I buy the whole milk version, in case you were wondering, and it tastes like melted chocolate ice cream.

Most recently, I was at the market, first in line to buy milk, when the Ronnybrook guy announced that the small plastic bottles of milk and chocolate milk were only a dollar. I had been on the fence about needing chocolate milk for sustenance--maybe I could hold out until breakfast?--but that little sale put me over the edge. I walked home drinking the chocolate milk, like a toddler or something, and I made it about halfway through the bottle before I was ready to toast the baguette I'd gotten for breakfast.

Skip now to a few days later, when I'm approaching my pre-vacation (that is, sort of empty) fridge, logically trying to figure out what I can make to send to my sister, Katie, who's down in Mississippi for Teach For America's training institute. I needed to be strategic here. There were two constraints: one, it costs a lot of money to ship by UPS to places like Cleveland, MS, so whatever I sent had better be good; and two, Kate was craving some real, nourishing food. Institute's food is apparently not so great, and they barely give the teachers-in-training time to eat it anyway. (You can check out Kate's adorable and informative blog, where she's writing about learning to teach in the Mississippi Delta, here.)

I decided to make a simple chocolate chip pound cake, packed with walnuts for some nutritional value. Instead of making pound cake the traditional way, with only butter, eggs, and flour, I went to add some milk too. I had just enough regular milk for the following day's coffee, but I did have leftover chocolate milk. In went that.

The chocolate flavor is not necessarily pronounced (aside from the chips themselves), but I think that there's a little something extra here, that the creaminess and chocolatiness of the very good chocolate milk eventually shines through. So fork over a dollar for on-sale chocolate milk and make a loaf yourself.

From my kitchen, sending sweets to Mississippi, to yours,

Cara, THE QUARTER-LIFE COOK

**Recipe**


Chocolate Chip-Walnut Loaf
Makes 1 loaf

Ingredients
1 3/4 cups flour
1/2 teaspoon baking soda
2 teaspoons baking powder
1/2 teaspoon salt
10 tablespoons butter
1 cup sugar
1 teaspoon vanilla
2 eggs
1/2 cup chocolate milk
1 cup chocolate chips
1 cup toasted walnuts, chopped

Preheat the oven to 350°F. Butter a loaf pan.

On a sheet of wax paper or in a small bowl, mix together the flour, baking soda, baking powder, and salt. Set aside.

Cream the butter with the sugar using an electric mixer. When fluffy, add the vanilla and the eggs. Beat until even creamier. Now add about 1/3 of the flour mixture and mix until incorporated. Add half of the chocolate milk; beat. Repeat this, adding another 1/3 of the flour, the rest of the milk, and the final 1/3 of the flour. Last, fold in the chocolate chips and the walnuts to distribute them evenly. Pour the batter into the prepared loaf pan. Bake for 45 minutes to an hour, until a toothpick inserted comes out clean. Cool until you can touch the pan, then loosen the cake and remove it. Cool completely.


Read more...

Wednesday, July 14, 2010

Recipe Flash: Baked Tomatoes with Thyme

AL FRESCO DINNER: Panzanella Salad with Lemon-Basil Vinaigrette; Turkey Burgers with Red Onion and Beet Relish; Lemon Tart with Cream

I usually don't bake tomatoes in the summer because a) the oven makes my apartment unbearably hot and b) the tomatoes are usually so red and juicy that I want to pick one right up and bite into it like an apple. In the winter, a trip to the oven is an excellent way to amplify a tomato's flavor when it is pale in complexion and lacking in taste. But in the summer, it can feel downright foolish.
But if you need a break from the usual Caprese Salad, and the weather is not quite so stifling, these baked tomatoes make for an excellent and elegant appetizer. They taste great at room temperature, so no need to have the oven on when your guests arrive. If your garden's yield has become a burden rather than a blessing, this is also an excellent way to use up your excess and eat the yield throughout the week. After the baking process, when you bite into a roasted tomato, its texture is like that of a fresh, red sauce. For this reason, they are a great topping for a simply dressed spaghetti with olive oil and garlic, or a mixed green salad with a basic balsamic dressing.

From my kitchen, albeit small, to yours,

Phoebe, THE QUARTER-LIFE COOK

**Recipe**

Baked Tomatoes with Whole Wheat Bread Crumbs and Thyme
Makes 2-4 servings

Ingredients
3/4 pound (about 3) beefsteak or other large firm tomato, cut into 1/2-inch slices
1 tablespoons balsamic vinegar
1 cup fresh whole wheat bread crumbs*
2 garlic cloves, minced
1/2 tablespoon fresh thyme leaves, plus more stalks for garnish
1 tablespoon chopped fresh parsley (optional)

* Remove crusts from 3 slices of sandwich bread and pulse in the food processor.

Preheat the oven to 350 degrees.

Brush a cast iron skillet or casserole dish with olive oil. Arrange the tomatoes in one layer. Drizzle with balsamic vinegar, and season with salt and pepper.

In a small bowl, combine the breadcrumbs, garlic, and herbs. Add a pinch of salt, and 1 tablespoon of olive oil. Toss to combine with a fork.

Spoon the crumb mixture over each tomato. Drizzle some additional olive oil over the top. Bake in the oven for 20 minutes, until the tomatoes are bubbling, then turn the heat up to Broil, and bake for 3-5 more minutes, until the crumbs are nicely browned. Remove from the oven, and garnish with the additional thyme stalks. Serve immediately, or at room temperature.


Read more...

Monday, July 12, 2010

Big Girls, Global Kitchen: What I Ate in Morocco

the couscousiere: small kitchen tool extraordinaire

Last week, I walked in my door after 22 hours of travel. My shirt smelled terrible, but my backpack still smelled like Morocco. Filled with spices, preserved lemons, and the last bites of a flatbread we didn't finish on the plane, it was an instant reminder of the trip, as if I could have forgotten already. But to ensure that I don't forget--at least the food--I've created the following slideshow--a memory for me, a recap for you.

Alex and I drove from Casablanca, where our flight landed, to Essaouira, with Alex's friend Melodee and Melodee's friend, Hind. Melodee and Hind switched off driving the under-construction roads while I drowsed in the backseat, waking up only for couscous (it was Friday, Couscous Day). We spent time at the beach and at restaurants, eating fresh fish, and we walked through our first set of medina streets filled with vendors hawking deliciousness. Then Alex and I went on to Marrakesh, where we indulged in trid at a restaurant Hind had recommended. Trid is a dish that's nowhere near as famous as tagine, but I loved it. It's a spiced chicken stew, containing lentils, tomatoes, and lots of onions, and it's served with extremely thin layers of torn steamed dough, very similar to the dough of the pan-fried flatbreads we came to love. We also made a point of eating lots and lots of glorious street food in Marrakesh--we just couldn't resist.

Leaving the city for the mountains, we encountered simpler, heartier food: turkey tagine chock full of vegetables and slices upon slices of local, ripe melon. From the High Atlas, we traveled to Rabat, where Melodee and Hind both live. The last evening of our trip, Hind showed me how to make trid from scratch at Melodee's apartment, and we ate huge servings of my new favorite dish. I bought a few things at the market myself and, working with what was available, baked a fragrant fig cake for dessert, which I'll post about soon.

Here's a photo account of many of my delicious Moroccan meals and snacks:

jus d'avocat (avocado blended with milk) at the windsurfing beach Sidi Kaouki

bread

fish tagine with onions and preserved lemons in Essaouira

lamb and apricot tagine

spicy rghiaf--pan-fried flatbread filled with spices & onions

the stalls at the Djeema al Fna, next to where we ate saucisses with fresh tomatoes and khobz

food stalls at the Djeema al Fna

mint tea*

hearty breakfast in the High Atlas Mountains

picnic by a Berber village: rice, salad, and kofte sauteed with onions and peppers

walnut tree in the High Atlas

figs from the souks in Rabat

harsha, spongy pancake-like breads at the Rabat medina

we bought disks of these stretched strands of dough for making trid

the cake I baked with the figs (and wonderfully fresh walnuts)

Not Pictured: copious amounts of freshly squeezed orange juice; breakfast spreads of flatbread with butter and jam; various tagines; lentils; chicken and kofte brochettes; merguez sausage.

It was a wonderful trip, both at the table and away from it! Stay tuned for more--in the coming weeks, I'll post more about the cooking we did and report back on attempts to make rghiaf at home.

From my kitchen, influenced by Morocco's, to yours,

Cara, THE QUARTER-LIFE COOK

*I thought that Moroccan mint tea was way too sweet, so I jumped at the chance to have the sugar cubes on the side. But of course when I tasted the unsweetened tea, I decided it needed sugar and added a big old cube. From then on, I stopped complaining about the tooth-aching sweetness and decided to enjoy it!

Read more...

Friday, July 9, 2010

Cooking For Others: The Best Bites, Ever

EVENT: Various Catering gigs
VENUE: Someone else's big kitchen
PARTY SIZE: 25 - 75
TYPE: Catered Cocktail Party with Hors d'Oeuvres
MENU: Shrimp & Mango Wonton Crisps; Soy-Sesame Ahi Tuna & Avocado Wonton Crisps

I recently posted my manifesto on why wonton skins are a leftover’s best friend. But I still haven’t shared with you the reason they entered my fridge/freezer in the first place.

Back in February we catered Jordana’s parents', Andrea and David’s, 30th wedding anniversary party. It wasn’t our first gig. But it was still our largest party to date. And our novice response was to propose a gargantuan menu of finger food. We pulled it off—all 18 dishes, that is. But I’d say we definitely came away with some lessons, along with ten canvas bags full of leftovers in Tupperware, to take into account for next time.

One of the best lessons: wonton crisps are awesome. During our menu-planning stage, while I was searching for inspiration, I came across this recipe. How cute, I thought. What a creative way to use wonton skins. Better yet, how convenient that these crisps can be made up to two weeks in advance!

Since our menu was tailored to the guests of honor’s set of varying tastes, we proposed Asian-flavored tuna tartar cups to satisfy Andrea’s love for seafood. The bites were a huge hit.

Being quarter-life cooks and all, we don’t cook that often with expensive ingredients like sushi-grade fish. As I ran out to Citarella the morning of the party, I was a little nervous about the cost of the tuna. But the cups required so little filling that they ended up being one of the most affordable items on the menu.

So for our next catering event, we made them again—this time with a shrimp and mango salad tossed with creamy ginger dressing. These, Cara and I agreed, were even better than the tuna version, though they had the same plus side: that we needed to buy very little shrimp to fill all of the crisps.

Somehow after making 300 bites, I still had enough wonton skins left from the original pack to make two versions of ravioli—one with sundried tomato, one with pea puree—and 100 more wonton crisps, for our next catering gig, Sarah's Birthday. The pack seemed infinite.

For your next cocktail party and your next and your next, I encourage you to pick up a pack of wonton skins and make these elegant little hors d’oeuvres.

They really are just the best bites. Ever.

Phoebe, THE QUARTER-LIFE COOK

**Recipe**

Shrimp & Mango Wonton Crisps
Makes 48 bites

Ingredients

12 wonton skins, cut into 4 squares
3/4 lb medium peeled and deveined shrimp, cooked*
1 mango
1/2 cup mayonnaise
1 tablespoon Dijon mustard
1 ½ tbsp minced fresh ginger
1 lime, juiced
1/4 teaspoon siracha
½ tbsp honey
½ tsp salt
1 cup cilantro leaves, finely chopped

*If you are not buying pre-cooked shrimp, simply bring a pot of salted water to boil and cook the shrimp for 3-5 minutes, until they've turned pink. Drain and immediately transfer shrimp to an ice bath or place the colander under very cold water until the shrimp are no longer steaming hot.

Preheat the oven to 350 degrees.

Place wonton skins on a cutting board and brush lightly with oil. Press each into a miniature muffin tin, oiled side down. Bake until wonton crisps are golden brown, about 8-10 minutes. Allow to cool for 5 minutes in the tin, then set aside and repeat. (The crisps can be made up to two weeks in advance.)

Cut each shrimp into 4-5 pieces--small enough to fit in the crisps--and peel and dice the mango into same-sized pieces.

In a food processor (if you do not have one, minced finely and combine in a bowl), combine the mayo, mustard, ginger, lime juice, siracha, honey, and salt. Pulse to combine. (This can be made up to a week in advance.)

About an hour before service, toss together the shrimp, mango, ginger dressing, and cilantro. Spoon into the crisps and serve immediately.

Read more...

Wednesday, July 7, 2010

Recipe Flash: Fragrant Fish Stew

YOU ALSO MIGHT LIKE: Mediterranean Catfish Spaghetti

Sometimes I like to see just how little I can get away with. Protein, that is. It's often the most important, most sizable part of a meal, but--not being a bodybuilder--I'm never convinced I need to ingest a terribly large amount of it. That may be the carboholic in me talking. But I am intrigued by the idea that, if you supplement your meat, fish, or tofu with pasta, grains, potatoes, or veggies, you can make the protein into an aspect of the meal without it being the focus. This also happens to be a very cheap way to cook, and the only way to cook, when Alex has merely 0.62 pounds of flounder in his freezer and I don't feel like going out in the rain.

From my kitchen, albeit small, to yours,

Cara, THE QUARTER-LIFE COOK


Fragrant Fish Stew
Serves 2

The spices in this stew are added with quite a light hand. You can ramp them up if you like, but I prefer to let the flavors of the vegetables, fish, tomatoes, and wine come through.

Ingredients
1 tablespoon olive oil
1 shallot, minced
1/2 leek, cut in half lengthwise and sliced thinly
2 cloves garlic, minced
1/2 bulb fennel, diced
1 teaspoon salt
1/3 cup white wine
1/8 teaspoon saffron, dissolved in 2 tablespoons water
1/4 teaspoon smoked paprika
pinch cayenne
1 14-ounce can crushed tomatoes
2/3 pound flounder or other white fish, cut into 2-inch pieces
freshly ground black pepper
2 tablespoons parsley, chopped
2 teaspoons red wine vinegar

6-8 ounces spaghetti

Heat the oil in a medium Dutch oven over low heat. Add the shallot, leek, and fennel, and cook for 15 minutes, until all the vegetables are very soft but not browned. Add the garlic and cook for another 5 minutes, then turn the heat up and add the wine. Let it come to a boil, then return the heat to low, cover, and let the vegetables cook for 5 minutes, until very tender, checking periodically to make sure there's still plenty of liquid in the pot.

Add the salt, tomatoes, saffron water, smoked paprika, cayenne, and 1 cup of water. Stir to combine, then bring to a boil. Let simmer gently for about 15-20 minutes, partially covered, to let the flavors meld. Taste for salt.

While the stew is cooking, bring a large pot of salted water to boil for the spaghetti. Put the pasta in about 5 minutes before adding the fish to the stew. Cook according to package directions, then drain and toss with a tiny bit of olive oil

Add the fish, toss to distribute, then cover the pot and cook 2-4 minutes, until the fish is cooked through. Mix in the red wine vinegar.

Scoop a portion of spaghetti onto each plate. Distribute the fish stew evenly over the pasta. Sprinkle with parsley and grind lots of fresh pepper. Serve hot.


Read more...

Tuesday, July 6, 2010

Cooking For Others: Birthday Parmigiana


EVENT:
Mom's Birthday
VENUE: Mom's Kitchen, Riverdale
PARTY SIZE: 4
TYPE: Festive Celebratory Dinner
MENU: Chicken Parmesan; Twice-Fried French Fries; Mixed Greens with Yellow Pepper and Basil Dressing; Sweet Ricotta Tart; Prosecco
WHAT YOU'LL NEED: Stainless Steel Slotted Turner

I guess it's not so surprising that, for my mom's birthday this year, we decided to traffic in nostalgia rather than foodie-ism. Phoebe's birthday featured Mini Meatball Subs and Mac and Cheese; mine was all about retro classics, too: Onion Dip, hot dogs on the grill, and bazooka bubble gum. So though things like duck confit went through my mind, in the end my sisters and I decided to make an old family dinner favorite: Chicken Parmesan.

When we ate Chicken Parm as kids, we did not eat it with garlic bread or with spaghetti. I didn't even know it was served with such things until we started going out sometimes to a red-sauce Italian joint in Yonkers. We ate it with homemade french fries, which to me is a much better use of side-dish space than either bread or pasta.


What's more, we ate the french fries dipped in the extra tomato sauce that had been made for the chicken. I don't know how you feel about Chicken Parmesan, French Fries, or Tomato Sauce as a dipping sauce for said fries, but I think this is the kind of food it's hard to feel anything but enthusiastic about. Chicken Parm is more or less a combination of pizza and chicken fingers, two meals kids everywhere are crazy about, but it's certainly not to be scoffed at for adult palates.


Chicken Parmesan with Fries wasn't a special meal back then, so it's funny we chose it to be a birthday dinner now. But truthfully, these days, it's rare that we make anything with so many steps as this, even if, with practice, I can imagine those steps can be streamlined. Though it didn't actually take that long to make, the fact that it was involved--in addition to its sentimental value--made the Chicken Parm an ideal birthday meal.

Truthfully, it's not the best-ever meal to make in a small kitchen. We were cooking up at my mom's, where counter space is not quite as precious a commodity as it is in my kitchen. However, I don't think it's really a problem to make the chicken itself in a kitchen like mine, as long as you don't endeavor to make the french fries as well. Serve the chicken with spaghetti, just like we never did.

From my kitchen, where birthdays turn us back towards dinners past, to yours,

Cara, THE QUARTER-LIFE COOK

**Recipes**


Chicken Parmesan
Serves 4, with extra sauce for dipping fries

Ingredients

For the sauce:
1 tablespoon oil
1 onion, diced
4 cloves garlic, minced
1/4 cup fresh basil leaves, torn
1/4 teaspoon red pepper flakes
1/2 teaspoons salt
1 28-ounce can crushed tomatoes

For the chicken:
4 boneless skinless chicken breasts
1/3 cup flour
2 eggs
1 1/2 cups breadcrumbs*
1 teaspoon salt
pepper
oil for frying

For assembling the dish:
3/4 pound fresh mozzarella, cubed
1/2 cup freshly grated Parmesan cheese
10 basil leaves

*To make fresh breadcrumbs, trim the crusts from half a baguette. Cut the insides into cubes, the process in a food processor until the cubes become crumbs.

To make the sauce, cook the onions in the oil in a large saucepan over medium-low heat until transparent but not brown. Add the garlic just before the onions are done and cook for 2-3 minutes, letting the garlic get ever so slightly golden. Add the basil leaves, salt, and red pepper, then add the tomatoes. Cook for 30 minutes over medium heat, letting the sauce reduce slightly. This can be made ahead.

Place the chicken breasts in a sealed plastic bag. Pound them to about 1/3" thick, using a meat pounder, rock, or other creative utensil.

Spread the flour onto a shallow plate. Crack the eggs into a bowl large enough to hold 1 chicken breast, and beat them. Combine the breadcrumbs, pepper, and salt in another shallow bowl.

To prepare the chicken breasts, one at a time, place them in the flour, turning to coat both sides. Repeat in the egg and then in the breadcrumbs. Place them on a baking sheet: you're ready to fry.

Put a paper-towel covered plate by the stove. Heat about 3/4 inches of neutral oil in a large cast-iron pan over medium-high heat. When a breadcrumb sizzles in an oil, put in as many breaded chicken breasts as will fit without crowding. Fry for about 4-6 minutes a side, until the chicken is crispy and brown. Remove to the paper-towel lined plate and repeat with the remaining breasts.

Preheat the oven to 350°F. Spoon about 3/4 cup of sauce onto the bottom of an attractive 9 x 13" baking dish (or any dish that will look nice on the table and will fit the chicken in one layer). Arrange the chicken breasts on top. Cover each with another 1/4 cup sauce, then top with a few basil leave. Add one quarter of the cheese to each piece of chicken.


Bake for 25 minutes until the sauce is bubbly and the cheese is melted and browning in spots. (If the cheese doesn't seem to be browning as much as you'd like, you can raise the heat on the oven.) Sprinkle on the parmesan and bake for another 5 minutes. Serve, accompanied by extra sauce and some bread, pasta, or french fries.

French Fries
Serves 4-6

Ingredients
4 large baking potatoes
oil--a quart or two
coarse salt

Peel the potatoes and cut them into fries--about 4" by 1/2" by 1/2". Do this just when you're ready to cook so the fries don't brown.

Line a large bowl with paper towels. Heat the oil in a medium pot over high heat. When the oil starts to shimmer, add a small fry. When this fry sizzles, that means it's time to start cooking. Turn the heat down slightly, and cook the fries in batches, depending on the size of your pot. You don't want to overcrowd and you don't want the oil to bubble over.

Fry each batch for about 8 minutes, until starting to crisp but still quite pale. Remove with a slotted spoon, letting as much oil as possible drip off before transferring to the towel-lined bowl. Repeat with the remaining uncooked fries.

When you're ready to eat, repeat this process, only now the fries should cook much more quickly, and since they'll have shrunk, you'll be able to cook in fewer batches. Sprinkle generously with salt and serve with warmed tomato sauce (see above).

Read more...