Pages

Showing newest 14 of 15 posts from January 2010. Show older posts

Saturday, January 30, 2010

Baking For Others: Late-Night Birthday Cake

EVENT: Alex's Birthday
VENUE: Cara's Apartment, Park Slope
TIME: 2:30am, January 17th
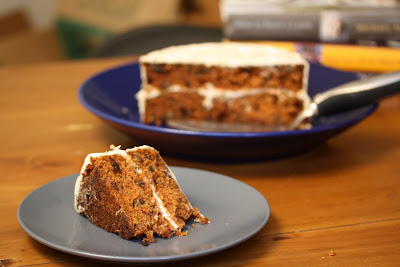
MENU: 7-inch, Dairy-Free Carrot Cake

I may be a decent baker, but I'm not so good with surprises. So when, for Alex's birthday, I determined I'd make him a cake, I didn't have the wherewithal to kick him out of my studio apartment while I did so. He claims to have guessed at the nature of my concoction long before the scent of the cake wafted out of my kitchen to the desk where I'd exiled him, eight feet away. It was the sound of me grating a vegetable drawer's worth of carrots, apparently, that tipped him off. Anyway, before we went out for the evening I made the cake as fast as I could. By the time we left, I had the cake nearly cooled, frosted (well, the frosting melted into the layers a tad), and hiding in plain sight on a cake plate on my table.

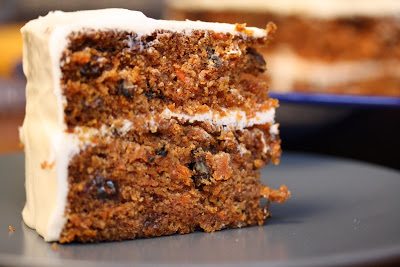
Alex, who made the stomach-related decision, several years ago, to consume no dairy whatsoever, thought (and I quote) that he would never eat things like creamy icing ever again. Having vowed, somewhere in the fall of 2007, that I'd be a vegan for life, I had an idea of what it was like to stand in his shoes. I got both the sadness and the conviction of this vow. And a year of dairy-, meat-, and egg-free life back then led me to the knowledge now that carrot cake is a resilient, long-suffering hero of a confection. You can cut out its eggs, its butter, its cream cheese, and somehow the cake tastes delicious. I'm not exaggerating. This faith-like belief in carrot cakes long ago chose the flavor of Alex's birthday cake for me.

Later, after we'd gotten back from celebrating my friend JoJo's birthday, it was 2 or 3 hours into Alex's actual birthday. Persisting in my delusion that the cake would be a complete surprise, I disappeared into the kitchen to decorate it with candles. I forced Alexto listen to three rounds of off-key "Happy Birthday To You" while I lit them, then I finally cut him a slice to eat and to share with me. Surprise or not, late-night cake ingestion seemed an excellent tradition, akin to opening one gift on Christmas Eve. I can't think of a better midnight snack.

Or breakfast. It should be duly noted that carrot cake is one of the best breakfasts around.

From my kitchen, where the cake tastes best after midnight, to yours,

Cara, THE QUARTER-LIFE COOK

Update, 2/8/10: I'm submitting this cake to a Valentine's blog contest called "Food Is Love" sponsored by bloggers Jennifer at Savor The Thyme and Kelsey at The Naptime Chef. Their idea was to find out how cooks show their love through food. I thought this cake was a good candidate because I modified the recipe to be dairy free for Alex. See his verdict on the cake in the comments below.

**Recipe**

Carrot Cake
makes a 2-layer, 9-inch cake

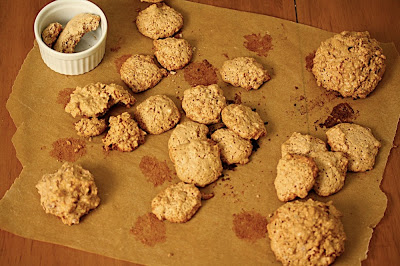
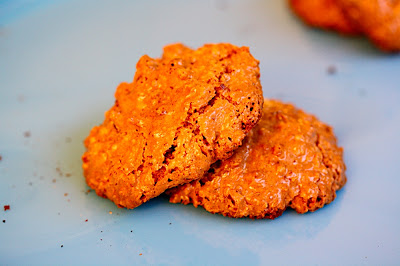
I made the batter by proportion, and it's actually a bit too much for a 7-inch cake. I used 1/3 of it for each layer then made mini muffins out of the rest. However, it's just the right about for two 9-inch layers, which is a more standard size cake pan anyway.

Last but not least, you can substitute standard cream cheese and softened butter for the tofu cream cheese and margarine/shortening.

Ingredients
1 1/2 cups all purpose flour
1/2 cup whole wheat pastry flour
2 teaspoons baking soda
1 teaspoon salt
2 teaspoons ground cinnamon
1/2 teaspoon ground nutmeg
1 teaspoon ground ginger
1 cup sugar
1 cup light brown sugar
1 cup canola oil
4 large eggs
3 cups finely grated carrots (about 6-7 medium carrot)
1 cup coarsely chopped walnuts
1/2 cup raisins

Preheat oven to 350°F.

Grease the cake pans, and, if you like, cut out a circle of parchment with which to line the bottom. Grease the parchment too.

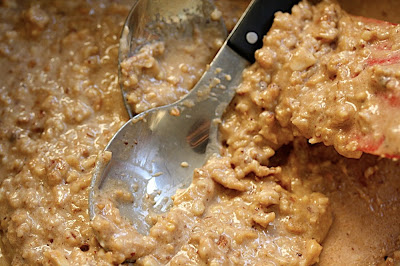
In a medium bowl, combine the dry ingredients (flour, baking soda, salt, cinnamon, nutmeg and ginger in medium bowl). In another, larger bowl, stir together the sugar and oil until the sugar is saturated by the oil. Beat in the eggs, one at a time. Add the flour mixture, and fold with a rubber spatula until just combined. When the flour's almost stirred in, add the carrots, raisins, and walnuts, still being careful not to overmix. Divide batter equally among cake pans.

Bake the layers for 40-50 minutes, or until a tester inserted into center comes out clean. Cool cakes in pans for a few minutes, then turn them out onto a rack or a plate to cool. Cool completely before icing.

Maple Cream Cheese Frosting

12 oz tofu cream cheese
12 oz margarine or shortening
1 1/2 cups confectioners’ sugar
3 tablespoons maple syrup

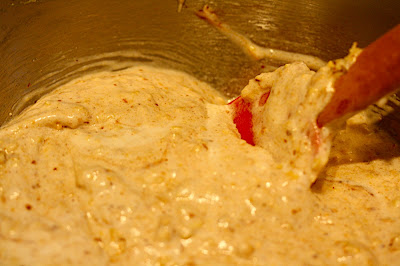
Beat all the ingredients in a food processor until very smooth. You may need to chill it in the fridge for a few minutes so that it's thick and easy to spread.

Trim the layers as necessary if they're really puffed up in the center. Then spread a thin layer of frosting on top of the first layer. Top with the second and carefully cover the top and sides with icing. Keep in the fridge--it'll stay good for a week.

the cake minus a slice: an accidental Pac Man!

Read more...

Thursday, January 28, 2010

Cooking For One: Retreat Lunch

DISH: Chard & Chickpea Toasts with Scallion Butter
TYPE: Out-of-Town Weekday Working Lunch
MAIN INGREDIENTS: Chard, Chickpea, No Knead Bread

It’s a rare treat that Cara and I actually get not only to eat together but also to prepare a meal in the same kitchen. Even if the opportunity did readily present itself to cook in tandem, our apartment kitchens are not so conducive to sharing, especially when one of us is on our home turf and in a hurry--or just an only child, like myself.

But a few weeks ago we decided to get away from the distractions of city life and hunker down to book writing and brainstorming for a little while. On a Tuesday morning we fled for Cara’s mom’s house in Long Island, stocked up on a mere $40 of groceries for the week (a joint experiment in and of itself—who knew Cara compared milk prices as obsessively as I do!), and got to work. We made a lot of index cards with chapter titles, recipe names, and other crazy coding matrices. And, naturally, we did a lot of cooking.

Our first working lunch was founded upon Cara’s No-Knead Bread, which had emerged from the oven as one beautiful, crusty round earlier that morning. We had bought a lot of random greens the day before, and with this meal of stewed beans and greens in mind, Cara suggested sautéed chard and chickpeas on top of a toasted piece of bread. And with my mind still on breakfast (we had already dug into the bread), I said that I’d make a scallion butter to slather on top of each slice.

Soon, Cara was manning the greens while I doctored the butter and bread (and consuming any uneven slices that happened to fly my way). Save for one minor disaster involving a shattered wine glass in my hand, lunch was on the table in a flash, with only a small amount of blood shed in the process.

From my kitchen, where Cara sautés the greens and makes the tourniquets, to yours,

Phoebe, THE QUARTER-LIFE COOK

**Recipe**

Ouch.

Chard & Chickpea Toasts with Scallion Butter
Makes 2 servings

Ingredients
1 tablespoon olive oil
1 shallot, sliced
2 garlic cloves, sliced
pinch red pepper flakes
1 bunch Swiss chard, stems removed and coarsely chopped
1/3 cup white wine
1 15oz can chickpeas, just a bit of the liquid tipped out

2 thick slices country white bread (see recipe for No Knead Bread), toasted

2 tbsp butter (room temperature)
2 scallions (green parts only), thinly sliced
Pecorino cheese for garnish (optional)

In a medium skillet, sauté the shallot and garlic in the oil until translucent and fragrant, about 3 minutes. Stir in the red pepper flakes. Add the chard to the pan, tossing to coat with the vegetables, then turn the heat up and add the wine, bringing it quickly to a boil. Turn the heat down to medium and simmer, stirring occasionally, until the liquids have reduced, and the chard is wilted. Add the chickpeas and most of their liquid, keeping the mixture moist. Continue to cook until the chard is tender. Season with salt and red pepper, and set aside.

In the meantime, cream the butter with the scallions until smooth and soft. Add salt if the butter was unsalted. Place back in the refrigerator to firm up until the chard has finished cooking.

To serve, slather the toast with a healthy (or not, depending on how you look at it) layer of scallion butter. Top each slice with a big portion of the chard and chickpea mixture, and garnish with grated pecorino cheese.


Read more...

Wednesday, January 27, 2010

Recipe Flash: Cilantro Succotash Quesadillas

COCKTAIL HOUR MENU: Chips with Mexican Dip and Chipotle Mango Salsa; Black Bean Cakes; Cinnamon-Mocha Dulce De Leche Bites
ONE YEAR AGO: Lightly Fried Tilapia with Caper Brown Butter and Lemon-Shallot Orzo

Come wintertime, I really miss the bright, fresh salads that were a staple of my summer diet. When this craving hits, I’ll often find myself resorting to frozen or canned corn combined with some other less seasonal ingredients. For Caitlyn’s Mexican-themed birthday over the summer, I made quesadillas two ways, one with this Curried Sweet Potato Filling and the other with a version of this succotash using fresh corn. Since the salad is more or less being hidden between layers of melted cheese, I thought the succotash quesadilla was as good a way as any to revisit my memories of summer, with but a few cans/packets of veggies.

From my kitchen, albeit small, to yours,

Phoebe, THE QUARTER-LIFE COOK
**Recipe**

Cilantro Succotash Quesadillas
Makes 8 servings

Ingredients

For the succotash:
5 oz, frozen edamame, thawed
1 15oz can corn, rinsed and drained
1 15oz can black beans, rinsed and drained
1/2 small red onion, finely chopped
1 lime, juiced
¼ cup cilantro leaves, roughly chopped
1 tsp salt
¼ tsp cayenne pepper
½ tsp chili powder

For the quesadillas:

12oz shredded Monterey Jack cheese or Mild White Cheddar
8 tortillas, traditional or whole wheat

In a medium sized bowl, combine all the ingredients for the succotash. Taste for seasoning and add any additional spice as necessary.

On a flat work surface, assemble each quesadilla one at a time: sprinkle a small handful of cheese on one side of the tortilla, spread a thin layer of succotash on top, and sprinkle with another small helping of cheese. Fold the tortilla in half and press down to make sure the quesadilla adheres. Repeat with the remaining tortillas. (You may have leftover succotash—try scrambling with eggs the next day!)

Arrange the quesadillas on two cookie sheets. Place in the hot oven and broil until golden brown on the top and the cheese is melted through.

NOTE: if the tortillas are not holding closed, you can use a second cookie sheet to weight them down in the oven. Simply place a sheet of tin foil over the quesadillas, followed by a second cookie sheet with something

Read more...

Monday, January 25, 2010

Big Girls, Test Kitchen: Late-to-the-Party No-Knead Bread

DISH: My Weekly Bread
MAIN INGREDIENTS: Flour, Yeast, Salt, Water

In November of 2006, when no-knead bread was sweeping the internet cooking world, I was living in a dorm room. I had no oven, no place to keep flour, and no covered pyrex or cast iron pot for baking. Even if I'd heard about the phenomenon, which I didn't, I wouldn't have been able to do much to hoist myself onto the rapidly expanding bandwagon.

In my first apartment, I played around a bit with baking bread. I made whole wheat and oatmeal loaves from my mom's old Laurel's Kitchen bread book. Though the scent of the yeasty doughs rising and baking subsumed the tiny place in remarkable smells, I found I didn't always get through a whole loaf, and it all seemed more work than it was worth--especially sweeping up the endless sprays of flour from the apartment that were a result of doing my kneading at the coffee table.

When I came back to the no-knead recipe, it was making a slight resurgence on the internet due to the publication of a book by Jim Lahey, the baker behind it all. I'd also been going through a toast-for-breakfast phase, and I wanted badly to make this bread all fall. But I didn't have the right pot--you need a heavy pot with a lid. I didn't own one. On Christmas, I became the proud owner of two Le Creuset pots (thanks, mom), and I got to work right away.

I've made five loaves since then, and it's just not getting old. I like to start the loaves on Friday or Saturday afternoon, then let them rise all night. In the morning, I get up early and shape and flour the dough, then doze off or do errands for an hour and a half until it's time to preheat the oven. When the bread finally comes out, I load the table with condiments and knives, and then Alex and I attack it. He dips bread in peanut butter and a little bit of jelly; I go for salted butter and sometimes thinly sliced Jarlsberg. I'm slightly embarrassed to admit we tend to get through half a loaf. Then I eat more modest slices, toasted, the rest of the week for breakfast. It's a system I think I could get used to.

In terms of experiments and tweaks: first and foremost, I abandoned the recipe's original "instant yeast" the moment I realized it wasn't what was in packets I had in my fridge. Instead, I mix active dry yeast with water and let it bubble before pouring over the flour. Right now I use 3/4 teaspoon, but I think I could play with using even less. I also usually have a bit more than the 12-18 hours prescribed for rising, so I keep the bread in the fridge for the last 6 or so hours of the rise (while I'm sleeping). So far, this hasn't seemed to have much of an impact--it just slows down the rising. My most recent loaf featured 1 cup of stone-ground whole wheat flour to 2 cups of white, and it was great. I'll definitely be playing around with flours in the coming loaves.

For now, all I can do is echo what every food blogger of the past four years has been saying: make this bread. It can easily be part of your routine, which is good, because you'll easily become addicted to it.

From my kitchen, where I'm fashionably late, to yours,

Cara, THE QUARTER-LIFE COOK


No-Knead Bread
Makes 1 loaf

A trick for getting the water to the right temperature is to hold your wrist under the stream from the tap. If you can't really feel the water, you've got the right temperature. If it feels cold or warm to your wrist, adjust accordingly.

Ingredients
3 cups flour
3/4 teaspoon active dry yeast
1 2/3 cups room temperature water
1 1/4 teaspoons kosher salt
1/4 teaspoon sea salt
Cornmeal or more floured as needed

Combine about 1/2 cup of water and the yeast. Stir to combine. Set aside for about 10 minutes, until the yeast bubbles. This activates the yeast and confirms that it's alive. Add the rest of the water.

In a medium bowl, combine the flour and the salts. Pour the yeast-water over the flour, then use a rubber spatula to form a soft, ugly dough. Cover with plastic wrap and leave to rise for about 12 hours, until there are bubbles across the top.


If you're not ready to bake, place the bowl in the fridge. Otherwise, proceed with the recipe.

Dump the dough out onto a floured surface. Let it rest for 15 minutes. Then, using as little flour as possible, shape the dough into a ball by folding the ends in. Turn onto a cornmeal-dusted non-terrycloth dishtowel, seam side down. Dust with more cornmeal, then cover with another towel. Leave for two hours.

When there's a half hour left to go of this rise, preheat the oven to 450°F and put a covered, heavy pot in the oven.( I use my 5.5 quart LeCreuset to achieve a well-proportioned loaf.) When the dough is ready, carefully take the pot out of the oven. Dump the dough, seam side up, into the pot and shake it to spread evenly. Cover and bake for 20-30 minutes. Uncover and bake for another 15-30 minutes, until deeply brown and crusty. Let the bread rest as long as you can before slicing into it.

I store my bread in an airtight baggie, even though this makes the crust soft. To "re-crust" a whole loaf, you can dab it all over with water and bake for about 10 minutes in a 450°F oven. If you're going slice by slice, just toast to rectify the crust.


Read more...

Saturday, January 23, 2010

Cooking For Others: Dinner Fail

Phoebe and her bandaged thumb, post exploding wine glass incident

Last week, we asked readers to tell us about their greatest (worst?) cooking failures. People responded with some pretty epic disasters.

Both Sarah and Stephanie had brownie trouble: Sarah forgot eggs and tried to mix them into the cooking brownies. They scrambled. Stephanie, on the other hand, was out of eggs altogether. She mixed dollops of mayonnaise into her brownie batter. It melted, burned, and cracked.

Callie, taking Cara's older sister Jill's advice that green onions (aka scallions) were the same as yellow onions, made a rice salad featuring about 4 or 5 cups of rice and about 4 or 5 diced onions. After tasting it, Cara still can't believe the salad was as edible as it was or that Callie managed to cut up all those onions without crying hysterically.

We randomly chose Seattle Dee as the winner of our BGSK Sweet Treats Calendar. Her failure:

As a new bride entertaining HIS FAMILY I tried out an ambitious menu that taxed my skills and scheduling ability. Rushing to thicken a thin sauce, I popped a pyrex baking dish fresh from the oven onto a hot electric burner. Not such a good plan. First came a loud CRACK! followed by the rolled/stuffed chicken breasts, artichokes and a sticky white wine sauce running over the stove top and onto the floor. While THE IN-LAWS sat, out of sight in the dining room, I threw a dish towel over the mess on the floor and plated and served the solid ingredients. We were SO lucky no one crunched on a sliver of glass - and I still haven't told this story to anyone else involved in that dinner.

To round out Seattle Dee's humiliation--or lack thereof, since she heroically managed to keep her disaster a secret--we present this statistic. 81% of you have cooked something so awful you had to throw it straight into the trash. Yum.

We further present a bunch more notable failures, from our kitchens and yours:

Recently, I tried to make a dinner with every pot and bowl in my repertoire. I was sort of cooking by feel, having a good time, and the menu was looking like it would be salmon in a roasted vegetable broth, with a heap of brown rice pilaf and a topping of sauteed veggie sausage. Soon after I knocked the saucepan full of broth onto the floor, I burnt the rice and overcooked the salmon. Basically the only tasty part of the meal was the sausage, which was also the one part of the meal I didn't make. -Cara

Months ago when I was baking my birthday cake at my mom's, I was delighted to use her new fancy mixer, which is the most ridiculously powerful kitchen instrument I've ever encountered. I had creamed the butter and the sugar, but when I went to crack in the egg, I managed to drop the entire egg, shell and all, into the bowl. Then, not used to the machine, I pulled the handle in the wrong direction. Hoping to stop the mixing, I'd actually increased the speed, and the beater pulverized the shell. It took me about an hour to pick out the confetti-ed egg shell. - Cara

I am a frequent perpetrator of burning vegetables in the oven, forgetting nuts on the stove, and leaving dish towels too close to the burner and having them erupt into flames. But I think my worst failure was when the oven decided not to work at all. I was having one of my first dinner parties in my new apartment and was serving roasted chicken breasts, rosemary potatoes, and carrots. I was running behind as is, and 20 minutes before people were about to arrive I went to put everything into the oven, and noticed it was not hot. Like, at all. When my friend Mark arrived early, I decided to punish him by making him sacrifice his arm to ignite the pilot light with a very short match. It didn't work. I spent the next hour under- then over-cooking chicken on the stovetop, transforming the potatoes into greasy, crunchy slices, all in front of anaudience who munched on the raw carrots and laughed. - Phoebe

And a few more highlights from the comments section:

Early in our marriage, I was attempting to impress my husband with my baking prowess. The recipe called for me to blind bake the pie crust using pie weights. I rolled out the crust, placed it in the pan and dropped in the pie weights. As I baked the crust I wondered how this was all going to work...needless to say, not quite the way I planned. When the crust was removed from the oven my husband and I, armed with tweezers, individually removed each pie weight. I bet he was impressed! - Nicole

A few years ago I was dating a boy which I guess I wanted to impress with my cooking prowess and I spent all day basting-on-the hour-chicken wings which I had created a rub for and two different varieties of sauce, a bourbon glaze and a more traditional BBQ... I was rushing to get to the party at his apartment and changed into my cutest football watching outfit: a white shirt, my pink jacket and jeans... the wings were barely our of the oven and I put them into a pyrex bowl with foil, then into double bags. I hustled up sixth avenue and I heard a cracking noise. The glass, going from super to to the super cold air cracked (it was pyrex!!!) shattered and before I could notice fell through the double bags and onto the sidewalk, splashing all the way up my jacket, bbq sauce and glass pieces... in a panic, I ran home leaving the steaming wings and sauce on the sidewalk, changed clothes and ran up the street, as I was walking by the disaster site, there were two things observed that changed my disapointed and frantic mood: 1. People were stopping on the street and looking up.... they thought that someone in a Super Bowl argument had thrown the wings out of the window of the apt buidling above to see if the wings could fly and 2. A homeless man was picking through the pieces licking sauce off his fingers... - Stephanie D

Thanks for everyone's participation! Seattle Dee, please get in touch with us so we can send the prize your way.

From our kitchens, which we're trying not to burn down, to yours,

Cara and Phoebe, THE QUARTER-LIFE COOKS

Read more...

Wednesday, January 20, 2010

Recipe Flash: Carrot-Raisin Raita

VEGETARIAN DINNER MENU: Free-Form Samosas; Potato Pea Masala; Spinach Paratha
ONE YEAR AGO: Carrot Raisin Cookies

I know a lot of people who love raita nearly to the point of obsession. For them, the condiment can even eclipse whatever else is on the table--flavorful curries, fluffy dishes of rice, hot-off-the-grill flatbreads--to the point where it doesn't really make sense to classify raita as a condiment. It's taken off, become its very own dish. Same goes for tzatziki, et al.

That's not really me, though. While I like the tang of yogurt and the creaminess of whole milk yogurt, it's never been something I crave, especially not at the dinner table. This raita, whose flavors borrow from the classic salad of carrots and raisins, may just change all that. It's interesting enough to be eaten straight from the bowl with a spoon, and it's a much-needed break from spice in a spread of Indian or Indian-inspired mains and sides. I ate some with leftover chana bateta and white rice, and the creamy tanginess may yet have won raita another disciple.

From my kitchen, albeit small, to yours,

Cara, THE QUARTER-LIFE COOK

**Recipe**

Carrot-Raisin Raita with Cumin Seeds
Makes about 1 cup

This is best made ahead of time so the flavors have time to mellow. Plan to make this 24 hours before serving for absolute best results.

Ingredients
1 container whole milk Greek yogurt
1 carrot
2 tablespoons raisins
1 ½ teaspoons whole cumin seeds
1/8 teaspoon salt

Toast the cumin: in a small, unoiled frying pan, cook the seeds over medium-low heat until fragrant. Pour into a small bowl and cool to room temperature before use. (Sticking them in the freezer helps with this.)

Pour ¼ cup boiling water over the raisins. Let them steep for 15 minutes, then drain and press out the liquid with a dish towel.

Grate the carrot. Let it rest for a few minutes on a dish towel, then squeeze it to get out any moisture. (This will turn your towel slightly orange; use one you don’t care much about.)

Combine all the ingredients in a small bowl. Refrigerate at least an hour or longer. Taste for salt just before serving.

Read more...

Tuesday, January 19, 2010

Cooking For Others: Scrambling Eggs Again


EVENT:
Kate's Birthday Brunch; Winter Visit
VENUE: Salima's Apt, Flatiron; Whitney's Apt, London
PARTY SIZE: 12; 3
TYPE: Sunday Morning Girly Brunch
MENU: Creamy Mushroom Tartines with Chive Scrambled Eggs; Lemony Smoked Salmon Scramble

I’ve been cooking for others a lot lately, but for whatever reason, the occasions seem to have fallen more and more before the hour of 1 o’clock in the afternoon. And when faced with a crowd, large or small, after just having rolled out of bed, there’s nothing I would rather make than soft scrambled eggs.

My holiday season of scrambled eggs kicked off with the 2nd annual Santacon Pub Crawl morning pregame, the same winning menu as last year: breakfast burritos with all the fixings. This year, I added caramelized onions that I had slowly sautéed the night before, and the sweet, eggy result topped all previous incarnations. The following week, I found myself yet again rolling out of bed at noon and hauling my butt to Salima’s, where a bowl of precracked eggs, a hot skillet, and a group of hungry girls awaited me to celebrate my friend Kate’s birthday. In tow was a container full of creamy, buttery mushrooms that I would later slather on toasted rosemary bread and top with slow-scrambled chive and cheddar eggs (pictured above). The plates were licked clean in minutes, and it was apparent that the girls barely interrupted their eggasm to take a sip of mimosa in between bites. (Since this dish was such a success, we might feature it in the brunch chapter of the book—apologies for the suspense, but you’re going to have to wait for this one!)

Really, I find that it’s hard to not to please a crowd with perfectly scrambled eggs, fancy add-ins or not. And my favorite occasions of the past few weeks have been with rich, creamy eggs that have had barely any bells and whistles at all. For New Year's and the days surrounding, I crossed the pond to give Whitney a much belated visit. When I returned, people asked about my trip, about London, and most of all about what I ate. The truth is, I could have been eating my meals anywhere in the world: it was just Sophie, Whitney, and me holed up in Whitney’s flat, playing countless games of Bananagrams, and enjoying each other's company over the contents of the fridge, far from the damp, cold winter rain outside the slanted windows.


Our first morning together, Whitney greeted us in bed with three plates of steaming hot frittata with goat cheese and onion. To return the favor, the next day we crept into the kitchen, searched through her cupboards, and set a pan of scrambled eggs with tarragon and shallots over the flame. The three of us ate curled up in our pajamas listening to Diana Kroll. And again, come New Year’s morning, the three of us were curled up once more, this time with a plate of lemony eggs with smoked salmon and shallots, the tiles of Bananagrams in front of us, and some wailing jazz in the background.

You don’t need me to tell you how delicious scrambled eggs are, or that they can make humble ingredients shine and be whipped up leisurely over the stove, surrounded by company. But this is why I love them. And if you aren’t too sick of hearing it, I’ll happily creep into the New Year with the thought of 365 more days of scrambled eggs in front of me.

From my kitchen, where all I ever want are eggs, to yours,

Phoebe, THE QUARTER-LIFE COOK

**Recipe**

Lemony Smoked Salmon Scramble
Makes 3 servings

I don’t love the texture of smoked salmon once it is added to a pan and cooked—it somehow loses the delicate cured quality, and becomes more like regular old cooked salmon. BUT, I do love the combination with any type of egg. My trick here is to toss the smoked salmon, sprinkled with lemon, last minute with the finished eggs and serve immediately.

Ingredients
1 large shallot, thinly sliced
6 eggs, cracked and beaten
4 oz smoked salmon, torn into thin strips
½ lemon
1 tbsp chopped tarragon (optional)

In a medium non-stick skillet, sauté the shallot in 1 tablespoon of olive oil over medium heat until translucent and beginning to brown. Season the eggs with salt and pepper and pour them into the pan. Turn the heat down to low and slowly scramble, scraping up any congealed bits of egg from the bottom of the pan as they form.

In the meantime, squeeze the lemon juice over the strips of salmon in a medium serving bowl. Set aside.

When the eggs are almost finished, taste for seasoning, sprinkle with tarragon or another green herb (parsley or chives would also work well here), and pour into the serving bowl with the salmon. Toss gently to combine, sprinkle with a touch more lemon, and serve immediately with a toasted bagel or baguette.


Read more...

Saturday, January 16, 2010

Big Girls, Test Kitchen: Small Kitchen Chicken Soup

EVENT: New Year, New Cold
TYPE: Healing, Small Kitchen Friendly
MAIN INGREDIENT: Chicken Thighs

I didn't make any New Year's resolutions this year. I was too sick to: I woke up on the morning of Friday, January 1st with a throat that felt like it was closing in on me. This progressed, on January 2nd, to sinus pain and a headache, on January 3rd to a nose that wouldn't stop running, and on the 4th to a permanent feeling of having to sneeze but being unable to, with the result that my eyes just teared all the time. It was not the best conditions in which to start a new year.

On Monday, four days into the illness, I ran out of tissues. I went out to replenish my supply, and to treat myself to a fresh-squeezed orange juice. At the market, I wound up by the butcher, and recalling an earlier conversation with my sister Kate during which she'd suggested I make myself some soup, I grabbed a package of organic chicken thighs.

The soup I proceeded to make is not my mother's perfect chicken soup. It's not the flawless, cloudy stock you might see in a restaurant kitchen. I didn't even use a whole chicken. This was because the market didn't have one, of course, but I was ultimately pretty glad. There was much less chicken detritus, but not much less taste, because I supplemented the ordinary "boil for hours" technique with "brown and then boil" and it made a world of difference. In other words, instead of extracting flavor from a whole chicken, I extracted flavor from chicken parts browned in oil, and from carrots, celery, onions, and garlic, also slightly caramelized. Within an hour and a half of coming home from the market, I was eating truly flavorful soup. And the next day? I was all better. Which gave me the opportunity to play with my soup: I had it one day with chicken meat and rice, one day filled to the brim with chopped arugula and a squeeze of lemon juice, and one day filled to the brim with egg noodles.

From my kitchen, where chicken soup is better than penicillin, to yours,

Cara, THE QUARTER-LIFE COOK

**Recipe**


Small Kitchen Chicken Soup
Makes 7 cups

Ingredients
1 teaspoon olive oil
2 teaspoons canola oil
4 chicken thighs, about 1.5 pounds
1 onion, diced
3 small carrots, cut into thin rounds
3 stalks celery, cut in half lengthwise, then thinly sliced
5 cloves garlic, smashed

Heat the oil in a large Dutch oven over medium-high heat. When it's hot, add the chicken pieces. Let them sear for about 2 minutes on each side, then remove to a plate, being careful not to drip the juices.

Turn down the heat to medium-low and add the onions, cook for a minute or two, then add the carrots and celery. Saute the vegetables until they're slightly softened, about 5 minutes. Add the garlic, cook another minute, then add back in the chicken and 8 cups of water. Raise the heat to high, and stir to scrape off any brown bits that may have been left at the bottom. When the stock boils, try to spoon some of the foam off the top, then cook, mostly covered, for about 50 minutes.


Read more...

Wednesday, January 13, 2010

Recipe Flash: Kourabiedes

MENU TO HERALD IN A NEW YEAR: Merguez Sausage with French Lentils; Beet and Arugula Salad; Kourabiedes
ONE YEAR AGO: Celeriac Frittata

I'd been wanting to make these cookies for a while. In many ways, they're quite similar to the Snowballs, that confectioners sugar-coated ball of pecan goodness. Both cookies are based on nuts and flour, and both have a minimal amount of sugar in the dough; the sweetness comes from layers of confectioners sugar sifted over the cookies as soon as they are out of the oven. As soon as I began to read up on kourabiedes, I found this similarity wasn't that remarkable. There are numerous variations of this cookie, from many different cultures and related to all kinds of holidays and celebrations.

But kourabiedes, in particular, are meant for New Year's. With the spiciness of cloves and the soft citrus-y hint of cognac, these cookies crumble as you eat them in a way that, for whatever reason, must bode well for the year to come. I took my first stab at making them this week, and though I think I'll experiment with them in the months to come, I was excited about my attempt.

In other news, Phoebe and I have an extra BGSK calendar we're dying to give away to a reader before we get any further into 2010. It features 12 pictures of baked goods, most of which have been featured on the blog. Not to give too much away, but we made this cake the mouthwatering cover. For a chance to win the calendar, leave a comment about your most traumatizing cooking disaster. We'll choose randomly from those who participate and announce the lucky winner next week. Good luck!

From my kitchen, wishing you a sweet new year, to yours,

Cara, THE QUARTER-LIFE COOK

**Recipe**


Kourabiedes
Makes about 60 cookies

Ingredients
1 cup shortening
1/4 cup confectioners sugar
1 egg yolk
1 tablespoon brandy or cognac
pinch cloves
1/2 cup walnuts
2 1/2 cups flour

about 1 1/2 cups confectioners sugar for sifting over

Preheat the oven to 300°F

Grind the walnuts: combine the nuts and 2 tablespoons of flour in a food processer. Pulse until the nuts are finely ground, not pasty. Set aside.

Beat butter and confectioners sugar for 1 minute, until fluffy. Add the egg yolk, brandy, and clove. Beat in remaining flour and walnuts just until mixed--don't overmix.

Shape a scant tablespoon of dough in a ball. Flatten it out and elongate the ends slightly. Set on a parchment-lined baking sheet. Bake 12-16 minutes, until the cookies firm but colored only on the bottom. Remove the tray and set it on a rack.

Sift a coat of confectioners sugar all over the hot cookies. Let cool for about 15 minutes, then add a second coat of sugar. Let cool completely. Keep in an airtight container.

Read more...

Monday, January 11, 2010

Cooking For Others: Blog Meets Book Celebration

EVENT: Book Deal and Blog 1 Year Anniversary Party
VENUE: Phoebe's Apartment, Flatiron
PARTY SIZE: 50-75
TYPE: Classy Weekend Rager
MENU: Jonestown Punch; Coconut Three-Layer Cake; Raspberry Cake with Peanut Butter Frosting; Sun Chips

We've never been the type to shy away from real parties, virtual as our blog may be. We hosted a big fete, with dips for guests' sustenance, back in March and called it our Launch Party. It was on a Thursday night in the living room of Phoebe's apartment, and it was crowded, loud, and fun.

When we found out we'd been made an offer for our book, our first thought, after "yay!!!!" was, "when should we have the We Have a Book Deal Party?" We wound up putting it off a few weeks, since our third thought was, "Uh oh, we have to write a book," but eventually we decided it was time. Otherwise we'd have to wait until after the holiday season and new year's, and we didn't have that kind of patience (not to mention that, now that it's January we really have to write the book). So we scheduled a Friday night cake-and-punch affair and opened up the flood gates (via Paperless Post) for our friends' attendance.

For the cakes, we discussed and debated until we landed on two winning choices: 1) a festive, albino coconut cake, and 2) a yellow cake punctuated with raspberries and covered in peanut butter buttercream, inspired by the cupcakes at Jordana's birthday a few weeks before. The PB&J cake's main rival for the coveted position of book party dessert #2 was a coffee-toffee ice cream cake, but we were eventually convinced of the insane impracticality of this idea.

For the punch, however, we sought expert advice. Phoebe asked her dear friend Anna's boyfriend, who consults for upscale bars, for the perfect "classy" party beverage, and he emailed us a punch recipe, along with the wisdom that punch is derived from the Hindu word for 5 (pronounced Paunch) and must contain 5 basic ingredients. Alcohol. Bitters. Sweet. Sour. Tea. Who knew!

For our party, he determined we should mix bourbon with orange bitters, simple syrup flavored with red zinger tea, lemon juice, and apricot brandy. We aimed to follow his directions to the letter, but then a budget-saving trip to BJ's had us dumbing down the ingredient list with Jim Beam instead of fancier booze and bottled lemon juice rather than tons and tons of fresh. Arguably, these substitutions eliminated the classy element of the cocktail altogether...

Friends came, went, opened bottle upon bottle of champagne in our honor. At the end, with mere slices of the cakes and none of the punch left, we decided to seal the deal. Somewhere around 1:30am, like newlyweds, we fed each other cake from our bare hands.

From our kitchen, cake-filled and writing-focused, to yours,

Cara and Phoebe, THE QUARTER-LIFE COOKS

**Recipes**


Jonestown Punch, BGSK Style
Makes 1 large bowl (or bucket)

Jason's recipe called for some premium liquors, and I'm sure he would be horrified at our poor-gal's excuse for Jonestown Punch. The actual cocktail, which is served at The Violet Hour in Chicago, has many nuances. Ours may not have been as complex or refined with the budget liquors and bottled lemon juice, but our crowd didn't seem to be any wiser.

Ingredients
10 cups Jim Beam (or other reasonably priced bourbon)
3.5 cup Fresh Lemon Juice (or bottled…let’s be real)
2.50 cup Zinger Syrup (recipe follows)
1.25 cup Apricot Brandy2 tbsp Regan's Orange Bitters (hard to locate…but it’s worth it!)

Garnish with sliced lemons (or oranges, Phoebe doesn’t do those though) and grated cinnamon.

Coconut Cake
Makes 1 rich two-layer cake

For the Cake Layers:
Loosely adapted from The Sweeter Side of Amy's Bread

Ingredients
3 1/3 cups flour
1 tablespoon baking powder
3/4 teaspoon baking soda
1/4 teaspoon salt
1 cup coconut milk
1/2 cup cream
1 teaspoon vanilla extract
1 1/2 sticks softened butter
2 cups sugar
4 large eggs

Preheat the oven to 350°F. Grease two cake pans and line the bottom with a circle you've cut out of parchment paper. (If, like me, you own only one pan, you'll have to bake in two separate steps. Use a measuring cup to wind up with even layers.)

In one bowl, mix the flour, powder, soda, and salt until combined.

In another bowl, whisk together the coconut milk, cream, and vanilla.

Then, cream the butter and sugar until it's light and fluffy. This takes about 3 minutes in an electric mixer, 5 in a handheld, and just about forever if you're working by hand. Add the eggs one at a time, beating well after each addition.

On a lower speed, add 1/3 of the flour mixture to the batter. Then add half the milk mixture. Repeat with the flour, milk, and flour again. Between each, you should stir only to just combine. Don't worry if the batter is thick--just don't overmix.

Divide the cake batter between the two pans, or, if you're working with one pan, divide it cup by cup between the pan and a second mixing bowl, making sure you ens up with even amounts. The pans should be about 2/3 cups full.

Bake for 40 minutes until the tops are golden and a toothpick inserted comes out clean.

Cool the cakes in the pan for 10 minutes, then carefully remove to a rack to cool completely.

For Icing and Serving:

12 ounces cream cheese, at room temperature
2 sticks butter, softened
1 teaspoon vanilla extract
3 cups powdered sugar, sifted

about 2 cups sweetened, shredded coconut

Combine the cream cheese, butter, vanilla, and sugar in a bowl. Mix to combine very well and keep mixing until the icing is creamy.

Arrange the first cake layer on a serving plate. Put a big scoop of icing in the middle, then use an offset spatula or knife to spread it evenly around. If the layers are at all uneven, this is your chance to use icing to level them out. Place the second layer, top side down, on top of the icing. Use the remaining icing to frost the top and sides, then, using your hand, press the shredded coconut into the icing all around the top and sides. Serve within a few hours; otherwise refrigerate. (Phoebe and I know, from sticking our forks into the leftovers at a lunch meeting, that this cake tastes amazing cold.)

Raspberry Cake with Peanut Butter Frosting
Adapted from Rose's Heavenly Cake
Makes 1 two-layer cake

This cake is really cool because the raspberries cooked in the middle of each layer make it resemble a four-layer cake when you've only made two.

For the cake:

Ingredients
4 large eggs, at room temperature
1 1/3 cup sour cream, divided
2 teaspoons vanilla extract
3 1/2 cups flour
2 cups sugar
1 teaspoon baking powder
1 teaspoon baking soda
1 teaspoon salt
2 sticks at soft room temperature
about 1 1/2 cup frozen organic raspberries

Preheat the oven to 350°F. Prepare a cake pan (or two if you have them!) by buttering it and lining the bottom with a circle of parchment.

Whisk the eggs with 3 tablespoons of the sour cream and the vanilla.

In a separate bowl--the bowl of a stand mixer if you have one--whisk together the flour, sugar, baking powder, soda, and salt. Add the butter, cut into rough tablespoon-sized chunks, and the remaining sour cream, and, using your hand-held mixer or your very strong arm if you don't have a stand mixer, beat this together for nearly two minutes. It will be quite creamy. Pour in the egg mixture in two parts, beating for nearly a minute after each.

Pour just over 1/4 of the batter into a pan you've prepared--this will be about 2 cups. Arrange half of the raspberries evenly about, then pour about 1 more cup (so you'll have used half the batter in total) on top, covering the raspberries. Repeat for the remaining pan. It may help with evenness to divide the batter into two separate bowls before proceeding with putting the batter and the raspberries in the cake pans.

Bake for 30-40 minutes, until a toothpick stuck in comes out clean and the cake springs back when you touch the top.

Cool completely before frosting.

For the Peanut Butter Buttercream and Assembly:

Ingredients
1 cup smooth peanut butter, at room temperature
1cup cream cheese, at room temperature
1 stick (1/2 cup) butter, at room temp
1 1/2 tablespoons sour cream
1 1/4 cups powdered sugar
2 teaspoons vanilla extract

3/4 cup fresh raspberries

In a food processor, beat all the ingredients until very smooth and uniform in color. You can store the buttercream in the fridge, but use it at cold room temperature. It goes on very smoothly with a knife if, like me, you're not into piping.

Place one layer on a serving platter. Spread a thick layer of buttercream across. Carefully place the second layer, top side down, on the buttercream. Use the remaining to ice the top and sides. Arrange the fresh raspberries around the top edge of the cake.


Read more...

Saturday, January 9, 2010

Baking For Others: Cookie Contest Redux


DISH: Brutti Ma Buoni Cookies
TYPE: Recipe Investigation
MAIN INGREDIENTS: Hazelnuts, Almonds, Egg Whites

During our exciting cookie giveaway contest in November, among the many suggestions for dream cookies, we received a challenge in the comments section of our post about classic chocolate chip. The issuer was Sara, a long-time loyal reader, not to mention the inventor of New Favorite Tofu. She told us about the Italian nut cookies called brutti ma buoni, which she eats at a Fort Greene Italian restaurant. At Locanda Vino et Olii, she claims, the brutti ma buoni are better than any version she's tried in Italy. "How about if I buy you a cookie from Locanda and you figure out how to make it?" she wrote.

A month and a half later, true to her word, Sara drove by my apartment and dropped off a metal takeout tin. Inside were four light brown lumps with rough tops. I peeked inside. "They're beautiful," I said. "Well they're really not," she said. She was right. Brutti ma buoni means "ugly but good" in Italian, and I guess these are relatively ugly cookies, at least until you know what they taste like. Then, as it should, inner beauty wins out.

ugly!

Although brutti are made with the ingredients of any old meringue cookie, they have a different texture than your run-of-the-mill crumbly cloud of egg white. They are chewy, as though the almond in the batter has morphed into marzipan, and they are deeply, resonantly flavorful. I could see why their recipe was a bit of a mystery though, as I had no real idea what created either texture or flavor.

My investigation started with google images: my theory was that if I could find a picture that resembled the cookies Sara had given me, then I'd be on the right track. This approach actually worked. The website I found was in Italian, though, its measurements in grams, and even after google translation, it was just barely legible ("Shelled the almonds and allow to burn for a while"). It did assure me of one procedure I hadn't yet heard of, in relation to these or any cookies: after whipping up egg whites with sugar and adding the nuts, the batter gets cooked for half an hour on top of the stove before being dropped into cookie portions and baked. A few more googles confirmed that while some cooks simply drop the whipped, sugared egg white into the oven to bake, the more authentic approach seemed to rely on this odd half hour of sauteing.

I read a few more recipes, morphing their proportions, ingredients, and cooking times into my own, and then I got going. I worked next to the cookies from Sara, as though they'd somehow cough up their secrets, provide me with some luck, or at least be there for comparison. Just to make sure the pre-cooking was necessary, I baked one cookie just after beating the eggs and folding in the nuts and sugar. The result was definitely ugly, but though its taste was faithful to the original, its texture was light, chalky, and crumby, like that of a meringue. No dice.

However, the cookies I baked after the pre-cooking: these were good. They had a much richer taste, I guess from the caramelizing of some of the sugar, and they were dense. But they still seemed a little too crunchy, a result, I determined, of their small size. When I increased each cookie's load by about threefold, I was rewarded with big ugly mounds that smelled delicious, were dense in texture and had just the flavor I'd set out to create.

the whole cookie experiment

I tested them once more for good measure, and then I shared the new recipe with Sara. At first she seemed dismayed at the numerous steps and figured she'd just as soon buy future cookies from the restaurant. But then she made them at home--tweaking as she went, and realizing that many parts could be done in advance--and she wrote back apparently happy and satisfied.

From my kitchen, where true beauty is in the taste, to yours,

Cara, THE QUARTER-LIFE COOK

**Recipe**

Brutti Ma Buoni
Makes 12 large cookies

It's important to keep the almonds and the hazelnuts separate when toasting them, since you'll be grinding them to different consistencies. You can use separate trays, or toast them at two different times if you'd like. Watch them carefully: you really don't want them to burn.

Ingredients
1 cup slivered, blanched almonds
1 cup raw hazelnuts
2 tablespoons powdered sugar
1 cup minus 2 tablespoons sugar
3 egg whites
1 teaspoon natural-process cocoa powder
1 teaspoon vanilla extract

Preheat the oven to 325°F. Toast the hazelnuts for 3-4 minutes, then add the almonds to the other side of the tray and toast another 3-4 minutes, until both nuts are fragrant and just slightly gold. (it’s harder to see when the hazelnuts are done, but they should be fragrant and if you taste one it’ll have a much richer flavor than when raw.) Keeping the nuts separate, remove to two plates and set them in the freezer to cool.


When the nuts are cool, peel the hazelnuts by rubbing them between your fingers. The toasted skins will usually fall off quite easily; don't worry about any that remain on.

Combine the almonds and 1 tablespoon of powdered sugar in a food processor. Pulse to grind finely, making sure that the nuts don’t become oily or butter-y (the powdered sugar helps with this). Remove to a bowl. Add the hazelnuts to the processor with the remaining tablespoon of powdered sugar.
coarsely chopped hazelnuts (left); ground almonds (right)

Pulse to chop coarsely—these should be larger than the ground almonds, though it's fine if some of the hazelnuts grow quite powdery. Pour into the bowl with the other ground nuts.

Put the egg whites into a bowl and whip them until they hold soft peaks. Add the sugar slowly, while continuing to beat for another thirty seconds or so (with a handheld mixer). By then, the eggs should be quite firm and somewhat smooth/silken.

Fold in the nuts, cocoa powder, and vanilla extract.

the batter, before cooking

Turn the batter into a large, heavy-bottomed stock pot. Over the lowest heat, cook it, stirring frequently but not constantly, for 15-20 minutes. (Use a pan that cleans up easily—the egg whites and sugar do grow sticky during this.) As you cook, the batter will deflate and grow more molasses-y. It will also darken in color. When it is fragrant and hot to the touch, remove from the burner. Let the batter rest for about 15 minutes.

the batter, after cooking

While you're cooking the batter, preheat the oven to 315°F (or turn it down if you left it on from the nut toasting). Using two spoons, heap mounds of batter the size of 2.5 tablespoons on the baking sheet. Bake for about 30 minutes, until the tops look dried out and the cookies are firm but not browned. Cool completely. These keep for days in an airtight container.

Read more...

Thursday, January 7, 2010

Cooking For One: Sitcom Risotto

DISH: Beet Risotto
TYPE: Weeknight Dinner in front of the TV
MAIN INGREDIENTS: Beets, Rice

We love risotto here at BGSK. Our most notable mention of the dish was when it took the spotlight as foolproof first date fare for my friend Dave and his non-meat-eating date. But in addition to being a show-stopping deal-sealer, risotto is also the perfect vehicle for pantry items and leftovers, and though it takes more time to make than a quick Fried Rice, I also find it to be the perfect thing to whip up when I am spending a quiet evening by myself.

Risotto gets a bad rap for requiring a lot of attention and effort. But really, you can leave it alone more than you would think. After the rice starts to get going, I usually put on the TV to catch up on my shows. I’ll add a cup full of stock, keep the heat very low, then enjoy the first few minutes of my program on the couch while sipping the rest of the bottle of wine I opened for the risotto. When the commercial comes, I head back over to the pot, give it a stir, add some more broth, and head back to my show. If you cook your risotto low and slow like this, the timing works perfectly with whatever sitcom you want to watch in the meantime. At the end of 30 minutes, the rice is usually ready, and you can begin the next show, while trying not to choke on your risotto in between punch lines.

A few weeks back, I had one of these sitcom risotto nights. I know you’re probably getting sick of my beet recipes by now, but go figure, that’s just what I had on hand. I also had some smoked mozzarella and arugula leftover from these pizzettes. And since I had already made Pink Greens earlier in the week with the tops of my beets, I thought the arugula would be a great addition to balance the richness of the dish and add some great color.

When I cook for one, I usually end up making enough for my roommate as well, should she return in time from work to join me, and even if she doesn’t, I am always more than happy to eat the leftovers for lunch the next day. On this particular occasion though, I was in a rather gluttonous mood. After all, I had a lot of 30 Rock to catch up on, and one bowl with one glass of wine didn’t seem to suffice. I ended up eating the second helping directly out of the pot and, after I had sucked down the remainder of the wine, I was holding my stomach in overly satiated pain, trying not to laugh so hard at Tracy Morgan that I lost my supper.

When Caitlyn came home, I was asleep on the couch with pink hands and mouth, empty pot and plate, looking as peaceful as a toddler after too many juice boxes.

From my kitchen, laughing and stirring in tandem, to yours,

Phoebe, THE QUARTER-LIFE COOK
**Recipe**

Beet Risotto
Makes 2 servings

As I said, you can really use whatever you have on hand for risottos. If using a woodier green like beet greens, chard, or kale, mix it in earlier than I do with the arugula so it has proper time to wilt.

Ingredients

2 shallots, sliced
2 garlic cloves, sliced
2 tbsp minced fresh ginger
¾ cup Arborio rice
1 cup dry white wine
3 cups chicken or vegetable stock
2 large roasted beets (for preparation, see here)
1 tbsp chopped fresh parsley
2 tbsp parmesan shavings
2 tbsp grated smoked mozzarella (optional)
1 cup chopped arugula (optional)

Coat a dutch oven or deep sauté pan with olive oil, and cook the shallot, garlic, and ginger until fragrant and beginning to brown, about 4 minutes. Add the rice and continue to cook for another few minutes so the grains are covered in oil and beginning to toast. Add ½ tsp of salt and the wine and cook, stirring, until nearly evaporated, about 1 minute. Return the heat to medium, and add 1 cup of stock, stirring occasionally until the rice has absorbed the liquid.

Turn the heat down to medium-low and continue adding the stock to the pot in ½ cup portions, stirring occasionally until each batch is absorbed before adding more. You don’t need to be constantly stirring, but you also want to make sure that the rice does not stick to the bottom of the pan. When the liquids are almost absorbed, add the next ½ cup of stock and repeat. During this time, if the liquids have absorbed, don’t be shy in adding more stock. This is not a precise science, it may end up being more or less than 3 cups total.

In the meantime, puree one of the beets and ½ cup of stock in a food processor until blended. Coarsely chop the remaining beet, and set aside.

Once the stock is almost gone, and the risotto has only a slight bite to it, add the beet mixture. When the risotto is almost done, add the chopped beets and the arugula and cook until the leaves are wilted. Top with mozzarella and/or parmesan, and sprinkle with parsley. Serve immediately. Best if enjoyed in front of the television, with a bottle of wine.


Read more...

Wednesday, January 6, 2010

Recipe Flash: Scrambled Eggs & Caramelized Onions

BRUNCH MENU: Spinach Hash Browns; Crusty Bread; Apple Walnut Cake

I'm always inclined to warm the random contents of my fridge in a skillet, top them with rich scrambled eggs, and call it lunch. Sometimes I'm more impressed than others by the combination frugality and fate has willed upon me. This particular experiment yielded one of those dishes. I had some leftover caramelized onions from the Sexy-Ugly Tart we made for our first catering gig, and smoked gouda from this brunch I made for Cara. The result was a simple, delicious revelation. One that is definitely worth making on purpose. Especially, on a lazy afternoon in early 2010, when we are still upholding our resolutions to stay in, cook more, and spend less money.

From my kitchen, albeit small, to yours,

Phoebe, THE QUARTER-LIFE COOK

**Recipe**

Scrambled Eggs with Caramelized Onion, Arugula, and Smoked Gouda
Makes 2 servings

Ingredients

4 eggs, scrambled
1 small sweet onion, thinly sliced
1 cup tightly packed baby arugula leaves
1/2 cup shredded smoked gouda
salt
red pepper

Coat a medium non-stick skillet with a thin layer of olive oil, and sauté the onions over a medium flame, stirring very infrequently. Once they soften and begin to brown on each side, return the flame to low and allow to slowly caramelize. During this time, it is important to make sure the onions are spread as evenly as possible across the pan. Every few minutes, scrape the bottom and redistribute the onions so each gains the maximum amount of surface area. The intention is to slowly crisp the onions by enticing the remaining liquids to sweat out, and for the onions to sweeten by condensing in their own juices. If you stir too often, the onions will turn to mush. This process takes about 20 minutes. This can also be done up to a week in advance and kept in the fridge.

Turn the heat to low, push the onions to the side of the pan, and pour the eggs in the middle. Slowly scramble, scooping up the partially cooked pieces from the bottom and redistributing the raw egg. When the egg is almost entirely cooked, add the arugula and the cheese, salt, and red pepper. Stir to combine and cook for another minute or so until the eggs are cooked, but not overdone. Serve immediately.


Read more...

Monday, January 4, 2010

Big Girls, Global Kitchen: Chana Bateta

EVENT: A Taste of India
VENUE: Cara's Apartment, Park Slope
PARTY SIZE: 2
TYPE: In-from-the-cold Weeknight Dinner
MENU: Chana Bateta; Spinach Paratha; Sauteed Corn with Mustard Seeds; White Basmati

This post might seem like it's about cooking an Indian vegetarian feast that's perfect for winter nights. But it's really about the odd powers of twitter to educate you when you least expect it.

The real story goes something like this: I'd been reading a stolen (from my mom, with her knowledge) version of a really lovely little cookbook called 5 Spices, 50 Dishes, by Ruta Kahate. The premise is that if you own black mustard seeds, cayenne pepper, cumin, coriander, and turmeric, you will have quite a broad range of simple Indian dinners at your fingertips. (You'll also need serrano chiles at your fingertips to proceed.) But the reason I was reading the book, not cooking from it, was because of these spices, I had only two: coriander and turmeric. When Alex sweetly suggested he replenish my spice collection, as part of his gratitude at my feeding him, I quickly made him a wish list. Suddenly, everything in the book was just waiting to be cooked.

I started with two coconut curries for a dinner party last week, and I found that after the first--shrimp with eggplant--I got the gist of cooking with these spices. This seems, after all, to be what the book is all about. So as I moved onto the second--meatballs in a masala sauce--I began to improvise. Chicken instead of lamb, a little less coconut so as not to overwhelm the flavors of the spices, a bit of sugar to bring out the tomatoes. Before I knew it, I had created a sauce that tasted not unlike the sauce from chicken masala, only with coconut milk instead of yogurt or cream.

On the Monday after the snowy, pre-Christmas weekend, I was feeling thoroughly chilled, as though I needed to be heated from the inside out. Beyond that, my body felt exhausted, wanting nourishment and craving peasant food like chickpeas and potatoes. I started to wonder about how this new masala-ish sauce would taste coating beans and potatoes. Good, I thought, and I started in. When the first smells of spice started to permeate the apartment, delighted, I turned to twitter. This was a creation our followers ought to have a clue about before it appeared on the blog.

Home from Christmas shopping, I wrote. Making Spinach Paratha and Corn with Mustard Seeds to go with Chickpea-Potato Masala. Good cold weather food.

Refreshing the page, I found that our friend (like someone we actually know) had tweeted back:

@BGSK Chick pea potato masala... Also known as "chana bateta" YUM!

The dish of my fantasies already existed. How...odd.

As for the rest of the meal: my dear little sister, Kate, typed up the recipe for Saag Paratha that I've loved ever since my mom and I took an Indian Bread course at ICE about a decade ago. We keep it in a binder at my mom's house, but I didn't have it on me. And then I turned to my new go-to, 5 Spices, 50 Dishes to complete the meal with a simplified version of the already quite simple Corn with Mustard Seeds. It was warming, spicy, and satisfying.

From my kitchen, where 5 spices and 1 tweet can create Indian magic, to yours,

Cara, THE QUARTER-LIFE COOK

**Recipes**

Chana Bateta
Serves 2

Ingredients
1/2 cup diced tomatoes
1 tablespoon tomato paste
1 1/2 tablespoons vegetable oil
1/2 teaspoon mustard seeds (black or brown, not yellow)
2 shallots, sliced
3 large cloves garlic, minced
1 tablespoon minced ginger
1 teaspoon cumin
1 1/2 teaspoons coriander
1/4 teaspoon cayenne, or more to taste
1/3 cup coconut milk
1 teaspoon salt
1 teaspoon sugar
2 large Yukon Gold potatoes (about 7 ounces), cut into an approximate 1 1/2" dice.
1 can chickpeas
2 tablespoons finely chopped cilantro, plus a few springs for garnish
1 teaspoon white wine vinegar

Combine the diced tomatoes and tomato paste in a mini food processor and process until smooth. Set aside.

Heat the oil over high heat in a large cast iron pan until smoking. Add the mustard seeds and cover immediately, and wait til they stop popping (15 seconds). Turn the heat to medium and add the shallots, garlic, and ginger. Cook for about 5 minutes, stirring nearly constantly, until the shallots are quite golden. Add the cumin, coriander, and cayenne, and cook for another minute or so, to toast the spices. Pour in the pureed tomato, and cook down for 3-4 minutes. It should be reduced to an almost paste-like consistency.

Pour in the coconut milk and the salt and sugar and bring to a boil. Add the potatoes and return to a boil, then turn the heat to low and cover the pan. Cook until the potatoes are soft--easily pierced with a knife--then uncover and add the chickpeas with some of the liquid from the can. Cook for 5 or 10 minutes, until heated through. Add the cilantro and cook a minute more.

This tastes best made ahead, so if you have time, cool it, then transfer to the fridge until ready to eat. Then reheat until piping hot, add the vinegar, stir to distribute, and serve, garnished with fresh cilantro.

Saag Paratha
Makes 4 breads

Ingredients
3/4 cups whole wheat flour
1/4 cup plus 2 tablespoons all purpose flour
1/2 teaspoon whole cumin seeds
3/4 teaspoon salt
1/2 cooked spinach, drained well (frozen is fine, just microwave to defrost, then press out all the water)
1/4 teaspoon red pepper flakes
1 tablespoon olive oil
2 tablespoons water, or more as needed
flour for dusting
1 stick butter or 1/3 cup oil in a bowl with a brush for cooking

Put both flours, cumin, salt, spinach, chiles flakes, and oil in a large shallow bowl or the bowl of a food processor. Add the water in a stream, and process or mix as the dough begins to crumble together together. Gather the dough and knead for a minute or two, dusting with flour if it sticks. Cover and set aside for 30 minutes.

Divide dough into 4 equal portions. Working with one at a time, place one ball, lightly dusted with flour on work board. Roll the dough into a 6-inch circle, dusting often to prevent sticking.
Brush top with oil and fold the circle in half. Brush the top of the half circle with more oil. Fold again to make a triangle. Dust with flour and use the rolling pin to stretch it into a 7-inch triangle. Roll all the breads the same way and keep them covered with plastic wrap.

Heat a large frying or cast-iron pan over high heat until hot. Add one bread, and reduce heat slightly. Cook until the underside of the bread is spotted, about 2 minutes, then turn and cook the other side the same way. Meanwhile, brush the baked side with oil or take a stick of butter and run it across the hot surface. Flip the bread. Brush the second baked side with oil or repeat the buttering, and flip the bread again. Cook bread until nicely fried and brown. Remove and keep warm in the oven as you cook the remaining rolled breads the same way.


Corn with Mustard Seeds
Serves 1-2
Adapted from 5 Spices, 50 Dishes

Garnish this with a tablespoon or two of finely chopped cilantro if you have it.

Ingredients
1 tablespoon oil
1/2 teaspoon mustard seeds
1 cup corn (frozen is fine in winter, just defrost it)
1/4 teaspoon turmeric
1/4 teaspoon salt

In a skillet, heat the oil over high heat until smoking. Add the mustard seeds and cover immediately. Cook until the seeds stop popping, about 15 seconds. Lower the heat and add the corn, turmeric, and salt. Cook until the corn is hot through.


Read more...