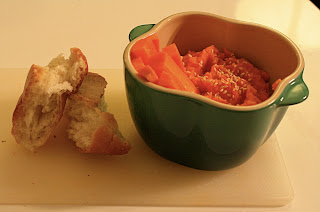
DISH: Potato and Cabbage Gratin; Vegetarian Pasta Carbonara
MAIN INGREDIENTS: Potato, Onion, Cabbage
TYPE: Wintry and hearty
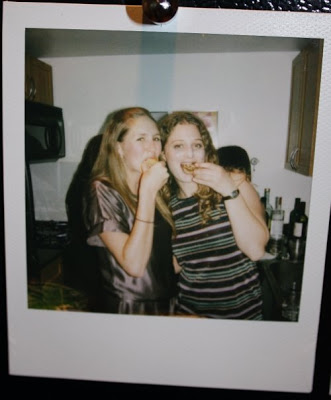
It is evident that Phoebe and I should spend more time on g-chat. Below, our inspiring what-on-earth-do-I-make-with-what-I-have conversation (edited for idiocy, digression, and capitalization):
me: and now I have an entire green cabbage in my fridge and I am trying to fathom what to do with it
Phoebe: oh I had a cracked out dream about this
me: about cabbage?
Phoebe: you order from this weekly farmers market that delivers all these super weird veggies to your door every Monday
me: a CSA!
wait that was your dream?
Phoebe: haha yes, that you did this
there were these weird red and orange potatoes that were covered in leaves
me: tell me more
I'll turn it into a dish
...
Phoebe: but as for cabbage, is it red or green?
me: it's green
Phoebe: hmm
me: which is not quite as fun to play with
Phoebe: slaw of sorts?
me: also there are turnips (to be expected)
and potatoes and carrots
...and that's pretty much it
Phoebe: wait, so were these delivered to you?
me: no no I purchased them
with my own money
@ the farmers market
Phoebe: ahhhh
of course
well why did you get green cabbage??
me: I like it!
it is very good sauteed in butter
with parm and pasta
 my thought bubble: (cabbage with butter, parm, and pasta)
true
me: it's just not the most exciting thing around
Phoebe: oooh or what about in a weird potato cabbage gratin
Eastern Europe meets France?
or I had an idea of an open-faced chickpea burgers with tahini slaw*
me: both sound great!
so for gratin, would you just cover in cheese? or make a bechamel-y thing?
Phoebe: maybe some paprika and/or other Hungarian spices?
prob a béchamel-y thing. but that’s your forte
From my computer, where I'm always talking about my next meal, to your kitchen,
Cara, THE QUARTER-LIFE COOK
*This too will come to fruition. Stay tuned.
**Recipes**
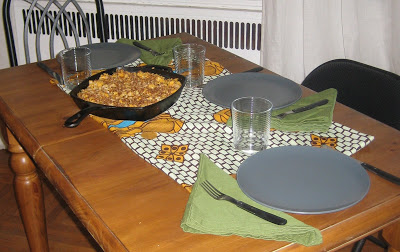
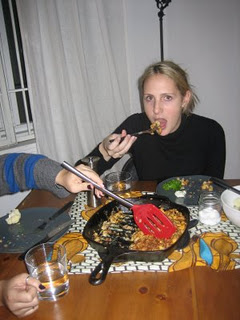
Potato and Cabbage Gratin serves 4
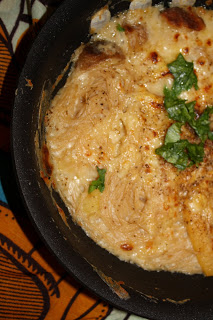
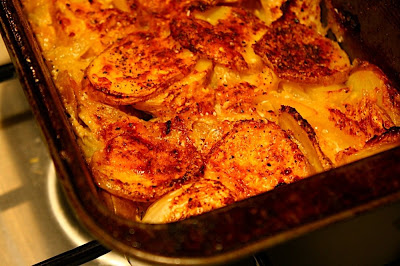
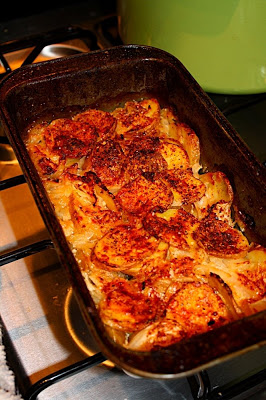 I don't think I'd ever made gratin before this one, probably mostly because the gooeyness of excessive heavy cream or bechamel always turned me off. What I ended up concocting is still plenty rich, but all I did was simmer potato slices in low-fat milk then pour them into the pan with the cheese. The idea, in retrospect, was to make the most of natural potato starch as a thickener. And, as per Phoebe's wise suggestion, I sprinkled some paprika over the top, confirming the Eastern European-ness of this invented dish.
Ingredients
2 cups Yukon Gold potatoes, sliced
1 cup low-fat milk
2 tablespoons white wine
1 tablespoon olive oil
1 teaspoon butter
1 small onion, thinly sliced
about 2 cups of green cabbage, sliced
1/2 teaspoon salt
1/2 cup grated Parmesan (really any) cheese
pepper to taste
dash of hot sauce
dash of paprika
Butter or oil a 9 x 5" baking pan, or use 4 individual ramekins. Preheat the oven to 400°F.
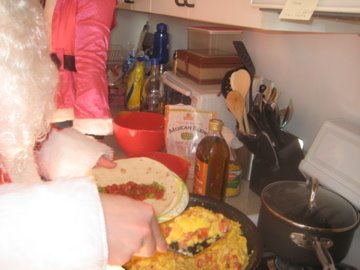
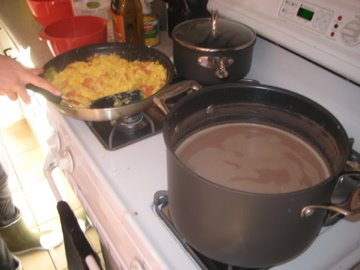
Melt the oil and butter in a saucepan over medium-low heat. Add the onions and cabbage and about 1/4 teaspoon of salt.
Meanwhile, put the milk, potatoes, white wine, another 1/4 teaspoon of salt, and several grinds of pepper into a small pot. Over medium heat, bring it to a simmer. Let it simmer, gently, for about 5 minutes while the cabbage cooks. Remove from heat; add a dab or two of hot sauce; pour into the prepared pan.
When the cabbage and onion are softened and slightly browned, add them to the potatoes in the pan. Sprinkle about half the cheese and mix it all together. Dust with the remaining cheese, a bit of paprika, and some more pepper.
Bake for about 45 minutes, until the potatoes on top are quite brown and the edges are crispy. Cool slightly before serving (with meat or fish, eggs, or a salad).
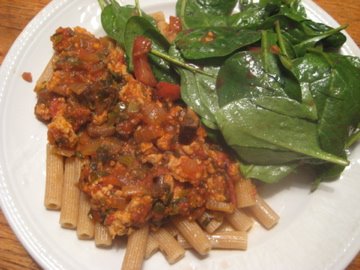
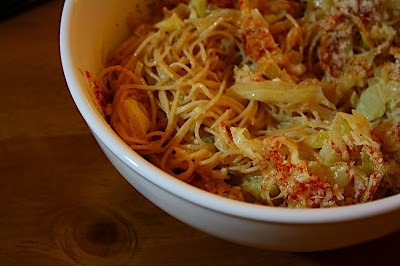
Vegetarian Pasta Carbonara
serves 2
Just as I'd never made gratin, I don't think I've ever really eaten Spaghetti Carbonara. It's made out of bacon, and it always just looked kind of gloppy. But I do have a predilection for dishes thickened with egg, which carbonara is.
My version uses a sweet sauteed cabbage-onion base just like the gratin, but the vegetables are then mixed with egg, cheese, and lots of salt and pepper to create a thick, rich sauce for noodles.
Ingredients
4-6 oz pasta (preferably spaghetti, linguine, fettucine, or angel hair)
1 egg
1/4 cup grated Parmesan
2 teaspoons butter
1 onion
2 cups thinly sliced green cabbage
1/4-1/2 teaspoon salt
fresh pepper
Bring a pot of salted water to boil for the pasta.
Combine the egg, 2 tablespoons of the Parmesan, salt to taste, and a few grinds of pepper in a small bowl. Set aside.
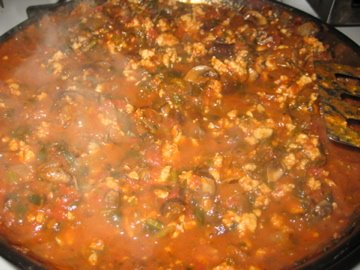
Melt the butter in a saucepan. Add the onions and cook over medium-low heat for about 5 minutes. Add the cabbage, and cook until soft and slightly browned, about 10-15 minutes.
When the cabbage is nearly done, cook the pasta to al dente. When it's nearly done, scoop out about 1/2 cup of pasta water. Add it slowly and while whisking to the egg-cheese mixture. Drain the pasta, reserving another 1/2 cup of pasta water. Quickly return the drained pasta to the cooking pot, pour in the egg, and heat, stirring constantly, for about a minute, over low heat. You want it to thicken but you want to make sure the egg doesn't curdle.
Add the egg and pasta to the cabbage and stir to combine. Sprinkle with the remaining Parmesan and serve immediately.
I don't think I'd ever made gratin before this one, probably mostly because the gooeyness of excessive heavy cream or bechamel always turned me off. What I ended up concocting is still plenty rich, but all I did was simmer potato slices in low-fat milk then pour them into the pan with the cheese. The idea, in retrospect, was to make the most of natural potato starch as a thickener. And, as per Phoebe's wise suggestion, I sprinkled some paprika over the top, confirming the Eastern European-ness of this invented dish.Ingredients
2 cups Yukon Gold potatoes, sliced
1 cup low-fat milk
2 tablespoons white wine
1 tablespoon olive oil
1 teaspoon butter
1 small onion, thinly sliced
about 2 cups of green cabbage, sliced
1/2 teaspoon salt
1/2 cup grated Parmesan (really any) cheese
pepper to taste
dash of hot sauce
dash of paprika
Butter or oil a 9 x 5" baking pan, or use 4 individual ramekins. Preheat the oven to 400°F.
Melt the oil and butter in a saucepan over medium-low heat. Add the onions and cabbage and about 1/4 teaspoon of salt.
Meanwhile, put the milk, potatoes, white wine, another 1/4 teaspoon of salt, and several grinds of pepper into a small pot. Over medium heat, bring it to a simmer. Let it simmer, gently, for about 5 minutes while the cabbage cooks. Remove from heat; add a dab or two of hot sauce; pour into the prepared pan.
When the cabbage and onion are softened and slightly browned, add them to the potatoes in the pan. Sprinkle about half the cheese and mix it all together. Dust with the remaining cheese, a bit of paprika, and some more pepper.
Bake for about 45 minutes, until the potatoes on top are quite brown and the edges are crispy. Cool slightly before serving (with meat or fish, eggs, or a salad).
Vegetarian Pasta Carbonara
serves 2
Just as I'd never made gratin, I don't think I've ever really eaten Spaghetti Carbonara. It's made out of bacon, and it always just looked kind of gloppy. But I do have a predilection for dishes thickened with egg, which carbonara is.
My version uses a sweet sauteed cabbage-onion base just like the gratin, but the vegetables are then mixed with egg, cheese, and lots of salt and pepper to create a thick, rich sauce for noodles.
Ingredients
4-6 oz pasta (preferably spaghetti, linguine, fettucine, or angel hair)
1 egg
1/4 cup grated Parmesan
2 teaspoons butter
1 onion
2 cups thinly sliced green cabbage
1/4-1/2 teaspoon salt
fresh pepper
Bring a pot of salted water to boil for the pasta.
Combine the egg, 2 tablespoons of the Parmesan, salt to taste, and a few grinds of pepper in a small bowl. Set aside.
Melt the butter in a saucepan. Add the onions and cook over medium-low heat for about 5 minutes. Add the cabbage, and cook until soft and slightly browned, about 10-15 minutes.
When the cabbage is nearly done, cook the pasta to al dente. When it's nearly done, scoop out about 1/2 cup of pasta water. Add it slowly and while whisking to the egg-cheese mixture. Drain the pasta, reserving another 1/2 cup of pasta water. Quickly return the drained pasta to the cooking pot, pour in the egg, and heat, stirring constantly, for about a minute, over low heat. You want it to thicken but you want to make sure the egg doesn't curdle.
Add the egg and pasta to the cabbage and stir to combine. Sprinkle with the remaining Parmesan and serve immediately.
Read more...