Pages

Saturday, May 29, 2010

Giveaway: Le Creuset Saute Pan [closed]

Many BGSK readers-to be are graduating from college just about now. Cara's sister Kate (aka the Best Commenter Ever), is taking the leap from college to real life this very Sunday.

In honor of her and the rest of the soon-to-be graduates, who in a matter of weeks will be stocking fridges and cabinets of their brand-new (to them) tiny kitchens, we're hosting a giveaway over this Memorial Day Weekend. The item up for grabs is this Le Creuset 28cm Large Stainless Steel Saute Pan. It's an awesome pan--enough surface area for frying, but also great for sauces and sautes that require a lid.

For a chance to win, we want to hear about the best best bare-bones meal you've ever made. The kind of dish that requires no kitchen, perhaps not even a microwave. The sort of food you made in a college dorm room, on the final night of a 10-night camping trip, on a hot plate, during a kitchen renovation, when your refrigerator failed you, or while you were sitting on the bench of a foreign city and had to forage for food at the nearest store.

Leave your comments below! We can't wait to hear your no-kitchen-necessary recipes and anecdotes.

From our kitchens, small but existent, to yours,

Cara and Phoebe, THE QUARTER-LIFE COOKS


Read more...

Thursday, May 27, 2010

Cooking For Others: My Noodle Obsession

EVENT: Dinner, anytime, anywhere
VENUE: Cara's apartment
PARTY SIZE: 2
TYPE: Simple, infinitely adaptable
MENU: Ginger Scallion Noodles with Pickled Cucumbers, Carrots, and a Fried Egg; Ginger Scallion Noodles with Pickled Carrots, Bok Choy, Grilled Eggplant, and Gomasio

The first time I tried Ginger Scallion sauce was the same night I was introduced to the Momofuku Pork Bo Ssam. The sauce is one of the many that arrives at your table and is meant to be piled on the rice-lettuce-pork wraps. The only problem with the array of sauces is that the rice-lettuce-pork wraps taste so ridiculously good on their own that it's hard to alter them with condiments. But I tasted the sauce on one or two of my wraps, and I was impressed. Then, at Noodle Bar, with the same Momofuku-pushing friends who'd introduced me to Bo Ssam, I ordered the Ginger Scallion Noodles and ate every last bite of a rather enormous serving.

As if my memory of this noodle bowl wasn't enough torture, I started seeing the recipe everywhere on the web. Ginger Scallion Sauce must have been one of the dishes David Chang was spreading to promote his cookbook, and suddenly it was ubiquitous. So I bookmarked it and, as I do with most of my bookmarks, ignored the fact that I had.

When I finally got around to making the noodles, I did it right. I got frozen ramen from one of the Japanese groceries downtown, and I quick-pickled some cucumbers in my colander. I can't remember if it was that or the second time that I even toasted some nori sheets to crumble on top. The point is, I've started making Ginger Scallion Noodles a lot for Alex and me--like it might have been two of the last few meals I've cooked for him--and I've started to venture away from the recommended serving ideas. For one, I've found that the noodles work totally well as good old-fashioned spaghetti. For another, that they're an excellent base for whatever ingredients need to be repurposed from the fridge or the pantry.

The noodles themselves are silky and deeply tasty, though the individual flavors of scallion and of ginger sort of melt away into a greater whole. They take well to practically any vegetable, protein, or seasoning sprinkled on top, though honestly you could also probably just eat a whole bowl of them plain. Best of all, the preparation is easy to streamline for a quick dinner. You start the water boiling at the same time that you grate the ginger and chop the scallions; then you let the sauce rest while you make whatever toppings you've chosen. By the time the noodles are drained, the sauce is ready, and you can eat right away.

From my kitchen, where ginger scallion noodles are becoming my go-to, to yours,

Cara, THE QUARTER-LIFE COOK

**Recipe**

Ginger Scallion Noodles
Serves 2
Adapted from Momofuku

Ingredients

1 1/2 - 2 cups thinly sliced scallions (greens and whites; from 1 large bunches)
1⁄3 cup grated peeled fresh ginger (from about a 5-inch piece of fresh ginger)
1⁄4 cup grapeseed or other neutral oil
1 1⁄2 teaspoons soy sauce
3⁄4 teaspoons rice wine vinegar
3⁄4 teaspoon kosher salt, or more to taste
12 ounces ramen, spaghetti, lo mein, or noodle of your choice

Mix together the scallions, ginger, oil, soy, vinegar, and salt in a bowl. Taste and check for salt, adding more if needed. Let rest at least 15 or 20 minutes.

Make the noodles according to package directions, boiling them in well-salted water. Drain, rinse with cold water to bring the noodles to room temperature, and drain again. Toss with the scallion ginger sauce and top with any of the below.

Grilled Eggplant

1 small eggplant
1 tablespoon kosher salt
1 tablespoon olive oil

Cut the eggplant into slices 1/3-inch thick. Toss in a colander with the kosher salt and allow to sit for 30 minutes to 1 hour. Pat the slices dry, then toss them with 1 tablespoon of olive oil to coat. Heat a cast-iron pan over medium-high heat for a few minutes, until hot. Add the eggplant in a single layer and cook for about 5 minutes per side, until cooked through. Repeat until you’ve used all the slices.


Picked Radishes, Carrots, or Cucumbers

To make quick-pickled vegetables, slice about 1 cup of any of the above. Put them in a colander with 1 tablespoon of salt for anywhere from 15 minutes to 1 hour. Rinse and squeeze out all the liquid. Then toss with 1-2 tablespoons of rice wine vinegar and 1/2-1 teaspoon sugar, tasting as you the vinegar/sugar.

Toasted Sesame Seeds, Gomasio, and Nanami Togarashi
Black Gomasio is a mix of black sesame seeds and salt. It's delicious sprinkled on top. Nanami Togarashi is a Japanese seven-spiece mixture that includes several kinds of chili peppers and is another great topping. To toast your own sesame seeds, pour 2 tablespoons into a small skillet. Cook over medium heat until golden and fragrant, keeping an eye on them to prevent burning.

Bok Choy

Clean and trim 4 heads of baby bok choy. Before you cook the pasta, submerge the bok choy in the salted, boiling water for about 3 minutes, until the leaves are limp and the white parts are cooked but still crunchy. Use tongs or a slotted spoon to fish them out, then drain while the pasta cooks.

Fried Egg
See directions here
.

Read more...

Wednesday, May 26, 2010

Recipe Flash: Sweet Pea & Crab Crostini

COCKTAIL PARTY MENU: Cilantro Succotash Quesadillas; Caprese Skewers; Corn Cakes with Lemon Chive Crème Fraiche; Jonestown Punch

Aside from the occasional crab cake (when someone else is paying), we rarely feature fancy ingredients like lump crab meat in our recipes. But in this case, the crab meat in question was for a birthday party we catered (on which more soon!). It was a special occasion and we wanted the food to match. Still, we tried to channel our usual frugality and stretch eight ounces of quality crab meat across as many possible pieces of crostini. To do this, I added chopped snap peas as extra bulk and to create a pleasant crunch to contrast with the creamy puree beneath.

Unfortunately, I also managed to make an extra 2 pounds of puree. Stay tuned for where this bowl of sweet peas ends up.

From my kitchen, albeit small, to yours,

Phoebe, THE QUARTER-LIFE COOK

**Recipe**


Sweet Pea & Crab Crostini
Makes about 30 crostini

1 tablespoon unsalted butter
1 small onion, diced
1 (16oz) bag frozen peas
¼ cup white wine
1 teaspoon salt
1 baguette, sliced and lightly toasted

For the crab:

1/2 cup fresh chopped chives
1 lemon, juiced
2 tablespoons mayonaisse
1 tablespoon dijon mustard
1/2 teaspoon honey
8oz lump crab meat
1/2 pound snap peas, stems removed, and finely sliced
salt to taste

In a large non-stick skillet, melt the butter and add the onions. Sauté the onions over medium-high heat until translucent and not yet brown, 5-10 minutes. Add the peas and white wine, and turn the heat to medium-low. When the peas have defrosted, transfer them to a blender or food processor. Blend until the peas are about the consistency of hummus. Taste for salt and correct as needed.

In a small mixing bowl, whisk together the chives, lemon juice, mayo, mustard, and honey. Add the crab and the snap peas an gently toss. Taste for seasoning and add salt as necessary (crab can be salty, so best to wait until the end to season it).

Scoop the pea puree onto toasted baguette rounds, and top with 1/2 tablespoon of the crab mixture.


Read more...

Monday, May 24, 2010

Cooking For Others: Backseat Sandwiches

EVENT: Matt's Birthday
VENUE: Phoebe's Parents' Car (Bobby), I-95
PARTY-SIZE: 5
TYPE: Friday Night Roadtrip (with lots of fun traffic)
MENU: Roast Beef Baguettes with Cider Onion Jam and Fennel Remoulade; Ancho Chicken Sandwiches with Avocado and Chipotle Mayonnaise; Friendship Crispy Treats

Over the course of the past year, most of my friends have been celebrating year 25, the great quarter-life birthday milestone, and making my life more festive than ever. For many, it was a matter of pulling out all the stops by returning to their roots; Salima brought back the blowout birthday weeks she's famous for, this time by taking the troops to Las Vegas; Cara got everyone to come out her mother’s house for a backyard BBQ; and Matt, instead of recruiting Caitlyn and me to recreate his old-school birthday glory in our apartment, gathered the whole college crew for a pilgrimage back to Rhode Island.

All thirty of us involved in this plan could not have been more excited. The only thing I was not looking forward to: leaving New York at 5pm on a Friday. My parents were nice enough to lend me their (aka, my former) car for the weekend, and to prevent my passengers from jumping out of the barely moving vehicle and beating me to Matt's cottage at a brisk walk I decided to make sandwiches for the road.

I had some leftover chipotle mayonnaise in the fridge, and that gave me the idea to make spicy chicken and avocado sandwiches to toast Matt's So-Cal roots. Then, as I was deciding between ciabatta and baguette in the bakery section, I realized I also had some Apple Cider Onion Jam to reappropriate, so I grabbed half a pound of roast beef on my way out, and decided to get both loaves.

When I got home, Cara was there for our weekly meeting. We talked about some quick book stuff as I got to work pan-searing chicken thighs. As she watched me start slicing open the two loaves of bread, Cara asked how many people I was planning on fitting in the car. Then I asked her to help me on another portion of the meal: the Rice Crispy Treats.


Beginning with the Cara-shaped Rice Crispy Treat I made for her 25th birthday, the friendship crispy treat has become my official quarter-life birthday cake. Matt’s name turned out to me a lot easier than Cara’s (no curvy letters), but that didn’t mean it rendered any fewer scraps for us to eat on the road, which I fed to the birthday boy and the rest of my passengers after the sandwiches and the New York state border were long gone.

From my kitchen, where back-to-back sandwiches make bumper-to-bumper traffic bearable, to yours,

Phoebe, THE QUARTER-LIFE COOK

**Recipes**

Ancho Chicken Sandwiches with Avocado and Chipotle Mayonnaise
Makes 4 sandwiches

If you don't want the hassle of making chicken for this recipe, you can use store-bought rotisserie chicken or sliced turkey. However, making your own chicken thighs is definitely the cheaper route ($5/lb vs $9 for sliced turkey!) and the marinade really makes this sandwich a keeper.

Ingredients
1 tablespoon ancho chili powder (or any chili powder you have on hand)
1 lime
1 tbsp Dijon mustard
1 tbsp olive oil
1 tsp salt
1 lb boneless skinless chicken thighs
1 ciabatta
1 avocado, sliced
1/2 cup chipotle mayonnaise (recipe follows)

In a mixing bowl, combine the chili powder, juice of ½ a lime, mustard, oil and salt. Add the chicken and toss until coated in the marinade. Place a nonstick or cast-iron skillet over high heat and brown the chicken in batches. Remove to a plate and allow to rest for 5-10 minutes.

In the meantime, cut the ciabatta in half lengthwise and toast under the broiler on a cookie sheet for a minute or two, until the bread is crusty, but not yet beginning to brown.

Slather both sides of the bread with chipotle mayonnaise. Cut the chicken into strips and arrange them on top of the bottom half of bread. Add a layer of avocado, squeeze the remaining lime juice over the top, and sandwich together.

Chipotle Mayo

Ingredients
½ cup mayonnaise
1 chipotle chili in adobo sauce
1 tbsp adobo sauce (from the can)
1/2 lime, juiced

Mix all the ingredients together. This can be done up to a week in advance and kept refrigerated.


Roast Beef Baguettes with Cider Onion Jam and Fennel Remoulade
Makes 4 sandwiches

The parts of this sandwich sound fancy and complicated, but the sum really is not. Each can be made up to a week in advance and used for a variety of different dishes, not just this sandwich.

Ingredients
1 baguette
¼ cup mayonnaise
1 tablespoon Dijon mustard
1 tablespoon lemon juice
½ teaspoon salt
1 small fennel bulb, heart and outer leaves removed, thinly sliced
1 cup Apple Cider Onion Jam (recipe follows)
½ lb roast beef

Cut the baguette in half lengthwise and toast under the broiler on a cookie sheet for a minute or two, until the bread is crusty, but not yet beginning to brown.

Meanwhile, make the fennel remoulade: in a small mixing bowl, combine the mayo, mustard, lemon juice, and salt. Toss together with the fennel and set aside (this can be done a day or two in advance).

Slather the bottom half of the bread with a thin layer of apple cider jam. Top with slices of roast beef and the fennel remoulade (try to leave some of the sauce behind in the bowl if it seems like a lot). Press the sandwich down and cut into individual servings.

Apple Cider Onion Jam
Makes about 1 cup

1 medium yellow onion, thinly sliced
2 tbsp unsalted butter
1 tbsp sugar
1/4 teaspoon salt
2 tablespoons white wine
1/3 cup apple cider
1 tbsp cider vinegar

To make the jam:

Combine the onion, butter, sugar, and salt in a small saucepan with a lid. Saute over medium-low heat, covered, for 20 minutes, stirring occasionally. Uncover, add the wine, cider, and vinegar and continue to cook over medium heat, stirring slightly more frequently, until there is no liquid left and the onions are soft and caramelized, about 25 minutes. Let the jam come to room temperature, then transfer to an airtight container and keep in the fridge for up to 3 weeks.

Read more...

Saturday, May 22, 2010

Baking For Others: Toasted Pecan Oatmeal Scones

SPRING-Y BRUNCH MENU: Toasted Pecan Scones; Scrambled Eggs with Caramelized Onions, Arugula, and Gouda; Toasted Baguette Slices

After making 6 plus batches of Yes, Pecan! cookie dough for ThinkBlue's Valentine's Day party gift bag, I was left with a cup or so of toasted pecans. I put them into an old takeout container and put them in my freezer, thinking I'd keep them stocked for future cookies or chocolate bark. But then I found myself sneaking into the freezer, cracking open the container, and grabbing a couple of nuts. Every morning, I put a few chopped nuts in my cereal for extra sustenance (you should try this, it takes cereal to the next level)--and I started using the toasted pecans in place of my regular walnuts or almonds. They were amazing. So rich and resonant, the taste of one pecan almost substituted for the taste of a cookie.

When I finally got to the bottom of the container, I tried to switch back to eating walnuts, but I couldn't. I had to keep buying--and toasting--the pecans.

Recently, we had an interview with a reporter on Saturday morning at noon, and though the day seemed like it might be a little summer-y, which puts a damper on baking, at noon it was still cool enough to turn on the oven. I searched through my pantry, trying to figure out what to make that would be delicious and emblematic of BGSK's kitchen style. Thinking of the pecans, I settled on these scones, rounding them out with oatmeal, cream, and lots of butter. They ended up being a little bit cookie-like, perhaps due to my inspiration. The nutty flavor had permeated every buttery crumb, and the scones revealed themselves to be total winners.

From my kitchen, pecan obsessed, to yours,

Cara, THE QUARTER-LIFE COOK

**Recipe**


Toasted Pecan Oatmeal Scones
Makes 8

Ingredients

1 cup pecans
2 cups flour
½ cup oatmeal
½ cup sugar
2 tablespoons baking powder
½ teaspoon salt
10 tablespoons (1 stick, 2 tablespoons) butter
1 egg
1 egg yolk
1/3 cup cream
1 teaspoon vanilla extract

Preheat the oven to 375°. Toast the pecans on a parchment-lined baking sheet for 5 minutes. Remove and set aside to cool to room temperature.

Combine all the dry ingredients in a bowl. Cut the butter into thin slices and add to the bowl of dry ingredients. Working quickly, rub the butter into the flour mixture with your hands until there are no large pieces remaining and the mixture appears like crumbs.

Whisk together the egg, yolk, cream, and vanilla until completely combined. Break the pecans into large pieces and add them to this mixture.

Pour the wet ingredients over the dry and mix together until just combined.

Divide the dough into 8 balls. Put them at least 2 inches apart on the baking sheet and press them down slightly with your palm.

Bake for 20-25 minutes until the scones are golden on top. Let rest on the sheet for 10 minutes, then transfer to a plate. Serve warm or room temperature.

Read more...

Thursday, May 20, 2010

Cooking For One: Avocado Quesadillas


MORE QUESADILLAS: Avocado Quesadillas, Cilantro Succatash Quesadillas, Curried Sweet Potato Quesadillas, Butternut Squash & Leek Confit Quesadillas, Spinach Pie Quesadilas

In his book A Platter of Figs, David Tanis has a recipe for avocado quesadillas. I remember reading it at my mom's over breakfast and noticing that it sounded delicious, but also thinking it was curious to be featured in a book that also contained recipes about how to make duck leg hams from scratch. Of course the idea of the cookbook, captured in its name, is that simplicity can trump complication. Thus, the three ingredient quesadilla, thus the platter of figs.

I couldn't get the idea of this quesadilla out of my head. But I had one major concern about it. Warm avocado is not my favorite, and I don't think I'm the only one who feels a little squeamish about this. It's one thing if fajita fillings warm the guacamole slightly, and it's a sacrifice worth making for seven-layer dip. But if I were going out of my way to put it in a quesadilla, I thought I owed it to myself to figure out a process that would keep the avocado as cool as possible. I melted the cheese with the tortilla open faced and then spread on the guacamole at the last minute, just before folding and eating.

I don't know exactly why having the avocado inside of the quesadilla seems like such a treat when, if I have an avocado, I could just as easily dip each bite into homemade guacamole--or just into avocado mash. But I guess there's something in the promise of a perfectly balanced bite of tortilla, avocado, and cheese. This makes a satisfying meal for one, but I can also imagine it as the starter to a larger feast.

From my kitchen, albeit small, to yours,

Cara, THE QUARTER-LIFE COOK

**Recipe**

Avocado Quesadillas
Makes 1

In David Tanis's recipe, if I recall correctly, the cheese was mozzarella, whose stretchiness when melted is, I imagine, a great counterpoint to the creamy avocado. It's on my list to try!

Ingredients
1/2 avocado
1 teaspoon lemon or lime juice
1/8 teaspoon salt
1 teaspoon butter
1 tortilla
1/4 cup grated white cheddar

Mash the avocado with the lemon or lime juice and the salt.

Melt the butter in a small saucepan over medium heat. Lay the tortilla down and sprinkle the cheddar across the surface. Cook until the cheese is melted and the bottom of the tortilla is deeply golden. Quickly spread the avocado mixture across one half of the tortilla. Turn off the heat and fold the tortilla in half, pressing down so the melted cheese glues it together.

Cut into wedges and serve immediately.

Read more...

Wednesday, May 19, 2010

Recipe Flash: Asparagus & Prosciutto


SPRING DINNER MENU: Seared Salmon with Green Sauce; Asparagus Spears with Burrata & Prosciutto; Warm Blue Potato & Green Onion Salad; Lemon Tart with Cream

It's rare that I splurge on expensive ingredients like proscuitto and buffalo mozzarella. But when I lived in Rome, it was easy enough to make a meal out of a few slices of high quality cured meat, combined with a few bites of silky cheese, rounded out some crusty bread dipped in olive oil. Meals like this don't really need recipes. When the quality of these items is so high, as they are in the standard supermarket in Italy, nothing else really matters.

Needless to say, we usually don't rely on ingredients like $26/lb Serrano Ham to round out our recipes. But the other day I had dinner at Piadina, a cute little Italian restaurant in the West Village, and when it came time to order, I was craving prosciutto. My appetizer was the simplest creation of homemade ricotta, blanched thick asparagus spears, and thinly sliced prosciutto, beautifully arranged to allow me to orchestrate each bite just so.

I recreated the dish for lunch the other day, and was surprised how far I could stretch the ingredients and how affordable they ended up for only one or two servings.

Every now and then, it's nice to pamper yourself.

From my kitchen, albeit small, to yours,

Phoebe, THE QUARTER-LIFE COOK

**Recipe**

Asparagus Spears with Burrata & Prosciutto
Makes 1-2 serving

I found domestic prosciutto at the deli counter for $15/lb, which ended up being very cheap when only buying a quarter pound. Just see what kind of specials your supermarket has. Sometimes, burrata can be surprisingly cheap as well.

Ingredients
1/2 lb asparagus, trimmed
1/4 lb prosciutto
1/4 lb burrata
olive oil
coarse sea salt

Bring a large pot of heavily salted water to boil. With a vegetable peeler, shave the asparagus stalks. Blanch in the boiling water for 1 minutes. Seriously, this will not take long. Remove to an ice bath or colander in the sink under running very cold water.

Arrange the prosciutto on one side of the plate. Coarsely tear the burrata and arrange on the other side of the plate. Dry the asparagus stalks and pile them in the middle. Drizzle with olive oil and sprinkle with sea salt.

Read more...

Monday, May 17, 2010

Baking For Others: Lemon-Almond Cake

SPRING DINNER PARTY MENU: Coconut Curry Mussels; Crusty Bread; Mixed Greens with Creamy Mango Vinaigrette; Lemon-Almond Cake

This is my new favorite cake. It has so few ingredients and such a fresh, clean taste, I can't help but want to make it for every dinner party, every box of treats, every day.

One of its best traits is having no butter in it whatsoever. This is good for a few reasons, none of which is health. The main reason is Alex, because he can't eat dairy, and because I, as the baker, prefer recipes that have no dairy to begin with than those that require substitutions like margarine or oil.

But the secondary reason--which may in fact be the more interesting reason, and the reason all of you should make this--is that I currently believe that, when eating dessert after dinner, lighter and more flavorful treats trump heavy, buttery, and chocolate-y ones. (Desserts like bread pudding, chocolate layer cake, and chocolate mousse cake are often things I'd rather eat as an afternoon snack, a small meal where they get all my attention and stomach space.) After a meal, a slice of this cake, which is sweet and tangy with lemon, won't weigh you down, or so overwhelm you that you forget what you ate for dinner. The egg whites and almonds give the cake its texture, somehow airy and dense all at once. I have a crazy idea to make it with pistachios and orange zest...I just can't stop imagining how good and green that cake would be.

As an aside, I have a 7-inch cake pan, which makes a really nice-sized dessert for small dinners. It's what's pictured above--I guess I think there's something dainty and cute about it. But if you're baking in a 9-inch pan, I've included the recipe with larger proportions.

From my kitchen, where light desserts win (at least for now), to yours,

Cara, THE QUARTER-LIFE COOK

**Recipes**

Lemon Almond Cake
Adapted from Marcella Hazan

While this cake is good enough to stand alone, it's great with strawberries and cream--or, I hear, strawberry ice cream.

Ingredients

6 ounces, shelled, unpeeled almonds (about 1 ¼ cups)
3/4 cups granulated sugar
5 egg whites
1/8 teaspoon salt
1/8 teaspoon cream of tarter
zest of one lemon
3 tablespoons plus 1 ½ teaspoons flour
butter or oil for greasing the pan

7-inch round springform pan

Preheat oven to 350F. Generously grease the pan.

Put almonds and sugar in a blender or food processor and pulse to grind to a fine consistency.

Beat the egg whites with the salt and cream of tarter until they form stiff peaks.

Sprinkle the ground almonds and the grated lemon peel over the egg whites, a little bit at a time, folding them in gently but thoroughly. The whites may deflate a bit, but fold carefully so as to keep as much volume as possible.

When the almonds are nearly incorporated, gradually shake the flour through a strainer over the mixture, continuing to fold it in as you go. Stop as soon as all the dry ingredients are mixed in.

Pour the batter into the pan, and gently spread it evenly around. Bake for 25-30 minutes Test the center of the cake by piercing it with a toothpick: if it comes out dry, the cake is done. If it does not, bake a little longer.

Let cool on a rack. After about 20 minutes, unlock the pan and loosen the cake from he bottom. Cool completely. Enjoy!


For an 8 or 9 inch pan, which is more standard, these are the proportions you should use:

10 oz., shelled, unpeeled almonds, about 2 cups
1 1/3 cups granulated sugar
8 egg whites
1/4 teaspoon salt
1/4 teaspoon cream of tarter (optional)
zest of 2 lemons
6 tablespoons flour

9-inch springform pan
butter or oil for greasing the pan

Follow the same directions, but bake for 45-50 minutes.

Read more...

Friday, May 14, 2010

Cooking For One: Single-Serving Frittata

WEEKEND BRUNCH: Zucchini-Shallot Frittata; Panzanella Salad with Lemon-Basil Vinaigrette; White Chocolate Raspberry Cookies

My mom makes the best frittatas. As it turns out, it was the first dish she ever cooked for my dad. And while eggs are a sure way to any man’s heart, she must have done something very right with that particular frittata.

When I was growing up, the frittata was the only breakfast item that we consistently ate for dinner. It often made an appearance when there was some sort of miscommunication as to whether we would all be around on a given evening, or when my mother was too tired to make Shepherd’s Pie, run out for a beautiful piece of fish to sear, or think of something more involved that she wanted to make instead.

On nights like these, she’d get started sautéing onions in a heavy cast-iron skillet, add some slivered potatoes to the bottom of the pan, pour in the egg with any other fresh veggies or herbs she had on hand, and finish it off in the oven. Until I started eating frittatas out at restaurants, I was under the impression that the crusted potato bottom was an obligatory part of a classic frittata, and I was sorely disappointed at the variations I was given later in life, which, if they didn’t have enough crispy-brown melted cheese on top, would just taste like an single-layer overcooked omelet.

So frittatas and I tried our hand at a long-distance open relationship when I left for college. I started playing the field a little bit, working my way through a variety of omelets and scrambles, expertly fixed by Lefty, my dining hall’s one-armed egg man (short-order cook by day, Providence’s finest DJ by night). Eggs were really the only safe option at lunchtime, the line sometimes stretching all the way around the circular room. But at dinnertime, the university couldn’t really justify offering an omelet stand, and, anyway, Lefty had more important things to do around town. When night hit, I really found myself missing my frittata.


Fast forward four years—we’ll skip my return to breakfast-for-dinner monogamy when I moved back in with my parents—and let’s take a look at where frittatas and I stand today. I make a lot of them for company since my only oven-proof cast-iron pan is very large. But I still have days when I don’t want to share my frittata love with anyone else. For these low key occasions, when I want to pamper myself with something extra comforting and delicious, I’ve developed a method for single-serving stove-top frittatas that can be made in a small nonstick pan. In this latest version, I layer thin slices of zucchini in place of the old potato, slowly wait for the egg to set over low heat, and cover the pan with a plate so that the top begins to cook as well. When the bottom has set up nicely, I carefully flip the whole thing. The result is a very beautiful, zucchini-studded frittata, one that I will happily keep in my life, and enjoy all to myself.

From my kitchen, where spring frittata fever is back, to yours,

Phoebe, THE QUARTER-LIFE COOK

**Recipe**

Zucchini-Shallot Frittata
Makes 1 serving

You can easily triple this recipe and serve it to company. Use a cast iron pan and instead of flipping the frittata stovetop, finish it in a hot oven and then invert onto a plate to serve.

Ingredients
1 large shallot, thinly sliced
1 small zucchini, thinly sliced
3 eggs, beaten
2 tbsp shredded Monterey Jack (or any mild white cheese)

In a small non-stick skillet, saute the shallot in 1 tablespoon of olive oil over medium-low heat. When they begin to become tender, add the zucchini. Saute the veggies until they are cooked through and beginning to brown, about 4 minutes. With your spatula, spread the zucchini and shallots evenly across the base of the pan. Season the egg with salt and pepper and pour it over the veggies.

Cook until the bottom of the frittata has set and the top is nearly cooked through, about 3-5 minutes. Using a spatula, loosen the bottom of the pancake. Peel back one side, and tilt the pan so that the remaining uncooked egg slides to the open surface area. Using a second spatula, gently flip the frittata. Sprinkle the cheese over the top, and cover the pan with a plate to lock in the heat. Cook for another minute or so until the cheese is melted and the underside of the frittata has set. Slide the frittata onto a round plate and serve immediately.

Read more...

Wednesday, May 12, 2010

Recipe Flash: Pulled Brisket Sandwiches

BBQ DINNER MENU: Five Spice Pulled Brisket Sandwiches; Cilantro Slaw; Warm Blue Potato & Green Onion Salad; Chocolate Bark with Cinnamon-Coated Nuts and Cherries

When I made my Passover Brisket this year, I accidentally cooked it a little longer than usual. This wasn't a disastrous mistake. It just meant that the meat ended up being too tender to slice into long, neat pieces. But when the filling of a sandwich, this tenderness is really something to strive for. Since the glop of stringy meat wouldn't have looked so gorgeous alone on a plate next to some Green Beans and Kugel, I decided to stuff it inside challah rolls (don't worry, this was actually pre-passover), and serve it to friends. When the 4 pounds of meat disappeared even quicker than the sliced version from past years, I knew I was onto something.

Recently, I tried out the recipe again, this time giving the brisket sauce a sweet and spicy Asian kick with the use of some Chinese Five Spice Powder. I made sure to cook the brisket for an extra half hour so the texture would be perfectly tender and shredable, like Pulled Pork. Serve this piled on sandwiches with a little siracha and scallions, and you'll be in brisket heaven.

From my kitchen, albeit small, to yours,

Phoebe, THE QUARTER-LIFE COOK

**Recipe**

Five Spice Pulled Brisket Sandwiches
Makes 8 servings

For this dish to be doable, you really need a stocked spice cabinet. Most below are staples of mine. The one wild card is the spice for which this dish is named: Chinese Five Spice Powder. Luckily, you can work around this by adding a little bit more of the other spices and adding a little cinnamon and nutmeg to the mix as well.

Ingredients
4 lbs brisket
6 garlic cloves, cut lengthwise into 4 pieces
3 cups beef stock
2 yellow onions, sliced
1 cup ketchup
1/2 cup brown sugar
3 tsp salt
1 tsp Chinese 5 spice powder
1 tsp cumin
1 tsp ground ginger
1/2 tsp cayenne
1 cinnamon stick
2 bay leaves

8 onion or challah rolls
scallions, seperated into strands length-wise, for garnish

Preheat the oven to 500 degrees.

Using a paring knife, cut small incisions in the meat and shove the pieces of garlic into them. Do this until the meat is stuffed with garlic all over. Place the brisket in a rimmed baking dish (preferably metal) and brown it in the oven, about 10 minutes per side.

Remove the meat, and pour in the beef stock (NOTE: if you are using a pyrex dish, wait a few minutes for the pan to acclimate to room temperature so it does not shatter. For more on this, see my disaster here). Turn the oven down to 350 degrees, cover the dish with foil, and cook in the oven for 1 hour.

In the meantime, saute the onions in 1 tablespoon of olive oil over medium-low heat until soft and caramelized, about 25-30 minutes, stirring occasionally.

Remove the meat from the oven, and add the remaining ingredients to the pan. Using a fork, whisk them all together with the beef stock. When the onions have finished cooking, arrange them on top of the meat. Cover the pan again with foil, and return it to the oven for 3 hours.

Remove the meat from the oven, and transfer it to a cutting board. Using a fork, pull the brisket apart into sinewy chunks. Return the meat to the sauce and serve, or store in the fridge over night--the brisket can be made a day or two in advance.


Read more...

Sunday, May 9, 2010

From My Mother's Kitchen: Hot Raisin Bread

OTHER MOM-INSPIRED FAVORITES: Fried Noodles; Green Goddess Soup with Zucchini, Chard, and Cilantro; Seared Salmon with Green Sauce; Rich Chocolate Celebration Cake

My mom made us breakfast every single day while we were growing up, before we piled into the car and she dropped us off at school on her way to work. When I say I don't understand people who don't eat breakfast, I say this with the perspective of someone who ate scrambled eggs, pancakes, French toast, corn muffins, and hot raisin bread every morning, not just someone who ate, you know, a bowl of cereal. Later, in middle and high school, we did sometimes eat just cereal or yogurt and fruit, but even then there were occasions when we'd get the full breakfast treatment.

On one of these days late in high school, my mom made hot raisin bread. She took it out of the oven, I cut myself a wedge, and when I drove my fork down through the cinnamon-sugar crust on top into the biscuit-like interior, I remembered why this was always one of my favorites. It's decadent in the way that Frosted Mini Wheats are decadent--a layer of sugar, in this case cinnamon-sugar and butter, bursts in your mouth, distinguishing the relative plainness of the inside. I was a junior or senior, and we had a field hockey game that afternoon against one of our rivals. The tradition was to dress up in funny outfits on game days, and I can only imagine what Phoebe and I and the rest of our teammates were wearing. Whether it was my breakfast or my outfit, I played one of my best games ever as forward, scoring a hat trick. Three goals. These days, that kind of athleticism feels like it belonged to another person completely.

Anyway, some other parent came up to my mom and was like, "What do you feed her for breakfast?!"

And my mom, I think, answered truthfully, "Well, it's this dish called hot raisin bread."

I wasn't eating my Wheaties. I was eating my mom's home-cooked food and apparently it did me better than that.


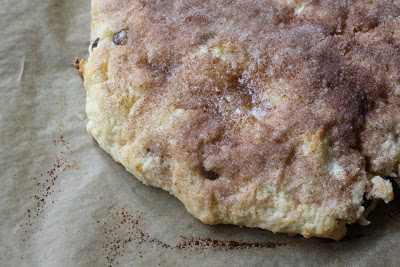
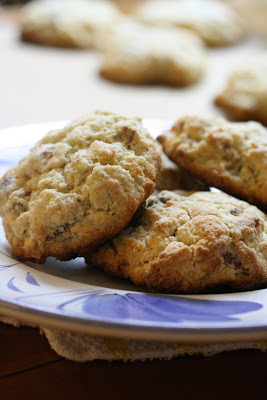
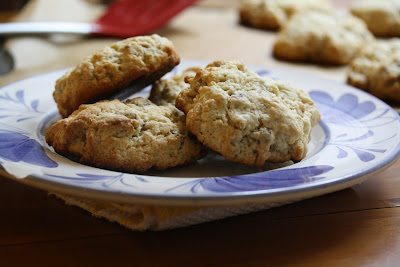
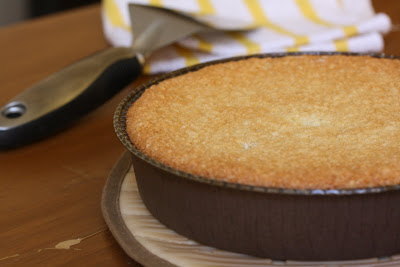
When I baked this recently, I ate it as an afternoon snack. The cinnamon-y scent filled my apartment. I cut a wedge, poured some some tea, and waited for something to happen. Sure I wasn't playing hockey, but wouldn't mom's magic breakfast work in my Brooklyn apartment too? I did some work on the book, researched my summer vacation, and kept on waiting. And waiting. I haven't found out yet if the Hat Trick Raisin Bread still makes me super athletic, but it definitely still tastes really good.

From my kitchen, where I'm wishing you a Happy Mother's Day, to yours,

Cara, THE QUARTER-LIFE COOK

**Recipe**

Hot Raisin Bread
Makes 1 bread, serves 6-8
from Quickbreads by Beatrice Ojakangas

Ingredients
2 cups flour
2 teaspoons baking powder
1/4 teaspoon salt
1/4 cup vegetable oil
3/4 cup milk
1/3 cup raisins
2 tablespoons sugar
2 tablespoons butter, melted or soft
1/4 cup cinnamon sugar (1/4 cup sugar plus 1/2 teaspoon cinnamon)

Preheat the oven to 450°F. Line a baking sheet with parchment.

Combine the flour, powder, salt, raisins, and sugar in a medium bowl. Add the oil and milk and mix into a soft dough.

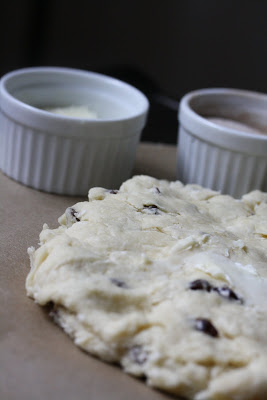
Transfer it to the baking sheet and pat the dough into a rough 8-inch square, about 1/2-inch thick.

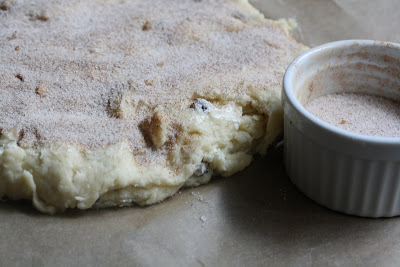
Spread with the butter and sprinkle with the cinnamon sugar.

Bake for 10-12 minutes, until just golden. Cut into squares and serve hot--this doesn't really weather well, so make it when you plan to eat.


Read more...

Friday, May 7, 2010

Potluck Parties: Tropical Menus

BRUNCH: Julia's Citrus-Sugared Dutch Babies
COCKTAIL HOUR: Sarah's Coconut-Lime Coolers
DINNER: Lainey's Cilantro-Lime Shrimp Tacos with Red Slaw

We host and attend our fair share of potluck parties. But they all take place in the city. There's one on the agenda that's a meet-up of all the good NYC folks who participate in Food52, but that's only as far away as Central Park. Small fry when compared to St. Thomas.

In St. Thomas, instead of seasonal green salads and pesto chicken sandwiches and green beans with cured shallots, we eat Citrus-Sugared Dutch Babies and drink Coconut-Lime Coolers. It's really nice in the Carribbean--unfortunately, going there and cooking there is all just a dream.

However, a little imagination never hurt anyone. We enlisted your imaginations to figure out menus during the imaginary trip giveaway we fake-ly hosted on April 1st, aka April Fool's Day. (We've been giving away lots of real stuff since then, and we'll be giving away more in the coming weeks!) But the creativity of our readers turned out not to be imaginary at all. The menus people submitted were mouthwatering and unique, and we wanted to make them less fake and more real. So we asked the winner, Sarah, as well as a few other commenters, to write up recipes and send us pictures of their food. What follows are the documented dishes that readers might have served us had they won our non-existent contest. If that's a bit of a puzzle, don't worry. Just relax, guzzle your cocktail, take a big bite of shrimp taco, and read on.

From our kitchen, transported to your kitchens (if not to St. Thomas), to yours,

Cara and Phoebe, THE QUARTER-LIFE COOKS

**Recipes**


Citrus Sugared Dutch Baby
(adapted from Joy the Baker, who adapted it from Gourmet)

Ingredients
1/3 cup sugar
2 teaspoons grated lemon zest
3 eggs (at room temp)
2/3 cup warm whole milk (I used skim)
the juice of 1 lemon
2/3 cup all-purpose flour
1/4 teaspoon pure vanilla extract
1/8 teaspoon cinnamon
1/8 teaspoon grated nutmeg
1/8 teaspoon salt
1/2 stick unsalted butter

Place skillet on middle rack of an oven and preheat to 450 degrees. Stir together sugar and zest and set aside. Whisk the eggs until pale and frothy (alternatively you can use an electric mixer on high speed). Beat in milk, juice, flour, vanilla, nutmeg, and salt--whisk/beat until smooth. Add butter to the hot skillet and swirl to coat. Add the batter and return to the oven. Bake until puffed and brown on top (about 18-25 minutes)

Top with sugar and love.
Coconut-Lime Coolers
Makes 1 Pitcher

Ingredients

2 cups coconut rum
3 scoops lime sherbet
3/4 cup fresh lime juice
3/4 cup coconut water

Fill blender pitcher over halfway with ice and add the rest of the ingredients. Blend until smooth.

Pour the drink into festive glasses and garnish with a slice of lime and some zest.

Cilantro-Lime Shrimp Tacos with Red Slaw
Makes 2-4

Ingredients
For the Shrimp:
2/3 cup fresh finely chopped cilantro
Juice and Zest of 2 limes
1 tbls olive oil
1 tsp cumin
1 tsp coriander
Salt and pepper
½ lb shrimp (I used 31-40 count shrimp, because the smaller ones work better in tacos so about 16 shrimp)

For the Slaw:
1 tbls fresh finely chopped cilantro
6 tbls mayonnaise
1 tbls sugar
½ tsp celery salt
1 ½ tbls apple cider vinegar
Juice of ½ a lime
Salt and pepper
1½ cups coleslaw (you can use the bag bought in the store or finely chop half a head of cabbage)

Other ingredients/toppings:
Tortillas
Diced tomato
Thinly sliced Jalapeno
Avocado slices
Diced red onion
1 or 2 limes
Chopped cilantro

For the shrimp marinade, mix the cilantro, lime juice and zest, olive oil, cumin, coriander, salt and pepper together in a small bowl or measuring cup. Peel and devein the shrimp (deveining is a preference issue), place them in a zip top bag and pour in the marinade. Massage the marinade into the shrimp a little and place in the fridge for about 30 minutes (not much longer as the acid in the lime will begin to cook the shrimp).
While the shrimp are marinating make the coleslaw dressing by mixing the cilantro, mayo, sugar, celery salt, apple cider vinegar, lime juice and salt and pepper together. Pour over the cabbage, you may not use all the dressing just as much as you like, don’t soak the cabbage as you want it to be a little drier than normal coleslaw so the tacos don’t fall apart.

Grill the shrimp on an indoor grill pan or sauté in a skillet about 2 minutes on each side until they are pink and begin to curl up, don’t over cook they will be tough! Heat the tortillas in the microwave with a damp paper towel about 20 seconds for the steamed effect.

Assemble tacos with coleslaw, shrimp, and additional toppings as preferred. Serve with rice and beans if desired, and a margarita is the perfect cocktail!

Read more...

Thursday, May 6, 2010

Giveaway: Roasting Pan Winner!

Thank you to everyone who participated in our Mother's Day Roasting Pan Giveaway courtesy of LeCreuset. We so loved reading about all of your favorite childhood dishes, and the love they continue to bring into your adult lives.

We chose a winner randomly from the list of commenters. Congrats to reader Laura!

Here's what Laura had to say about her mother's dish--we can't wait to beg her for the recipe so we can make it ourselves:

My mom made the best stroganoff growing up, it was my favorite meal! Now I make it for my friends and myself all the time--it's a huge hit with everyone. I've even experimented with it to make it healthier, but keep the amazing flavor. Thanks mom for your inspiration...and original recipe :)

Thank you again for all your heart-warming words about mom. It made us wish we had sat at each and every one of your family tables.

We'll have more questions, and more exciting kitchen toys to give away, soon--so keep coming back for seconds! In the meantime, don't forget that it's not too late to order your mother a special batch of BGSK Blondies in support of pediatric cancer--please visit our Virtual Bake Sale before Sunday!

From our kitchen, albeit small, to yours,

Cara and Phoebe, THE QUARTER-LIFE COOKS

Read more...

Wednesday, May 5, 2010

Recipe Flash: Spiked Lemonade


BOOZY AFTERNOON SNACK MENU: Deviled Eggs; Pigs in a Blanket; Turkey Pepperjack Melts; Chocolate-Bottomed Blondies

When I pass a lemonade stand (a rare enough occurrence these days) and I notice that the kids are simply pouring Minute Maid into little cups and selling Enteman's soft chocolate chip cookies, no matter how cute the young entrepreneurs, I feel anger welling up. When I was a kid, we made lemonade for lemonade stands from scratch! Still, as a grown-up, no amount of anger can prevent me from feeling guilty that I've just been biking by and consequently have no money with which to buy re-packaged Minute Maid from the kids.

Fresh Lemonade is a quintessential summertime drink, and it's really not so hard to make. What's more, when you make lemonade at home, you can customize it exactly to your taste: if you're a sourpuss, go easy on the sugar syrup, and if you can't take too much lemon, ease the flavor with a bit more water. And, unlike at a lemonade stand, here you'll find a spiked variety too.

From my kitchen, puckered up, to yours,

Cara, THE QUARTER-LIFE COOK

**Recipe**

Lemonade, Spiked or Sober
Makes 4-5 cups

Ingredients
3/4 cup sugar
4 large pieces of lemon zest
1 cup freshly squeezed lemon juice (from about 8 lemons)
6 ounces vodka

Make a simple syrup by combining the sugar, zest, and 3/4 cup of water in a small saucepan. Over medium-high heat, cook until the sugar dissolves. When the mixture bubbles, turn the heat down and simmer for 2-3 minutes, just until it becomes slightly more syrupy. Remove from the heat and let the syrup steep for 15 more minutes, then remove the lemon zest.

Combine the lemon juice and the sugar syrup in a large bowl or pitcher. Add 2 1/2 cups of water. If you're making spiked lemonade, add 4 shots of vodka. If you're keeping it virgin, add another 1/2 cup to 1 cup water, tasting as you go to achieve your preferred degree of tanginess.

Serve over plenty of ice, garnished with mint leaves and lemon slices.


Read more...

Monday, May 3, 2010

Cooking For One: Potato Chip Chilaquiles

DISH: Potato Chip Chilaquiles
TYPE: New kitchen tools, old leftovers
CINCO DE MAYO BRUNCH MENU: Guacamole; Potato Chip Chilaquiles, Spinach Salad with Corn, Avocado, and Cilantro Citrus Vinaigrette

Chilaquiles is a Mexican dish that uses leftover tortillas, crisped, as the base for sauce, cheese, and eggs (or chicken). As a frittata uses up extra sauteed vegetables and yesterday's pasta, or as fried rice makes the most of Sunday night's dried-out takeout, Chilaquiles takes chips, eggs, and salsa, and makes them each transcend their individual taste value into a dish that you would never think was composed of leftovers.

I'd had in mind, actually, to make something more like Migas, a Spanish dish of leftovers, stale tortilla chips specifically. In Migas, the tortilla chips (or tortillas, or just bread) are scrambled with the eggs, but there was no way I was scrambling my chips in with my eggs.

Why?

Because, wanting to make use of the mandolin Kate got me for Christmas, I decided to make fresh, homemade potato chips. (I had neither tortillas nor tortilla chips, incidentally. I can't figure out where the decision to make Chilaquiles or Migas came from in the first place.) The chips were warm, thin, salty--so good--and I didn't want to sacrifice their crisp to the eggs. So I subverted tradition, made chips solely for the purpose of using them in a leftover-inspired plate of food, and enjoyed the fresh fried-ness of my lunch.

From my kitchen, where I make potato chips for breakfast, to yours,

Cara, THE QUARTER-LIFE COOK

**Recipe**

Potato Chip Chilaquiles
Serves 2

Ingredients
2 large handfuls good quality, kettle-cooked potato chips
1 tablespoon olive oil
1 small onion
1 clove garlic
1 can black beans
1 teaspoon cumin
1/2 teaspoon coriander
pinch cayenne pepper
1/2 cup (3-4 ounces) shredded cheddar cheese
3 eggs
1/2 cup salsa, preferably homemade

Arrange the chips on two plates.

In a frying pan, warm 2 teaspoons of the oil over medium heat and add the onion and garlic. Saute until translucent, then add the spices and stir for a moment until they're fragrant. Pour in the black beans with most of their liquid, and simmer until it's reduced, smashing some of the beans up against the side of the pan. Cook for about 10 minutes, then taste for salt (really taste--you never know how salty canned beans are), and simmer over low heat while you scramble the eggs.

In a small, nonstick frying pan over low heat, scramble the eggs with the remaining teaspoon of olive oil and a pinch of salt.

Divide the black beans evenly over the two plates of chips. Top each with half the shredded cheese, then half of the scrambled eggs. Pour salsa over and pass more on the side. Garnish with cilantro if you have any.


Read more...