DIY: Homemade Ricotta

Take a deep breath. Hold onto your seat. Remember how you’re feeling right here, right now.
I am about to change your life.
Or, rather, Jennifer Perillo is; I’m just the humble messenger. This is her recipe for Creamy Homemade Ricotta, one that I happily stumbled upon while surfing Food52.
I’m not a DIY-kind-of-girl; I always skipped over those pages in magazines, always avoided subjects like pottery and woodshop, always strayed away from anything that looked too fussy, too crafty, too…well…difficult.
This recipe is none of the above.
You have milk? Great. Lemon? Salt? Okay, you’re ready. Invest in some cheese cloth, and you will be making this once a week, every week, probably for the rest of your life.
This ricotta takes no more than an hour, only 5-10 minutes of which are active: pouring, stirring, straining. You can do that in your sleep. (Literally, you could wake up, put this on the stove, get ready, and eat it for breakfast with some fruit and honey. It is that easy.)
The results: luscious. Creamy. Unctuous. So good that you will be hating yourself for not having found this earlier (that is, until the third or fourth bite, when your mind will only be focused on more, more, more).
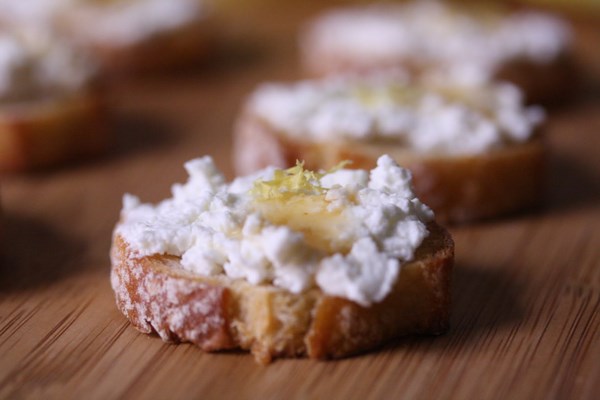
The possibilities are endless: layer it into Sweet-Sexy-Zesty Crostini, use it in lasagna, spoon it into a lemony tart. Or, you know, you can just stand over the pot, like me, and shovel it in. You deserve it. You just made cheese. How cool is that.
Brette Warshaw is a junior at the University of Pennsylvania, where she is a student of European history, creative writing, and jazz studies. She will be eating her way through Rome during the fall semester, leaving a wake of empty plates, flabbergasted waiters, and ripped skinny jeans behind her. Read more…
**Recipe**
Creamy Homemade Ricotta
Adapted from Jennifer Perillo on Food52
Makes about 1 cup
Jennifer’s recipe originally calls for heavy cream and buttermilk. I omitted the heavy cream and made my own buttermilk, but feel free to use the original recipe for even-creamier results.
Ingredients
5 cups whole milk (or 4 cups whole milk plus 1 cup heavy cream)
3/4-cup buttermilk (or 3/4-cup whole milk plus 1 tablespoon lemon juice)
½ teaspoon fine sea salt
If making your own buttermilk, combine 3/4-cup whole milk with 1 tablespoon lemon juice. Let stand for 5 minutes.
Add the ingredients to a 4-quart pot. Bring to a very gentle boil over medium heat. Meanwhile, line a sieve or fine mesh strainer with a few layers of cheesecloth and place it over a deep bowl or pot.
Once the curds begin to separate from the whey (you’ll see little specks of white bob to the surface), stir gently and set heat to the lowest setting (one good stir will do). Cook for 2 more minutes, then remove pot from heat and set on an unlit back burner for at least 30 minutes, and up to one hour (this will help the curds further develop).
Gently ladle the curds into the cheesecloth-lined strainer (this helps produce a fluffier, creamier curd than just pouring it straight into the strainer). When all the curds have been spooned into the bowl, pull the cheesecloth up the sides to loosely cover the ricotta in the strainer. Let sit for 10 minutes to drain (this will yield a very moist ricotta. If using for a cake recipe, you may want to let it drain longer for a drier consistency).
Store in a tightly covered container in the refrigerator for up to three days.
Recipe Index Keywords:
Categories: Campus Cooking, DIY, Eating, Featured, and Recipes.Cooking Method: Make Ahead and On the Stove.
Mealtime: Dinner, Early Bird, Lunch, and Snacktime.
I Don't Have Any: Money, Pantry Items, and Space.
I'm Cooking For...: Brunch.
Type of Food: Breakfast Brunch & Eggs, Condiments, and Vegetarian.
I Don't Eat: Carbs, Gluten, and Meat.
Originally posted on Monday, October 3rd, 2011


Leave a Reply