In This Small Kitchen Archives

Small Kitchen, Massive Pan

Over the weekend, we toured a submarine. In the bunks, the engine room, and the galley kitchen, every gadget fit neatly into the storage space available. Compactness was the going criterion, and minimalism the approach. Was there a small kitchen tip here?

I thought about it. You would imagine we’d want to mimic this efficiency in a city kitchen of limited size, that we’d want to own only those pots that stack like a puzzle in our tiny cabinet. But that mindset doesn’t take into account a cooking truth, that even in small kitchen, bigger is sometimes better. Get me off this submarine!

I’m talking about bigger in terms of surface area. So much of a food’s flavor comes from the browning that happens when squash or garlic or beef is exposed to heat. Crowd a skillet or throw too many mushrooms onto a baking sheet, and you’ll have steamed mush, not crispy golden delicacies. On top of that, you’ll make less of a mess: fewer pots of rice will boil over, fewer squares of tofu will fly out of the pan, and grease splatters will decorate less of your kitchen wall. Go big, I’m serious.

In other words, this quick post is written just to encourage you to buy the 12-inch skillet instead of the 8-inch one when you’re stocking your kitchen. Reach for it when you caramelize onions, stir-fry squash, and simmer perfect pasta and sauce. Even if you’re cooking for one or two, let your ingredients have the run of the kitchen, let them enjoy the full expanse of your XL pots and pans.

(Pictured: Singapore Curry Noodles in a bigger-than-usual pan.)


I Grew All This

Hello! As you read this, I’m driving south along the Pacific. We started in Seattle on Thursday, and we’ll make it to San Francisco before the week’s out. If you have recommendations for stops in Portland or along the Oregon or California coast, please share.

While back-to-school season always makes me wish I were a student again, the pleasure of a being able to take a vacation after Labor Day can’t be overstated. The summer’s just longer this way.

While I’m on the road, away from the kitchen, a little recap of what the season has brought to this small kitchen:

Growing in the garden:

After planting our first few radishes in April, both our vegetables and the number of containers holding them multiplied. Gardening is addictive.

Here’s what we ended up growing: two kinds of little tomatoes (sun gold, red pear), two kinds of radishes, lemon cucumbers, green leaf lettuce, kale, habaneros, carrots and a bunch of herbs (tarragon, sage, dill, basil, Thai basil, and mint). We planted string beans but they petered out early. I also threw in some marigold seeds and some nasturtiums.

Send Help: We’re Planting a Small Kitchen Garden

For the last two summers, we’ve been members of a CSA. The twice-monthly vegetable deliveries have kept us feasting healthfully on the most seasonal stuff without a lot of effort. But this year, with a new very sunny roof deck attached to our apartment, we decided to try something different.

We’re planting vegetables.

I jumped in with a two-session course about small space gardening at the NYBG last month, which made me feel simultaneously overwhelmed and excited. Now that the soil’s warming up, we’re solidifying plans and browsing seed catalogs. Here’s what we’re going to do:

  • Get two EarthBoxes. These containers were recommended for their drainage abilities in particular. It’s going to get really hot up on the roof, and we’ll have to water a lot. With good drainage, we won’t have to worry about drowning our plants. We’re putting the containers on casters, so we can move them around the roof til we find the best location with respect to sun and wind. Our landlords also left some containers-there are chives (see them in between the Adirondack chairs?) surprising us in one!-so we may make use of those, too.
  • Keep the rest of the equipment to a minimum. Small kitchen, small shed. So far, the list is: gloves, soil thermometer, watering can, popsicle sticks (for labeling), hose, organic potting soil, and organic fertilizer. And seeds. Later in the season, we’ll figure out supplies for trellising, should our beans or tomatoes make it that far. The idea is also to keep the budget in check and avoid the $64 tomato problem.
  • Plant radish and carrot seeds in the containers before we leave for a two-week trip in late April. If it rains while we’re gone, maybe we’ll be on our way to early radishes. If the plants wither, we’ll plant again when we return, plus add herbs and greens. What gardeners know and I’ve just discovered is that you have to embrace trial and error. So this will be my first exercise.
  • Prioritize low-energy plants with a short time to harvest. I’d never thought about veggies this way before the course, but it makes so much intuitive sense. Plants grow roots and leaves first, then spend more energy to develop flowers (broccoli, for example) and fruits (like peppers). So if there’s a plant where you eat the roots and leaves (carrots, radishes, lettuces), you’ll be able to harvest more quickly. That also means there’s less time for things to go wrong. I’m still going to try planting some pole beans, cherry tomatoes, and peppers once a few small harvests of roots and leaves have actually come up.

Do you have a garden? Any tips? I’d love to hear any thoughts about starting out, not getting frustrated, and acquiring a green thumb.

P.S. The simplest way to prepare spring’s first radishes and scallions.

In This Small Kitchen: We No Longer Have a Microwave

Six months ago, we moved (two blocks) to a new apartment. Between the beautiful afternoon light and the roof deck where I’m about to plant radishes(!), we marvel each day at our NYC real estate luck-no matter that we hike up five flights to reach our nest and now cook on an electric stove.

The kitchen, though, didn’t have a microwave when we got here, nor an obvious place to install one, so we decided to try nuke-free living for a while before we committed any counter space to the gadget. Six months in, we barely miss the ability to melt cheese in a heartbeat. That’s not fully true. But still, though there’s more patience needed to reheat leftovers or make oatmeal, and more dishes dirtied in the process, I’ve loved the exercise in not depriving foods of texture and never sticking my spoon into steaming soup to find that the center is cold.

Here are my notes and tips from a half year of microwave-free cooking and eating.
Reheating Leftovers

Stovetop heat is bottom up, so the key to getting your leftovers good and hot throughout is to capture some steam, creating an oven-like situation in your pan. Note, by the way, that we don’t have a toaster oven either. This is all about stovetop and oven.

For pasta (sauced or plan), I like to add some olive oil to the pan. If I’m looking for crispy edges, I cook over medium heat, turning every so often. If I want sauced pasta to get a little soft, I cover the pan. See also: Fried Noodles, Spaghetti with Red Sauce & a Fried Egg.

Extra rice dries out in the fridge, making it the perfect candidate for use in fried rice or rice pudding cereal. I used to love being able to make rice in advance for dinner parties, then heating it up til it was fluffy and hot in the microwave. I’m still working on an exact replacement for that situation, but it definitely involves some extra water. I have been experimenting with a bastardized Persian rice, where you melt butter in the bottom of a pot, then add the leftover rice and some splashes of water, reheating the whole thing very slowly til the rice is moist again and the bottom has a crust. Also, if you know you’re going to eat your rice with curry, for example, store them in the fridge together-the sauce will prevent the rice from drying out, and then you can reheat in a covered pan over low heat all together.

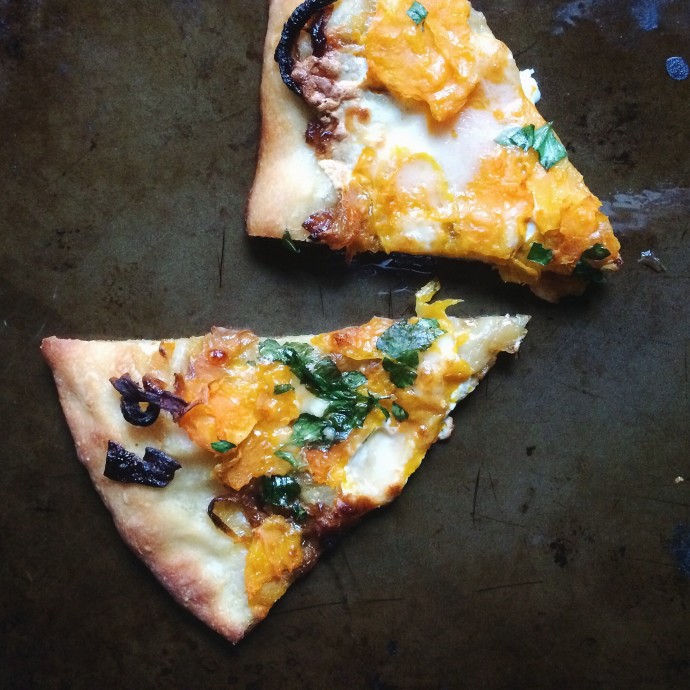
I always skipped the microwave for pizza anyway. I’d rather eat it cold than soggy! You can reheat pizza in the oven (at a high temp, for a very short time), but if you don’t want to preheat for just a slice or two, grab a big enough pan and set it over medium heat. When it’s hot, add your slices and then cover the pan with any lid that even remotely fits. This will create steaminess inside. When the bottom crust is crispy and the cheese is melted, you’re ready. This is also how I make open-faced grilled cheese toasts.

In This Small Kitchen: Reusing Your Oil

Most of the time, I don’t deep fry at home. This isn’t a problem. I figure if I eat French fries at restaurants and baked potatoes here, I’ve achieved a balance I don’t need to upset. And then, once in a while, I fry potatoes at home and remember: oh, this is wonderful.

So the delight I took in some recently fried fries did not beg the question of whether frying at home is hard (it’s not). Rather, it made me think about if homemade chips are worth the $10 of oil I need to fill up my pot to deep fry them. And that’s when we have to talk about reusing oil more than once. To do so, you simply strain out all the particulates that have gotten into your oil. I did so twice, first through a strainer, and then through a strainer lined with a paper towel. The idea is to get out any organic matter that might spoil. With “naked” and battered foods, there’s not a lot of residue to strain out; with floured or breadcrumb-covered chicken or zucchini, there will be more. I stored this cleaned-up oil in a jar.

After straining, I had yet another object cluttering my kitchen, though: a jar of used oil. So, I kept frying. Yes, after the French fry meal, I went on a short but steady fried food bender. It mostly involved battered banana fritters with chocolate sauce, which I cooked up fresh for guests after we’d eaten our main, not the kind of entertaining I usually do. Apparently my jar of oil was stretching my boundaries.

Once I’d used the oil five times or so, I disposed of it (responsibly! not down the drain). I’d eaten my fill of homemade fried food for the time being, the oil was spent, and the jar no longer had to crowd my countertop. It’ll be a while before I make French fries again, but when I do, I’ll make them often-just for a couple of weeks.

P.S. One of the few fried recipes on the site-Fried Chicken Salad with Buttermilk Dressing.

In This Small Kitchen: The Grains We’re Eating Now That Quinoa Is Expensive

The other day, I looked at the price on the box of quinoa and saw a stamp of $7.99. Twelve ounces of Ancient Harvest brand quinoa (by far the best-tasting) had soared up to eight dollars! From 2007 to to 2013, the price per pound of quinoa doubled, but this was the first time I’d seen the box retail for quite that much. I put it back, went home, and started eating farro.

The story makes sense. The rebranding of quinoa as a superfood turned it into a grain we ate all the time. But unlike rice, which has long fed the world’s daily habits and has production mechanisms more able to meet demand, quinoa growing remains the province of Peru and Bolivia. Yield has increased, as have exports, but probably not enough to power the 4.4 million quinoa salad recipes on the internet. So, the price goes up, and maybe those of us who aren’t willing to pay a premium back off.

And where will we go? In case you, too, are reeling from the price hikes, I’ve made some notes on the grains, legumes, and nuts we’re eating instead of our bi-weekly quinoa. In looking to substitute for quinoa, I try to account for two aspects of the seed that have made it so popular: it’s a complete protein, and every bite delivers a lovely caviar-like pop. If you haven’t tried some of the grains I mention below, then quinoa might have one more power: as the gateway grain.