Two Gifts: Coconut Granola and a Scale
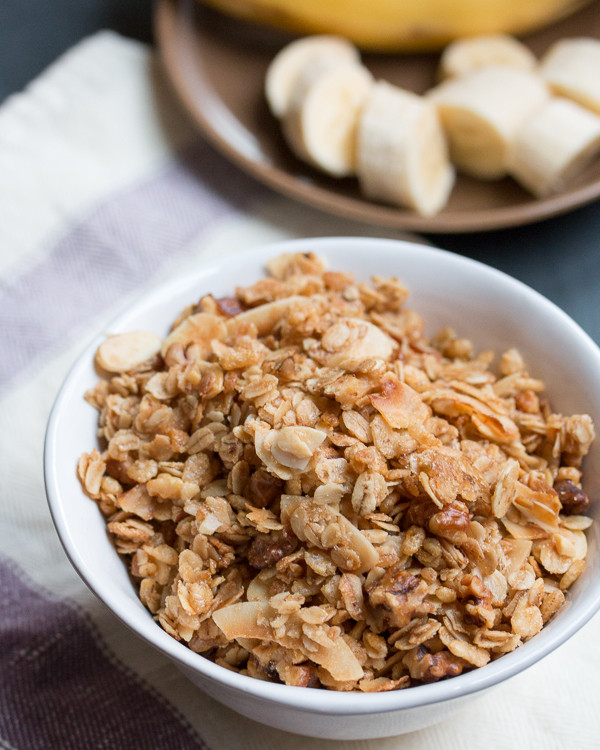
The last-minute gift for your family and friends is a jar of this homemade coconut granola, which hits all the right notes: salty, sweet, crunchy, and rich. I love it.
The gift for you (or your favorite baker) is a kitchen scale. Hear me out.
I had thought kitchen scales were for wanna-be professionals until I got this Hario one when we started brewing coffee with the Kone. It took at least a year before I used the simple scale for anything but coffee. But one day I read a recipe for pizza dough made by weight, and I realized that baking by weight wasn’t pretentious. It was the ultimate lazy cook move.
To make this granola, you put a bowl on the scale, then zero it out. You add the oats, zero it out. You add the nuts, and then you zero it out again. Etc. You don’t have to take out all your measuring cups and then feel like half the maple syrup you poured is stuck to them. It makes substituting different kinds of nuts really easy: you’re just trying to reach a certain weight, and when you hit it, you’re done.
Here’s the recipe for granola, basically as I’ve been making it for years, just a little less sweet and with the measurements done by weight instead of volume.
If you’re not convinced, go here for another good granola recipe, this time made with cups and teaspoons.
- 300 grams rolled oats
- 100 grams unsweetened shredded coconut or coconut chips
- 220 grams nuts, coarsely chopped (this batch had a mix of slivered almonds and chopped walnuts, but I use what I have on hand)
- 40 grams puffed rice cereal
- 1 teaspoon (6 grams) sea salt
- 100 grams brown or turbinado sugar
- 150 grams maple syrup
- 100 grams coconut oil (melted if solid)
- Preheat the oven to 300°F. Combine all the dry ingredients in a bowl. Add the syrup and the coconut oil. Mix to distribute. Scoop onto the baking sheet. Bake for 45 minutes, until just golden. No need to stir, but do pull in the corners if they seem to be getting brown. Let cool on the baking sheet, then break up and store in airtight containers. Letting it cool before stirring is a good way to get clumps, so be patient!